 CSA Support
Special Features: Operational DND Report Category
This report category helps you get an insight into Container Destination activity, including Storage, Demurrage, and Detention at the destination. It is an operational version of the Destination DND Report that has the same structure and data, however does not include cost and contract information.
To view the Destination DND report category
- Navigate to Business Intelligence>Reports.
- Select Operational DND Report.

Figure 1
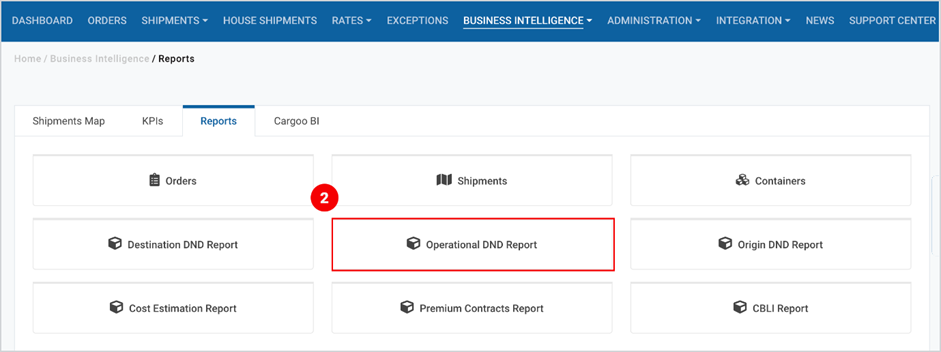
Figure 2
When you open Operational DND Report you will see 3 (three) tabs.
- Active Containers – Provides information on the Free Time for the containers which have arrived at final destination but are not yet returned empty to the depot.
- Returned Containers – Provides information on the Free Time for the containers which have been returned empty to the depot, with the option to include active containers in the report as well.
- Planning – Provides information on Free Time deadlines for both returned containers and containers which have arrived at final destination.
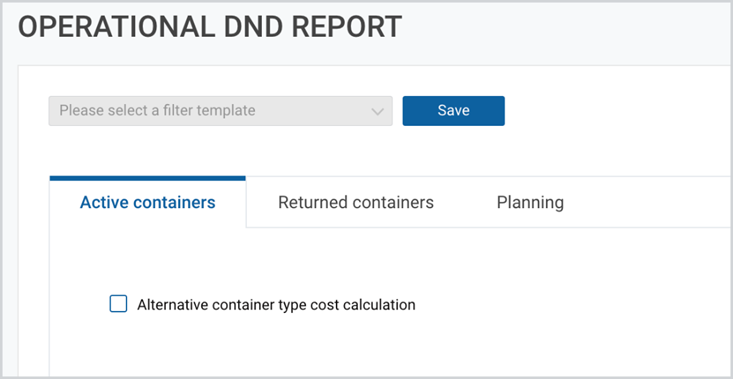
Figure 3
Before generating a report, make sure that
- You’re using the right Company account.
(For more details, please see Business Intelligence: Reports Section article.) - You have checked the Data for multiple companies: section and have selected all the companies for which you are looking to get the data .
(For more details, please see Common Features: Data for Multiple Companies article.) - All Filters and Additional Filters are set.
(To set the Filters and Additional Filters follow the steps described in Filters and Additional Filters.)
Tip | Save the filter configurations as a template in case you use the same filter configurations repeatedly, or use existing templates if any. |
Once all filters are set, generate a report and use report table features to view and analyze the report online or use the provided options to download or save it to preferred file formats.
(For more details on report table features, please see Common Features: Report Table article.)
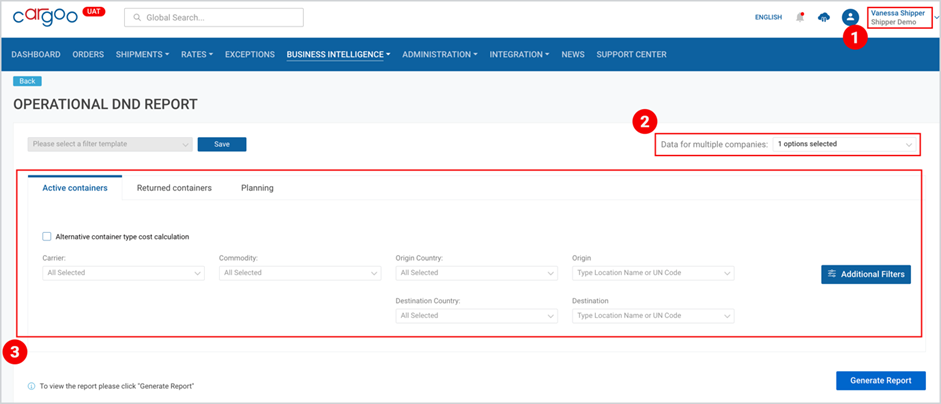
Figure 4
Filters
To set the filters
- In all tabs (Active Containers, Returned Containers, Planning), select Alternative container type cost calculation, if you want the generated report to include container type broad match (the estimated costs can be alternatively applied for 40GP container type instead of 40HQ (and vice versa) and for 40RF container type instead of 40RQ (and vice versa));
- (Only in Returned Containers and Planning tabs) Select Include active containers, if you want the generated report to include not only returned containers, but also active containers i.e., the ones that have arrived at final destination and do not have valid “Returned” event.
- (Only in Returned Containers and Planning tabs) Select the Returned Containers From and To date. The default selected date is a week prior to the current date If you select the start date and do not select any option for the end date, then in the report, the requested period will be considered to end on the current date. However, you can set both start and end period in the past, and get the report for this exact time period.
- Use the drop-down menus of the following filters to narrow down the search results and filter the data accordingly:
- Carrier,
- Commodity,
- Origin Country,
- Destination Country.
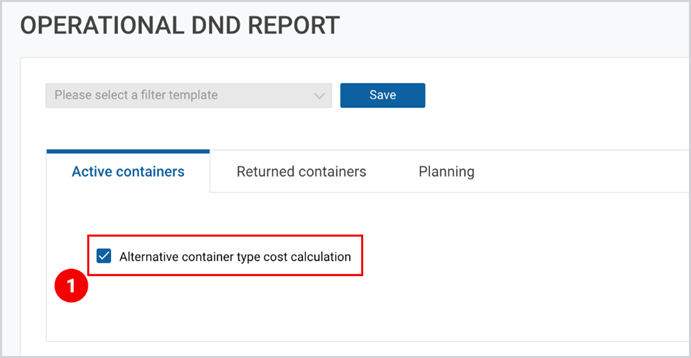
Figure 5
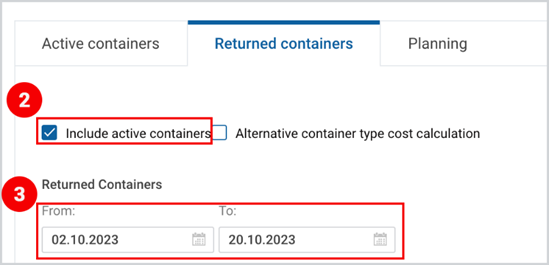
Figure 6
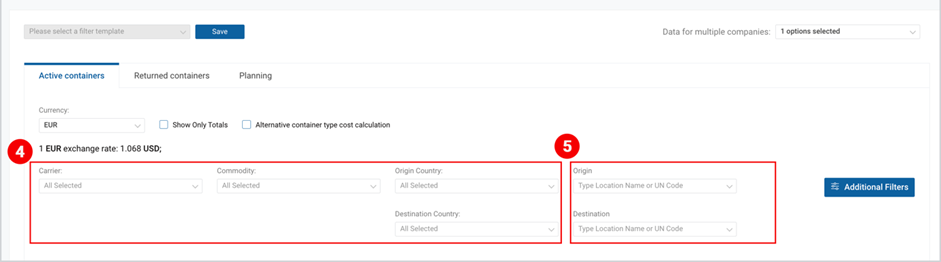
Figure 7
Additional Filters
Additional Filters allow you to
- Filter the data per your role in the shipments;
- Add additional fields to the report.
Select Your Role in Shipment
- Select Additional Filters.
- Select one of the three filter options:
- My Shipments — Shipments created by you or by companies selected in Data for Multiple Companies.
- Observer — Shipments where you or the companies selected in Data for Multiple Companies are added as Further Parties.
- All — This option includes the above-mentioned two filter options and is selected by default.
- Click Apply.
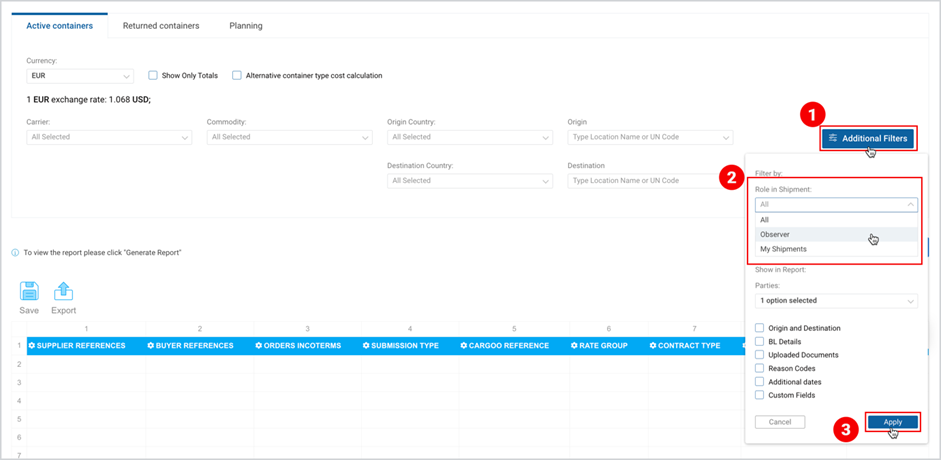
Figure 8
Show in Report: Parties (Business Partners)
- Select Additional Filters.
- Open the drop-down menu for Parties and select more Parties or deselect the default selected option.
By default, only Delivery Location is selected. - Click Apply.
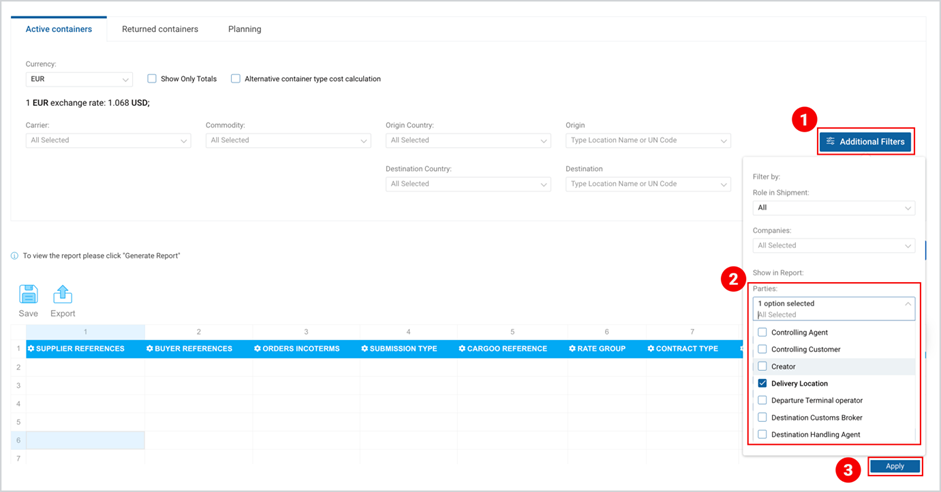
Figure 9
Show in Report: Fields
To add more fields to the report
- Select Additional Filters.
- Select the checkboxes of the fields you want to be shown in the report.
Information on the list of columns added per field is given in Table 1: List of Columns Added per Field. - Click Apply.
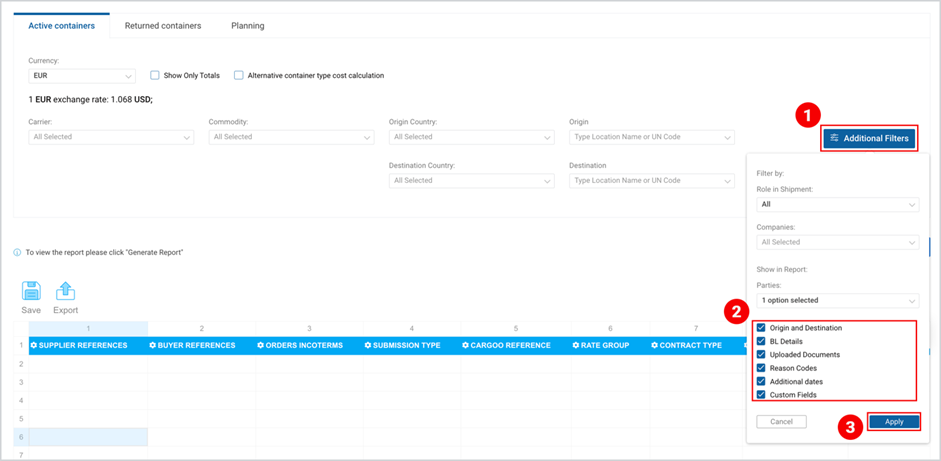
Figure 10
Table 1: List of Columns Added per Field
Fields | Columns |
Additional Dates |
|
BL Details |
|
Custom Fields | *Custom setup fields derived from the order if such fields are available for the company. |
Origin and Destination |
|
Reason Codes |
|
Uploaded Documents |
“This field does not filter. If the shipment has no data about the field, it still shows 0/0” |
To download the print version of this article click the PDF icon: