 Cargoo Support
ISF Filing
Cargoo provides a unified platform for creating and submitting Importer Security Filings (ISF).
ISF, also known as 10+2, is a U.S. Customs and Border Protection (CBP) requirement that mandates importers to provide information about their ocean shipments in advance. It ensures a smooth movement of goods across borders with enhanced security to protect international supply chains. ISF electronic filings are required to be submitted at least 24 hours before the goods are loaded onto a vessel to be shipped to the United States.
Per the U.S. CBP regulations, the following information needs to be submitted in the ISF filing:
- 10 data elements from the importer, such as:
- Seller
- Buyer
- Importer of Record number
- Consignee number
- Manufacturer (or supplier)
- Ship-to party
- Country of origin
- Commodity Harmonized Tariff Schedule (HTSUS) number
- Container stuffing location
- Consolidator (stuffer)
- 2 data elements from the carrier:
- Vessel stow plan
- Container status messages
The following paragraphs describe the ISF regulations and offer step-by-step instructions for creating and submitting ISF filings on Cargoo.
Accessing the ISF Filing Module
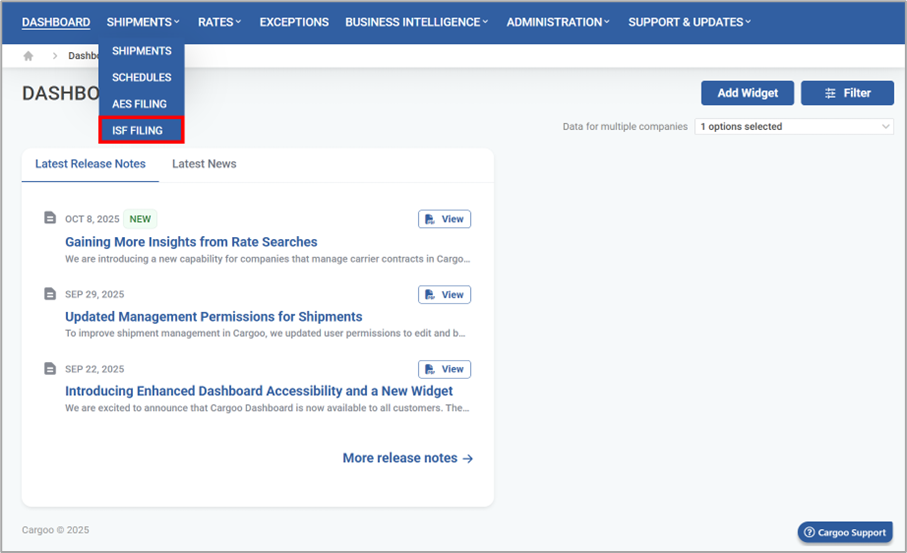
To access the ISF Filing module, go to Shipments → ISF Filing.
Note: The module is available when enabled in the company settings. If not enabled, you will still be able to see if an ISF filing is added in the Documents tab of the shipment, but you will not be able to view / access it.
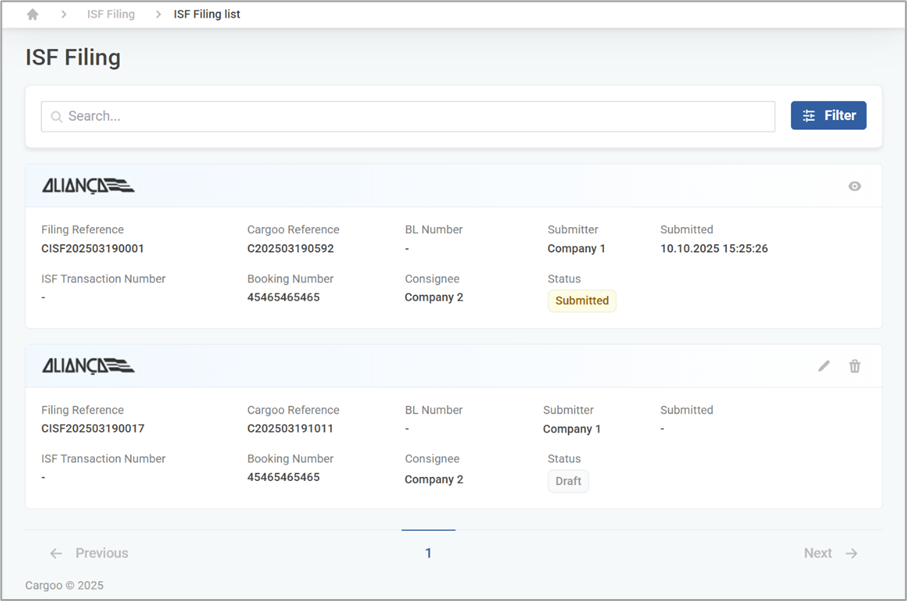
In the ISF Filing module that opens, the records are organized in summary cards displaying the following information:
| Field | Description |
| Filing Reference | System-generated filing ID assigned to the record |
Cargoo Reference | Shipment number assigned in Cargoo |
BL Number | Bill of lading (BL) number of the shipment |
Submitter | The name of the user who submitted the ISF filing |
Submitted | Date of ISF filing submission |
ISF Transaction Number | Transaction number of the ISF filing |
Booking Number | Booking number of the shipment |
Consignee | U.S.-based party physically or contractually receiving the goods upon entry |
Status | Current status of the ISF filing |
Creating an ISF Filing
To create an ISF filing, the user should be assigned either of the following roles in the shipment:
- Consignee
- Destination Handling Agent
- Destination Customs Broker
You can create an ISF filing with statuses Confirmed and further. To do this, you should first add an Importer Security Filing (ISF) type document to the shipment.
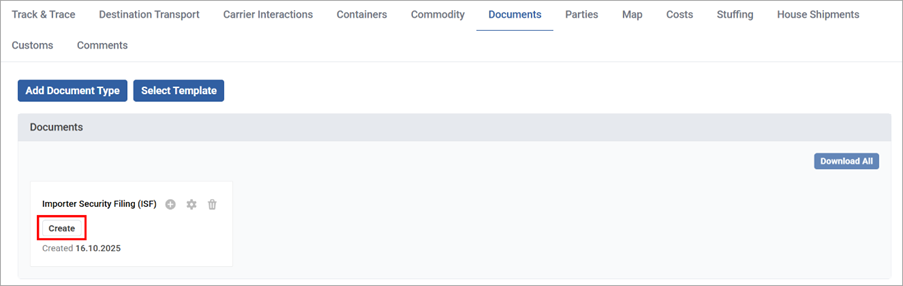
Once the document type is added, you can proceed with creating the ISF filing. To do this:
1. Click Create on the Importer Security Filing (ISF) card.
Creating an ISF Filing
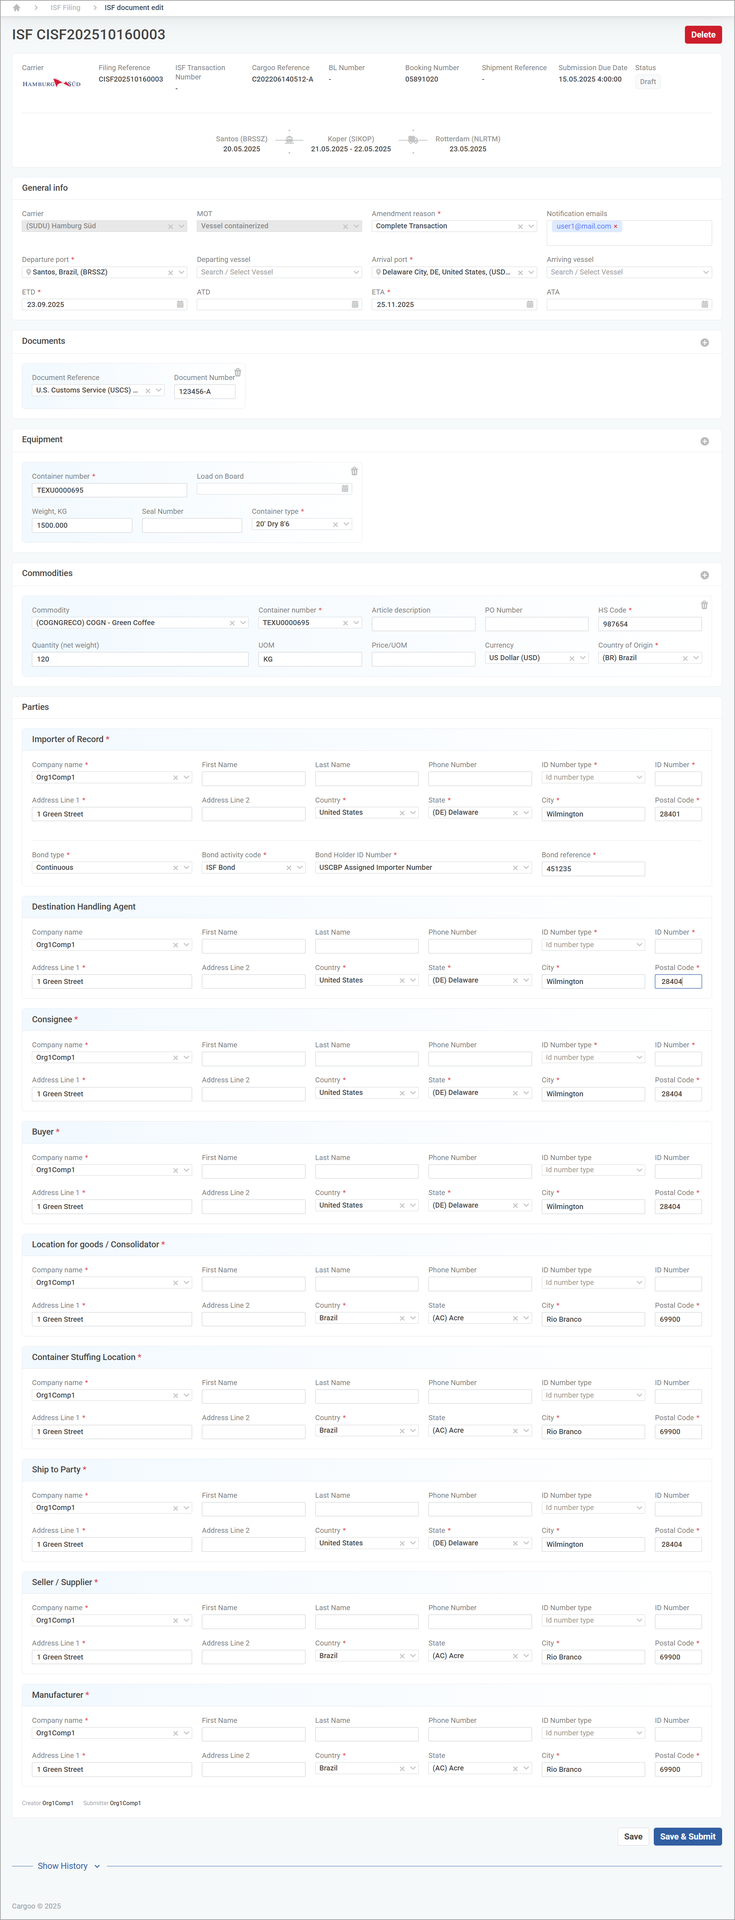
2. In the ISF document edit page that opens, provide the required information as described in the table below:
Note: All fields marked with a red asterisk (*) are mandatory.
Field | Description / Action |
Shipment Information | A read-only summary of the shipment displaying the following details:
|
General info | |
Carrier | A read-only field showing the name of the carrier, pre-populated from the shipment |
MOT | A read-only field showing the mode of transport (MOT), pre-populated from the shipment |
Amendment reason * | Specify the reason for the amendment. To do this, select a different option from the drop-down list. Note: By default, the reason is set to Complete Transaction. |
Notification emails | The email addresses of users to whom the notification emails about the ISF filing will be sent, pre-populated with the email address of the current user. Enter more email addresses upon need. Hint: Enter the email address and click Enter, or click Add. To remove added address, click X. |
Departure port * | The port where the shipment departed from pre-populated from the shipment. To modify, select an option from the drop-down list. |
Departing vessel | The name of the vessel in which the goods are shipped, pre-populated from the shipment. To modify, select an option from the drop-down list. |
Arrival port * | The port where the shipment arrives at, pre-populated from the shipment. To modify, select an option from the drop-down list. |
Arriving vessel | Specify the arrival vessel. To do this, select an option from the drop-down list. |
ETD * | The estimated time of delivery (ETD) of the shipment, pre-populated from the shipment. To modify, see the Selecting a Date paragraph. |
ATD | Indicate the actual time of delivery of the shipment. To do this, see the Selecting a Date paragraph. |
ETA * | The estimated time of arrival (ETA) of the shipment, pre-populated from the shipment. To modify, see the Selecting a Date paragraph. |
ATA | Indicate the actual time of arrival of the shipment. To do this, see the Selecting a Date paragraph. |
Documents | |
Documents | Click |
Document Reference | Indicate the type of document. To do this, select an option from the drop-down list. The following options are available:
|
Document Number | Enter the unique number of the document. Note: For the Master Bill of Lading Master Bill, and Ocean Bill of Lading Regular Bill the number must start with the Standard Carrier Alpha Code (SCAC). |
Equipment | |
Container Number * | The unique number of the container, pre-populated from the shipment |
Load on Board | Indicate the date of loading the container. To do this, see the Selecting a Date paragraph. |
Weight, KG | Enter the weight of the goods in kilograms. |
Seal Number | Enter the unique number of the seal. |
Container Type * | The type of container, pre-populated from the shipment. To modify, select an option from the drop-down list. |
Commodities Note: If the shipment has stuffing information in finalized status, then stuffing information for containers / commodities and linkage of commodities and containers is taken from stuffing. | |
Commodity | Specify the commodity of the shipment. To do this, select an option from the drop-down list. |
Container number * | Specify the number of the container. To do this, select an option from the drop-down list. |
Article description | Enter a brief description of the article. |
PO Number | Enter the number of the purchase order. |
HS Code * | Enter the Harmonized System-Based Schedule B code of the goods. Note: The code must contain a minimum of 6 digits. |
Quantity (net weight) | Enter the net weight of the goods. |
UOM | Enter the unit of measurement to specify the quantity of the goods. |
Price/UOM | Enter the price of goods per unit of measurement. |
Currency | Specify the currency of the purchase. To do this, select an option from the drop-down list. |
Country of Origin * | Specify the country of origin of the shipment. To do this, select an option from the drop-down list. |
Parties The sub-section contains separate cards for the following party types:
Note: Parties marked with a red asterisk (*) are mandatory. Depending on the party type, fields are pre-populated from the shipment information, and all fields can be modified. | |
Company name * | To specify the name of the company, select an option from the drop-down list. |
First Name | Enter the first name of the party. |
Last Name | Enter the last name of the party. |
Phone Number | Enter the phone number of the party. |
ID Number Type | To specify the type of the ID number, select an option from the drop-down list. |
ID Number | Enter the ID number of the party. |
Address Line 1 * | Enter the full address of the party. |
Address Line 2 | Enter the secondary address of the party. |
Country * | To specify the country, select an option from the drop-down list. |
State | To specify the state of the address, select an option from the drop-down list. Note: This field is mandatory for the USA location |
City * | Enter the name of the city |
Postal Code * | Enter the postal code. |
Bond Type * | The type of bond is pre-populated automatically. To modify, select an option from the drop-down list. Note: This field is available only for the Importer of Record party. |
Bond Activity Code *) | Specify the bond activity code. By default, it is set to ISF Bond. To modify, select an option from the drop-down list. Note: This field is available only for the Importer of Record party. |
Bond Holder ID Number * | The ID number of the bond holder, pre-populated automatically. To modify, select an option from the drop-down list. Note: This field is available only for the Importer of Record party. |
Bond Reference * | For the Importer of Record party, enter the reference of the bond. Note: This field is available only for the Importer of Record party. |

Registering an ISF Filing
3. Click Save to keep the changes made and return to the form later.
Or,
4. Click Save & Submit to complete the form and submit the ISF filing to the U.S. CBP. Upon successful submission, a confirmation pop-up opens.
Adding an ISF Document
To add an ISF filing document:
1. Go to Shipments.
2. Locate the shipment to which you want to add an ISF document and click the shipment card to navigate to the Track & Trace page.
3. Go to the Documents tab.
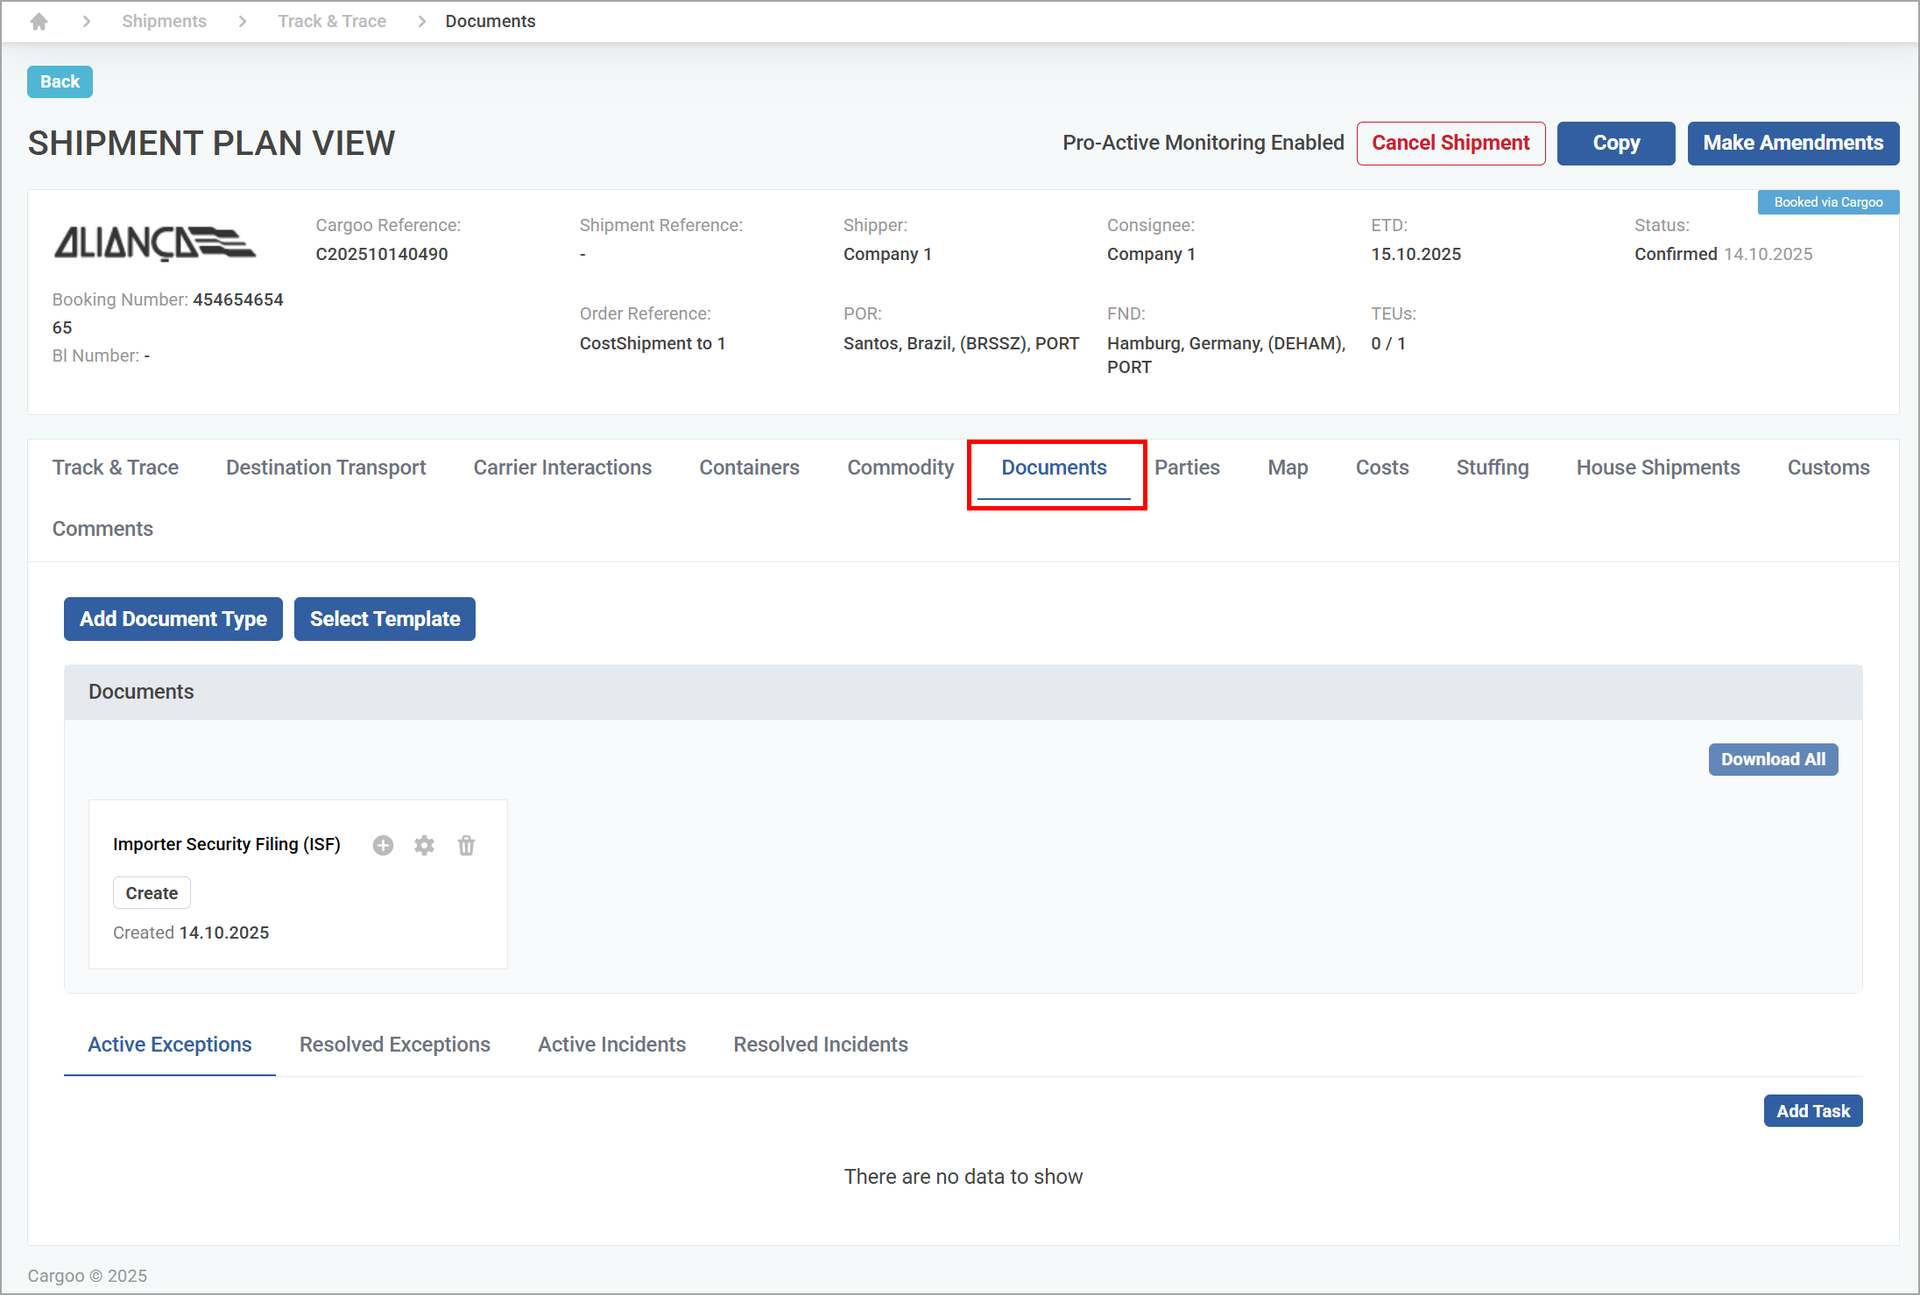
Navigating to the Documents Tab
4. In the Documents tab, click Add Document Type.
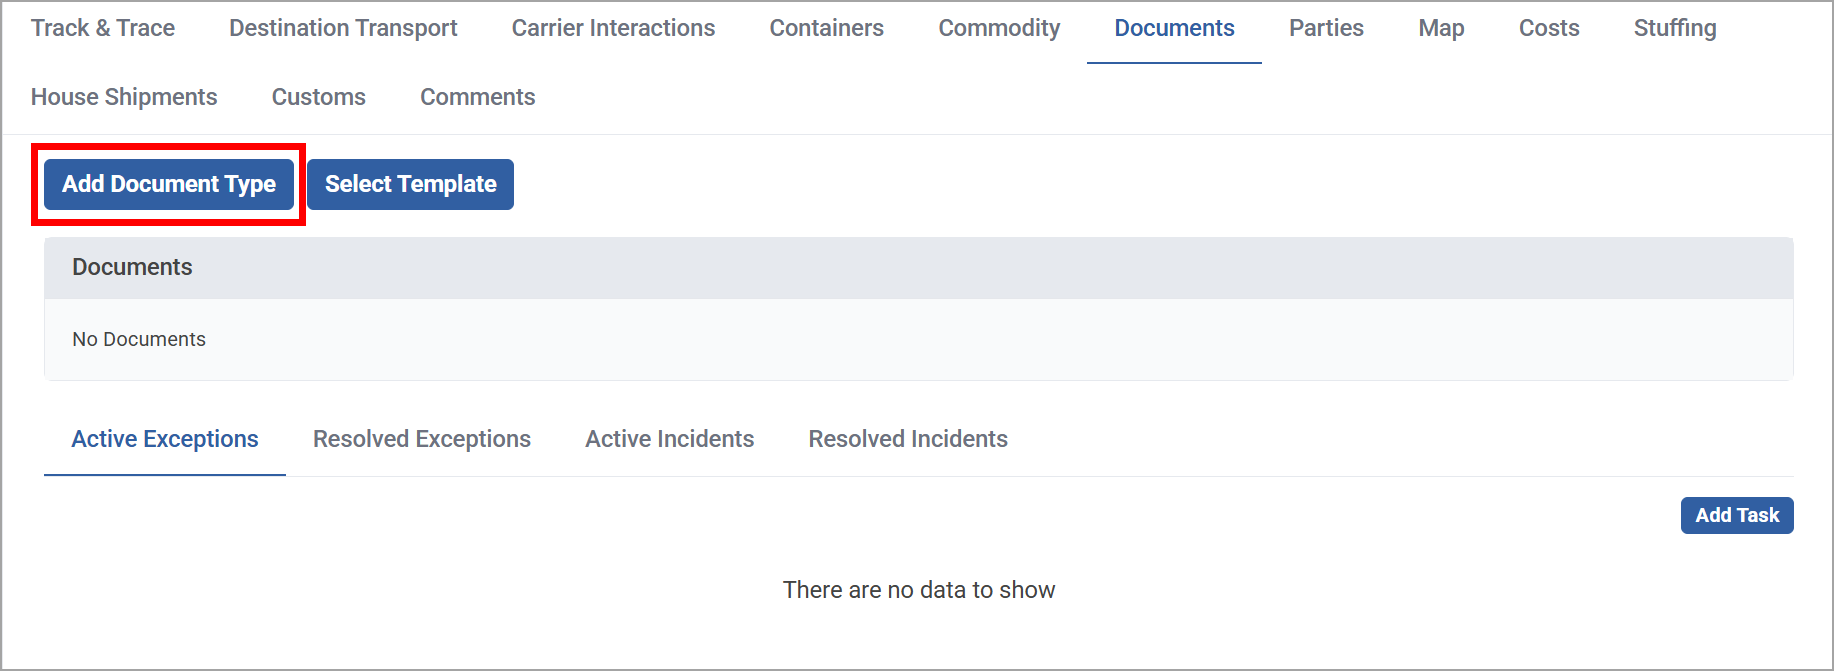
Adding a Document Type
5. In the drop-down list that opens, select Importer Security Filing (ISF). An Importer Security Filing (ISF) card opens in the Documents tab.
Hint: Start typing, and matching results will instantly appear in the search bar.
Working in the ISF Filing Module
This section describes how to search for, filter, edit, and delete ISF filings as well as view a submitted ISF filing history.
Searching for ISF Filings
The ISF Filing module allows users to search for records, making it easier to navigate through a large number of records.
To search for records:
1. Go to Shipments → ISF Filing.
2. In the search box, enter a parameter of the record by which you want to locate the ISF filing. You can search with the following parameters:
- Filing Reference
- Cargoo Reference Number
- ISF Transaction Number
Hint: Start typing, and the system will generate all matching results.
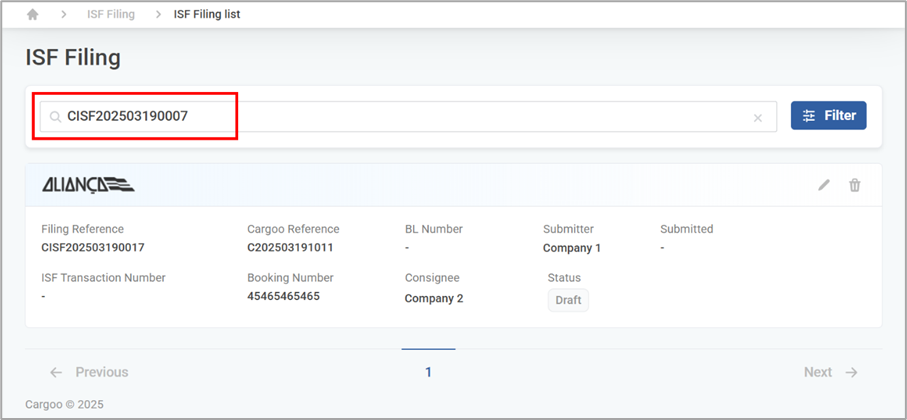
Searching for ISF Filings
3. To clear the search results, click X in the search box.

Filtering ISF Filings
In the ISF Filing module, you can filter the records by applying criteria to view records of a specific status, company, etc.
To filter ISF filing records:
1. Go to Shipments → ISF Filing.
2. Click Filter above the records table. A pop-up opens displaying the available filtering criteria.
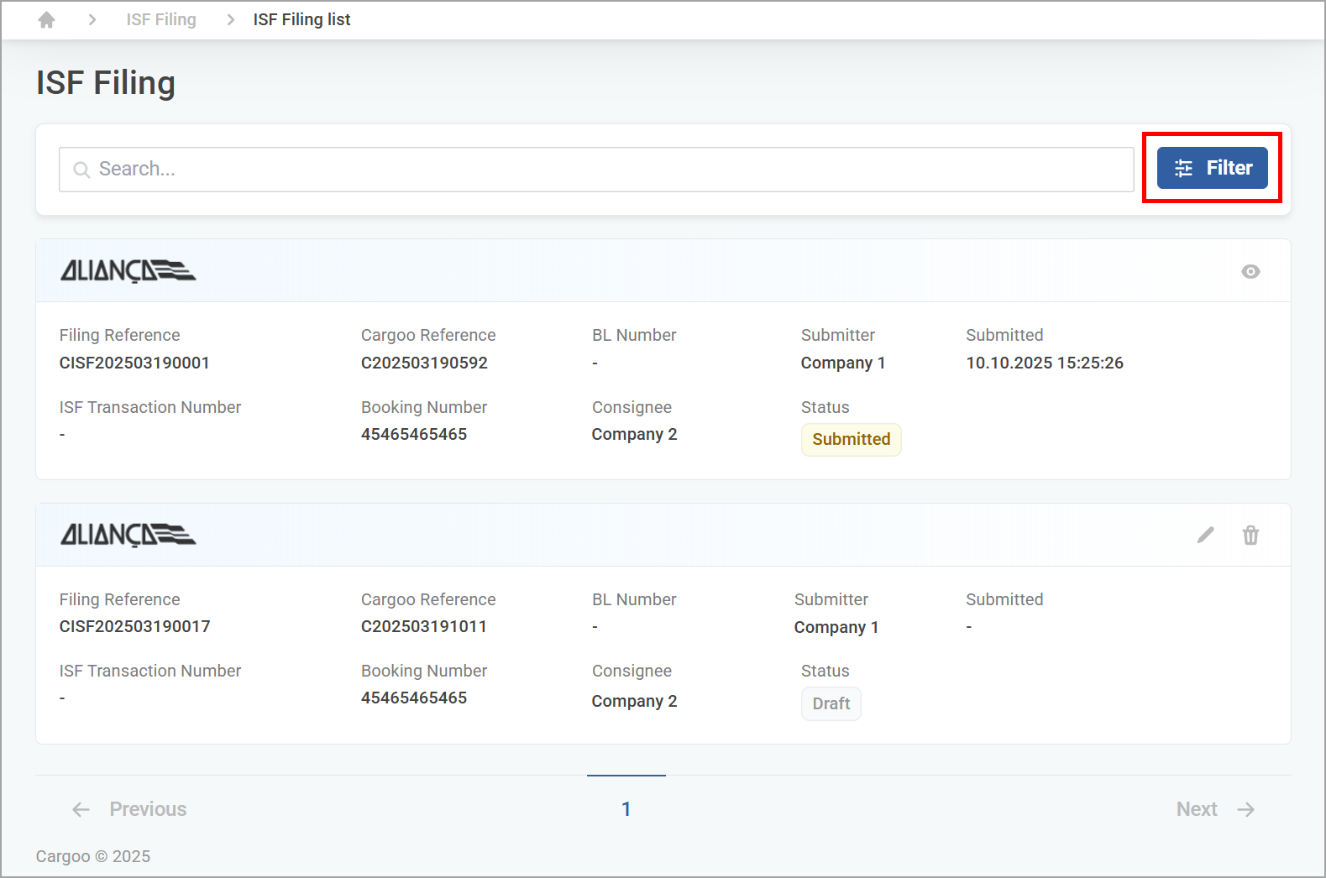
Filtering ISF Filings
3. In the pop-up that opens, specify the filtering criteria as described in the table below:
Field | Action |
Status | Specify the status(es) by which you want to filter the ISF filings. To do this, select all options from the drop-down list. |
Carrier Code | Specify the carrier codes by which you want to filter the ISF filings. To do this, select all options from the drop-down list. |
Party Type | Specify the party types by which you want to filter the ISF filings. To do this, select all options from the drop-down list. |
Company | Specify the companies by which you want to filter the ISF filings. To do this, select all options from the drop-down list. |
Created | Specify the period in time by which you want to filter the ISF filings. To do this, see the Selecting a Date paragraph. |
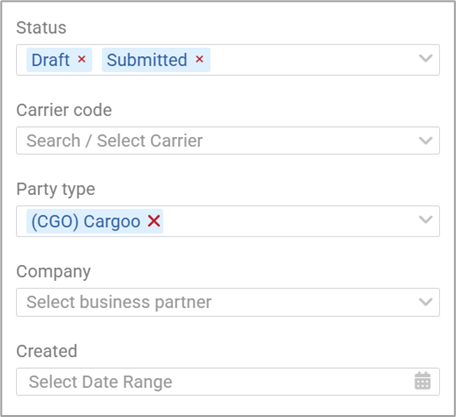
Applying Filter Criteria
4. To remove applied filtering criteria, click 

5. Click outside the filter pop-up to close it.
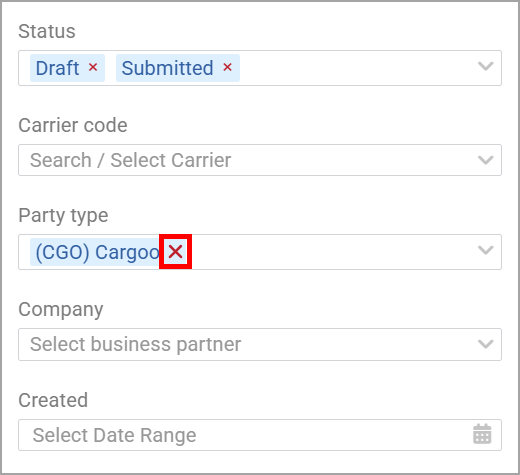
Clearing Filtering Criteria
Selecting a Date
To select a date:
1. In the date field, click the 
2. If the date you want to add is in the current month, click the corresponding date.
3. If the date is in a different month, click the name of the current month and select the desired month from the current year.
4. If the date is in a different year, click the current year to select a different year. Then, select the desired month and date.
Or,
5. Use the 


Hint: You can click 

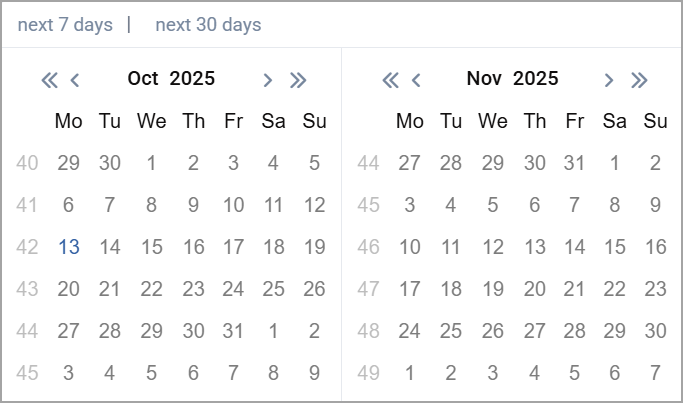
Selecting a Date
Editing an ISF Filings
In the ISF Filing module, you can edit draft, confirmed, and rejected ISF filings if your current company is the creator of the filing. To do this:
1. Go to Shipments → ISF Filing.
2. In the ISF Filing list that opens, locate the ISF filing card you want to edit.
3. Click the pencil icon in the ISF filing card. The ISF Document Edit opens.
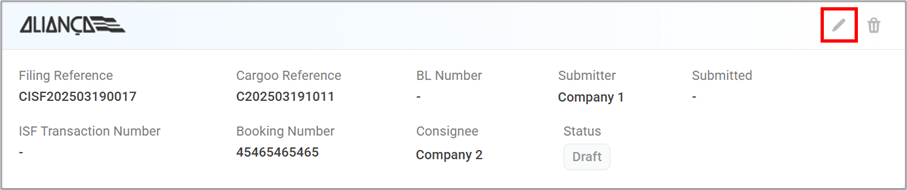
Editing an ISF Filing
4. Make necessary changes as described in the Creating an ISF Filing paragraph.
Deleting an ISF Filing
In the ISF Filing module, you can delete the draft ISF filings if you are the creator and the submitting party of the filing. To do this:
1. Go to Shipments → ISF Filing.
2. In the ISF Filing list that opens, locate the ISF filing card you want to delete.
3. Click 
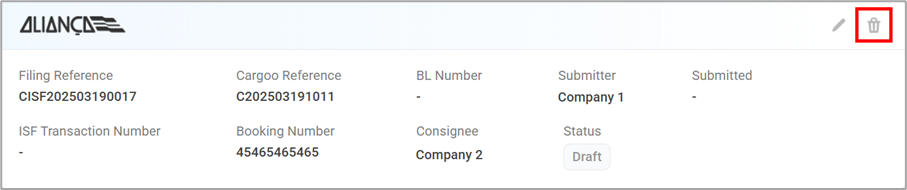
Deleting an ISF Filing
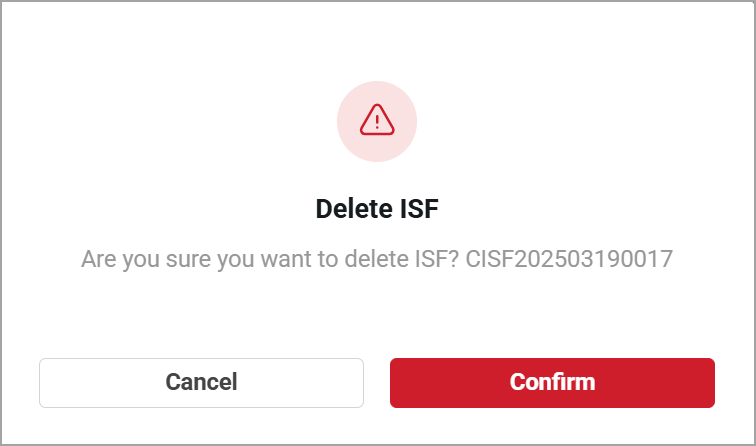
4. In the pop-up window that opens, click Confirm to finalize the deletion.
Viewing a Submitted ISF Filing History
In the ISF Filing module, you can view the submitted ISF filing overview and the record history. To do this:
1. Go to Shipments → ISF Filing.
2. In the ISF Filing list that opens, locate the ISF filing card you want to view.
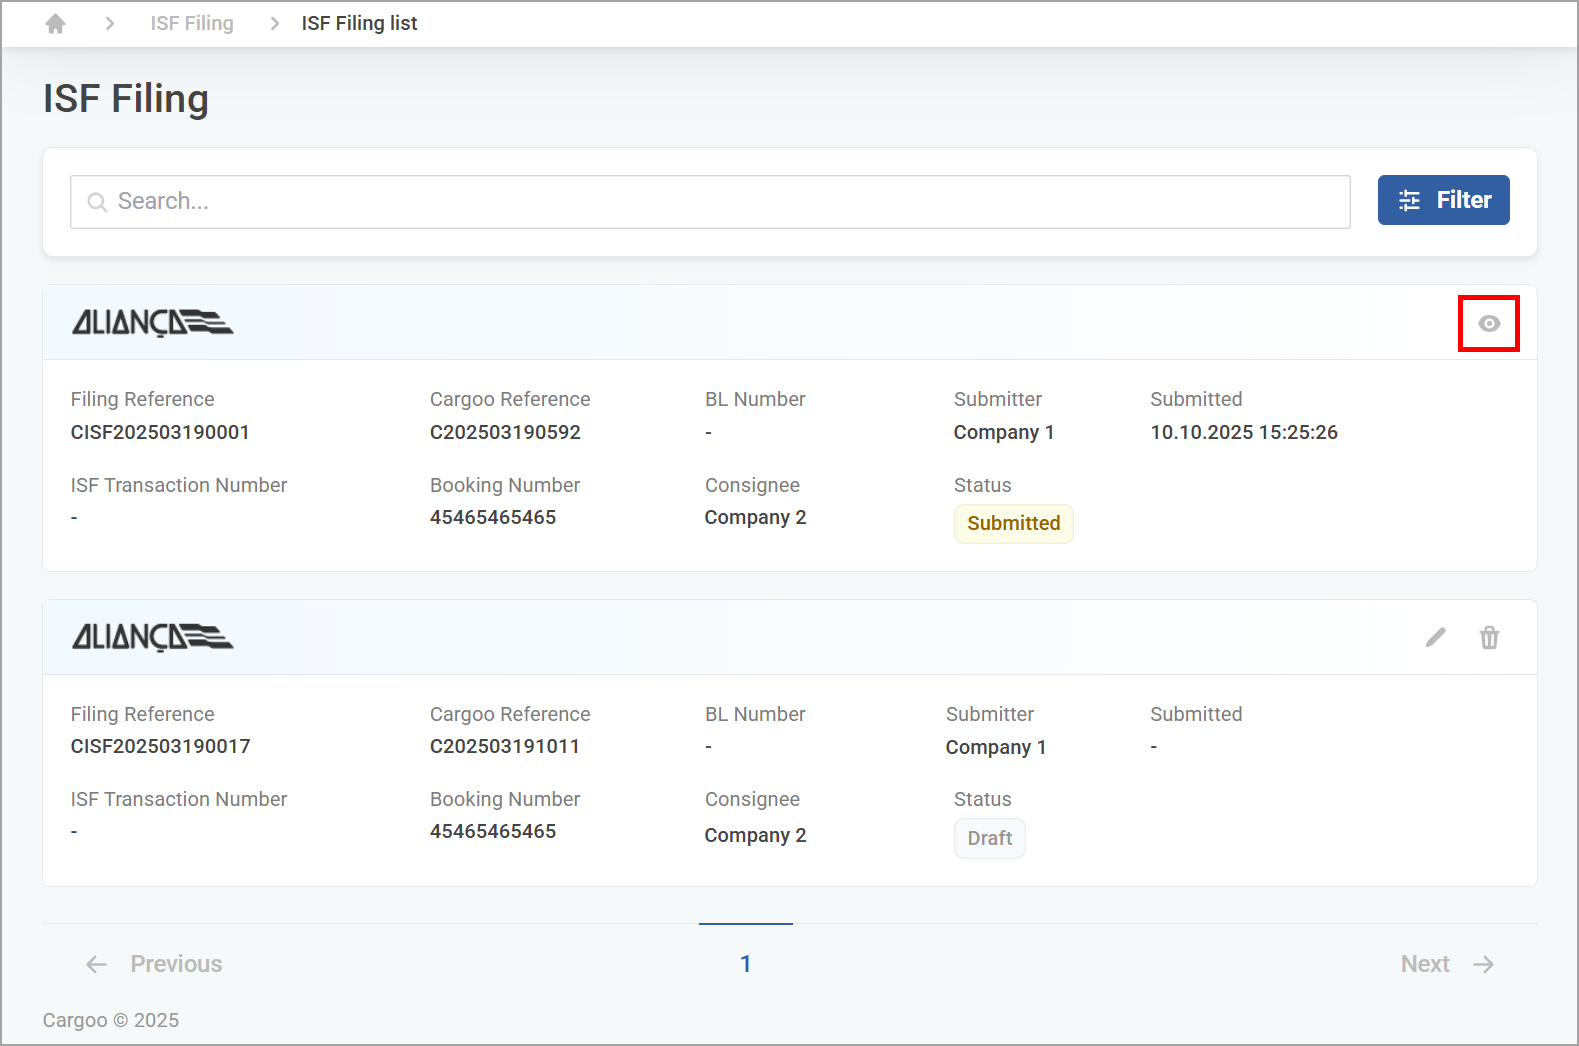
3. Click 
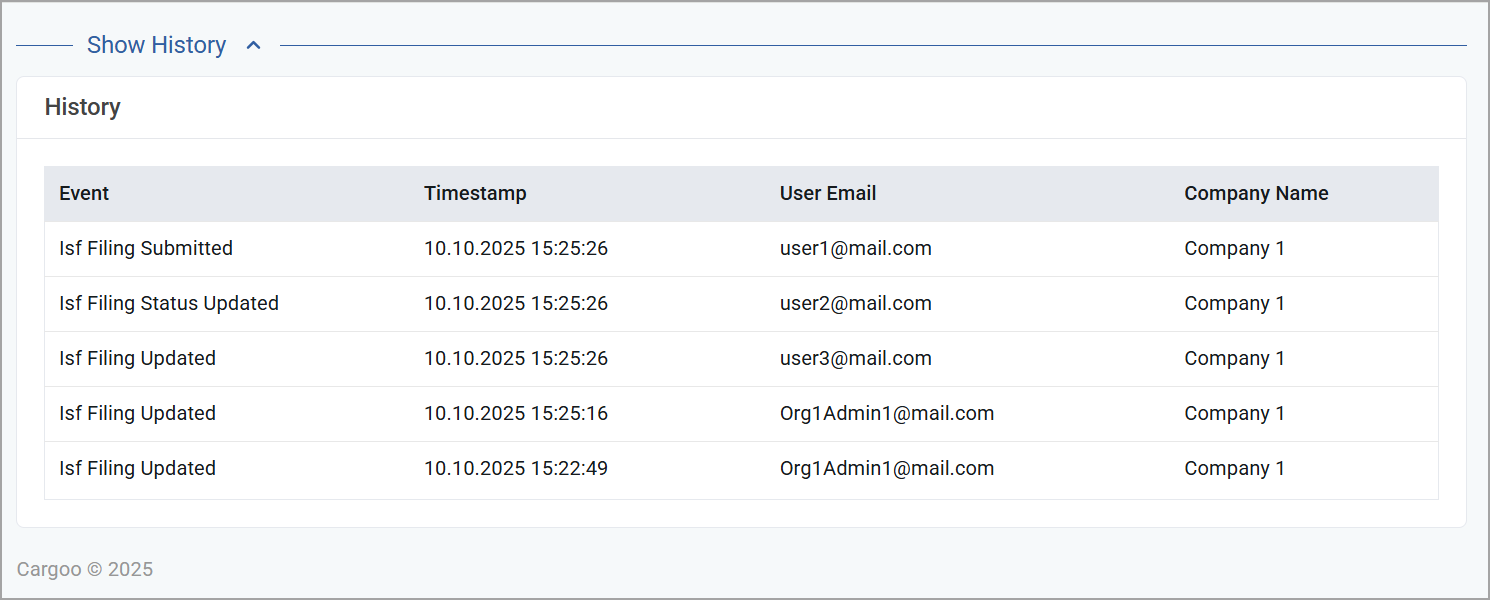
4. Click 
- Event
- Timestamp
- User Email
- Company Name
Viewing a Submitted ISF Filing History
Submitted ISF Filings and Feedback
After submitting a filing, you will receive feedback from the U.S. Customs accepting or rejecting your ISF filing.
Hint: U.S. Customs will send feedback for each submission, amendment, or cancellation request, indicating whether it has been accepted or rejected.
- ISF Accepted - an intermediate state; you can submit amendments or cancel (withdraw) the filing. An ISF Transaction Number is assigned.
- Bill on file - the final acceptance of the filing.
- Rejected - review the reason, correct the data, and resubmit the filing. The reason is displayed within the filing, upon hovering over the
icon next to the status bar.
For all status updates (acceptance, rejection, or intermediate confirmation), Cargoo automatically sends an email notification to you as the submitter.
The table below lists the available ISF filing statuses, available actions, and responsible users:
Status | Description | Available Actions | User |
Draft | Set upon first save | Deletion |
|
Changing and saving | |||
Submission | Submitter | ||
Viewing | Other parties | ||
Submitted | Set after submission | Viewing | Other parties |
Confirmed | Set automatically after Cargoo receives feedback from the U.S. Customs with an acceptance code | Changing and saving | Creator |
Re-submission | Submitter | ||
Request cancellation | Creator | ||
Viewing | Other parties | ||
Amendments submitted | Set after submission, when an ISF number exists | Viewing | Other parties |
Rejected | Set automatically after Cargoo receives feedback from the U.S. Customs with rejection comments | Changing and saving | Submitter |
Re-submission | |||
Cancellation requested | Set upon requesting withdrawal | Cancelling | Creator |
Viewing | Other parties | ||
Cancelled | Set upon cancellation confirmation | Viewing | Other parties |
Creation of a new filing | Creator |