 BIM Support
Special Features: CBLI Report Category
This report category helps you get an insight on available Carrier Bill of Lading Instructions (CBLIs)
To view the CBLI report category
- Navigate to Business Intelligence>Reports.
- Select CBLI Report.

Figure 1
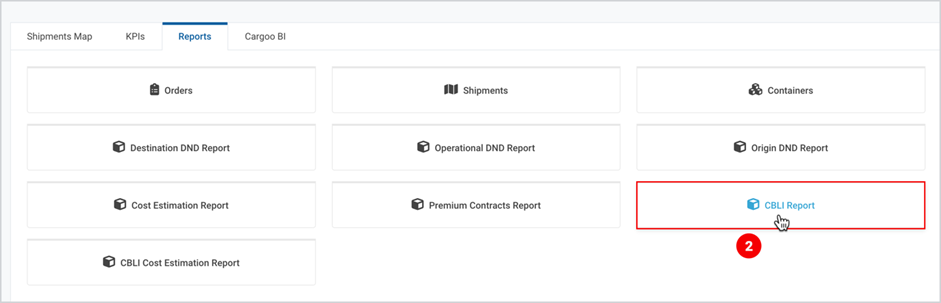
Figure 2
Before generating a report, make sure that
- You’re using the right Company account.
(For more details, please see Business Intelligence: Reports Section article.) - You have checked the Data for multiple companies: section and have selected all the companies for which you are looking to get the data .
(For more details, please see Common Features: Data for Multiple Companies article.) - All Filters and Additional Filters are set.
(To set the Filters and Additional Filters follow the steps described in Filters and Additional Filters.)
Tip | Save the filter configurations as a template in case you use the same filter configurations repeatedly, or use existing templates if any. |
Once all filters are set, generate a report and use report table features to view and analyze the report online or use the provided options to download or save it to preferred file formats.
(For more details on report table features, please see Common Features: Report Table article.)
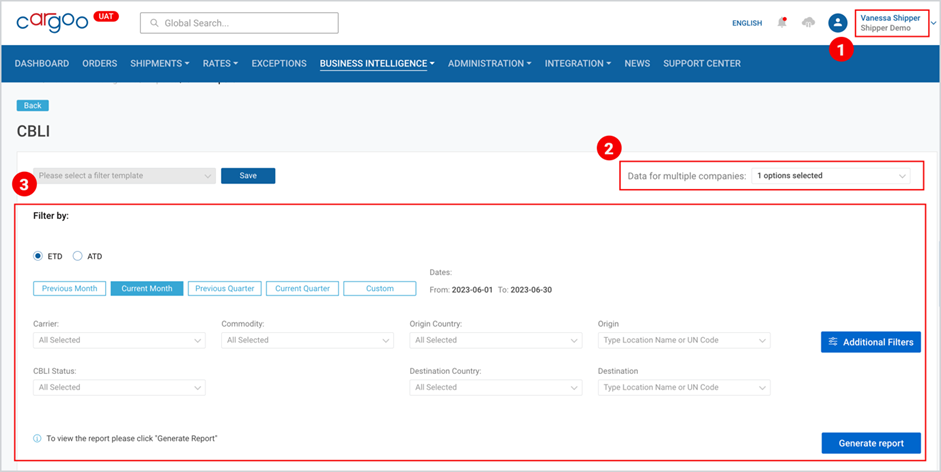
Figure 3
Aside from the Common features, the CBLI report category offers the following special features:
- Filter by
- Additional Filters
Filter by
To set the filters
- Select between ETD and ATD (ETD is selected by default).
- Select the time period from the provided options: Previous Month, Current Month, Previous Quarter, Current Quarter, or Custom (use the calendars to select From and To dates).
- Use the drop-down menus of the following filters to narrow down the search results and filter the data accordingly.
- Carrier,
- Commodity,
- Shipment Status,
- Origin Country,
- Destination Country.
4. Type in the Location Names or the UN Codes (UN/LOCODE) for the Origin and the
Destination.
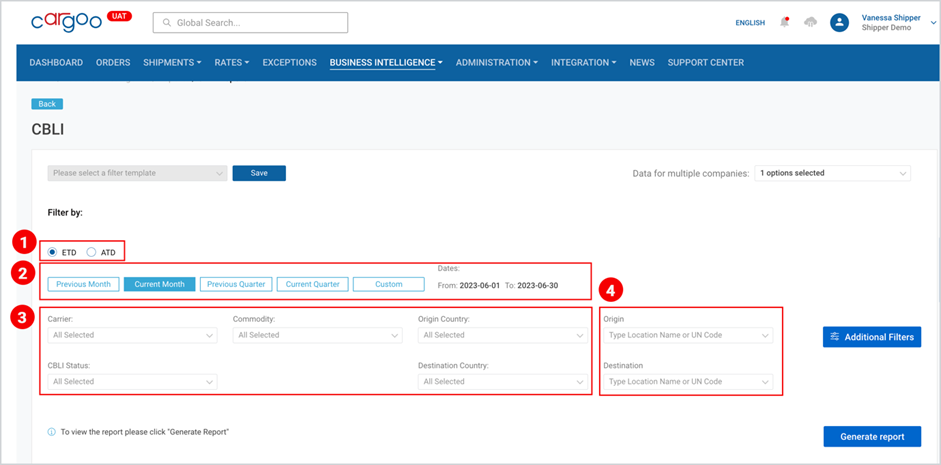
Figure 4
Additional Filters
Additional Filters allow you to
- See the data for companies available for the user (and support user);
- Add additional parties to the report.
Select Companies
Select Additional Filters.
- Under Companies, select all required ones from the searchable drop down (current company is selected by default)
- Click Apply.
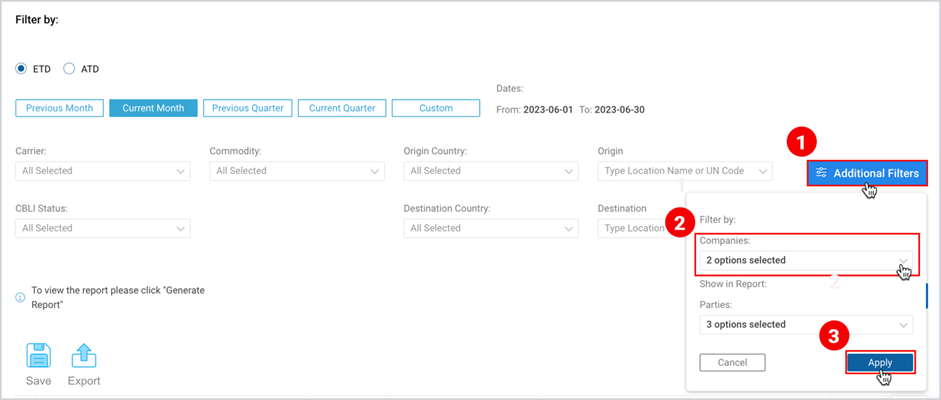
Figure 5
Show in Report: Parties (Business Partners)
To add more Parties to the report
- Select Additional Filters.
- Open the drop-down menu for Parties and select more Parties or deselect the default selected option (by default, only Delivery Location is selected).
- Click Apply.
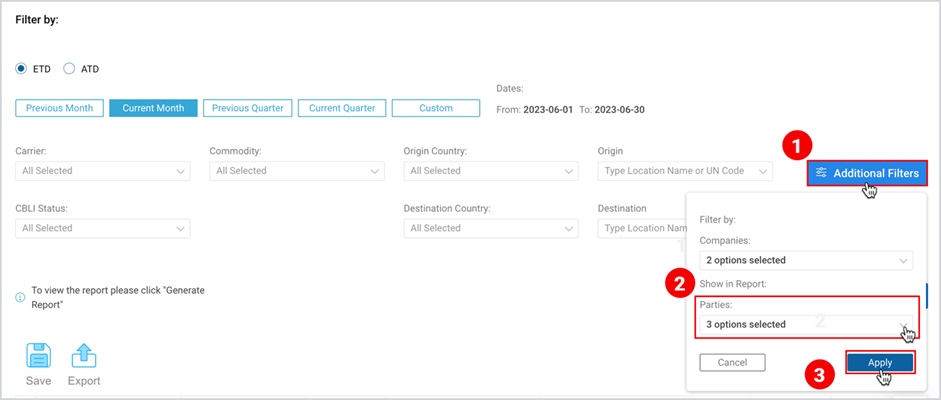
Figure 6
By default, the following 3 parties are selected:
- Carrier
- Shipper
- Consignee
The selected Party (Business Partner) is added in the corresponding column, only if the Party was added in any of the Shipments. If the party is not added in the shipment, that the columns data will be left blank.
To download the print version of this article click the PDF icon: