 Cargoo Support
Special Features: Orders Report Category
TABLE OF CONTENTS
Here you can view all the data on Orders created or being monitored by you.
To view the Orders report category
- Click Business Intelligence>Reports.
- Select Orders.
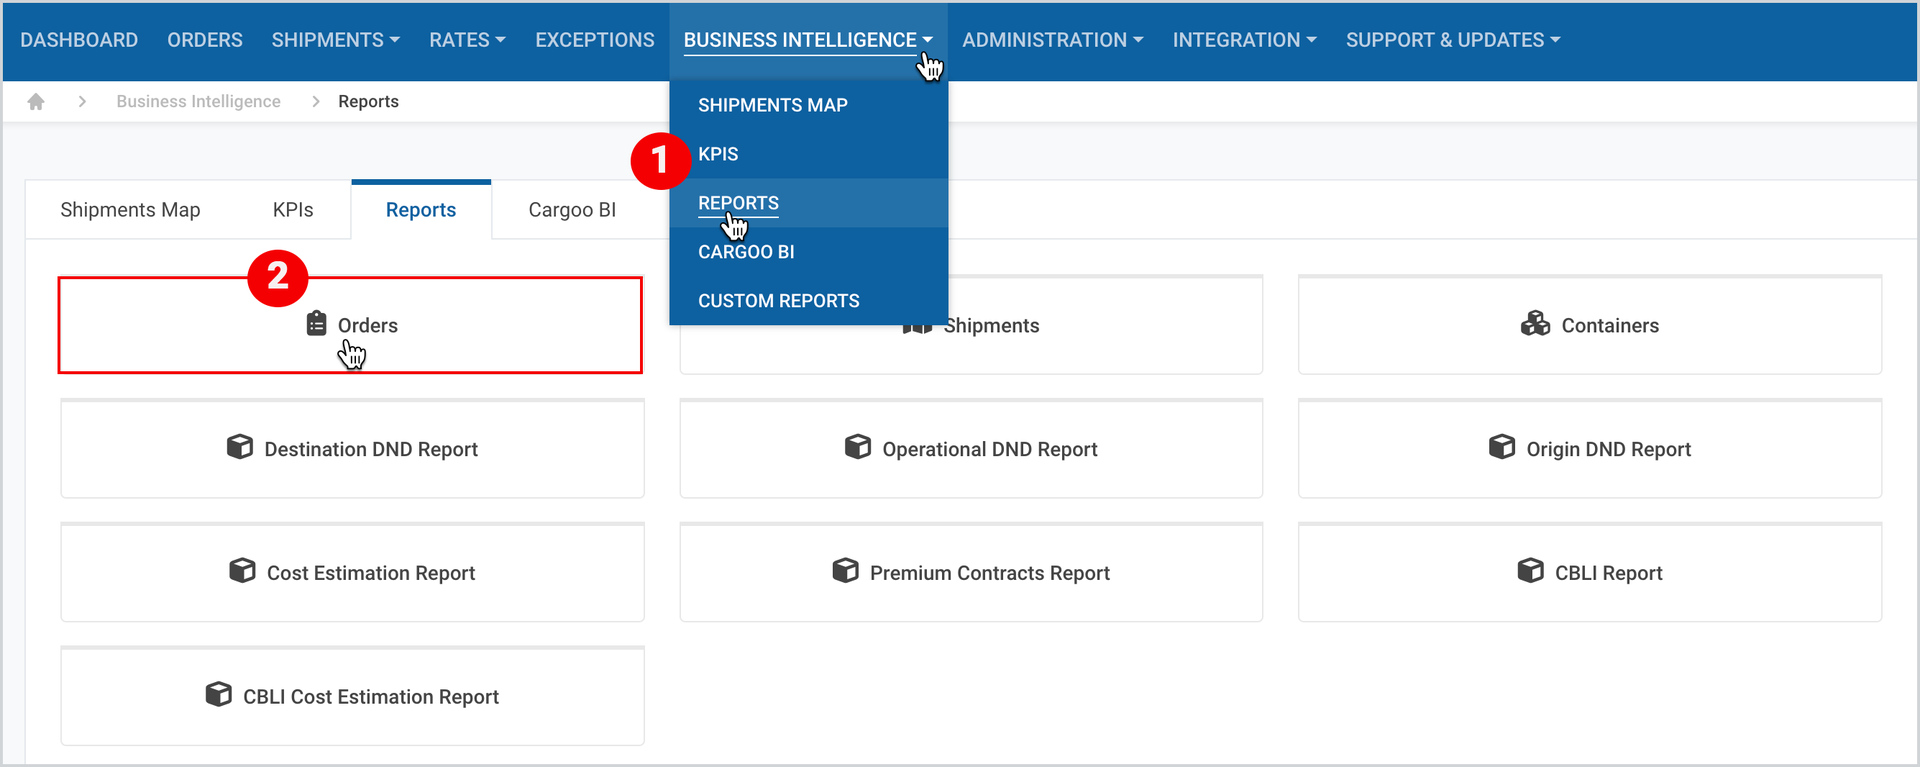
Figure 1
Before generating a report, make sure that
- You’re using the right Company account .
(For more details, please see Business Intelligence: Reports Section article.) - You have checked the Data for multiple companies: section and have selected all the companies for which you are looking to get the data.
(For more details, please see Common Features: Data for Multiple Companies article.) - All Filters and Additional Filters are set.
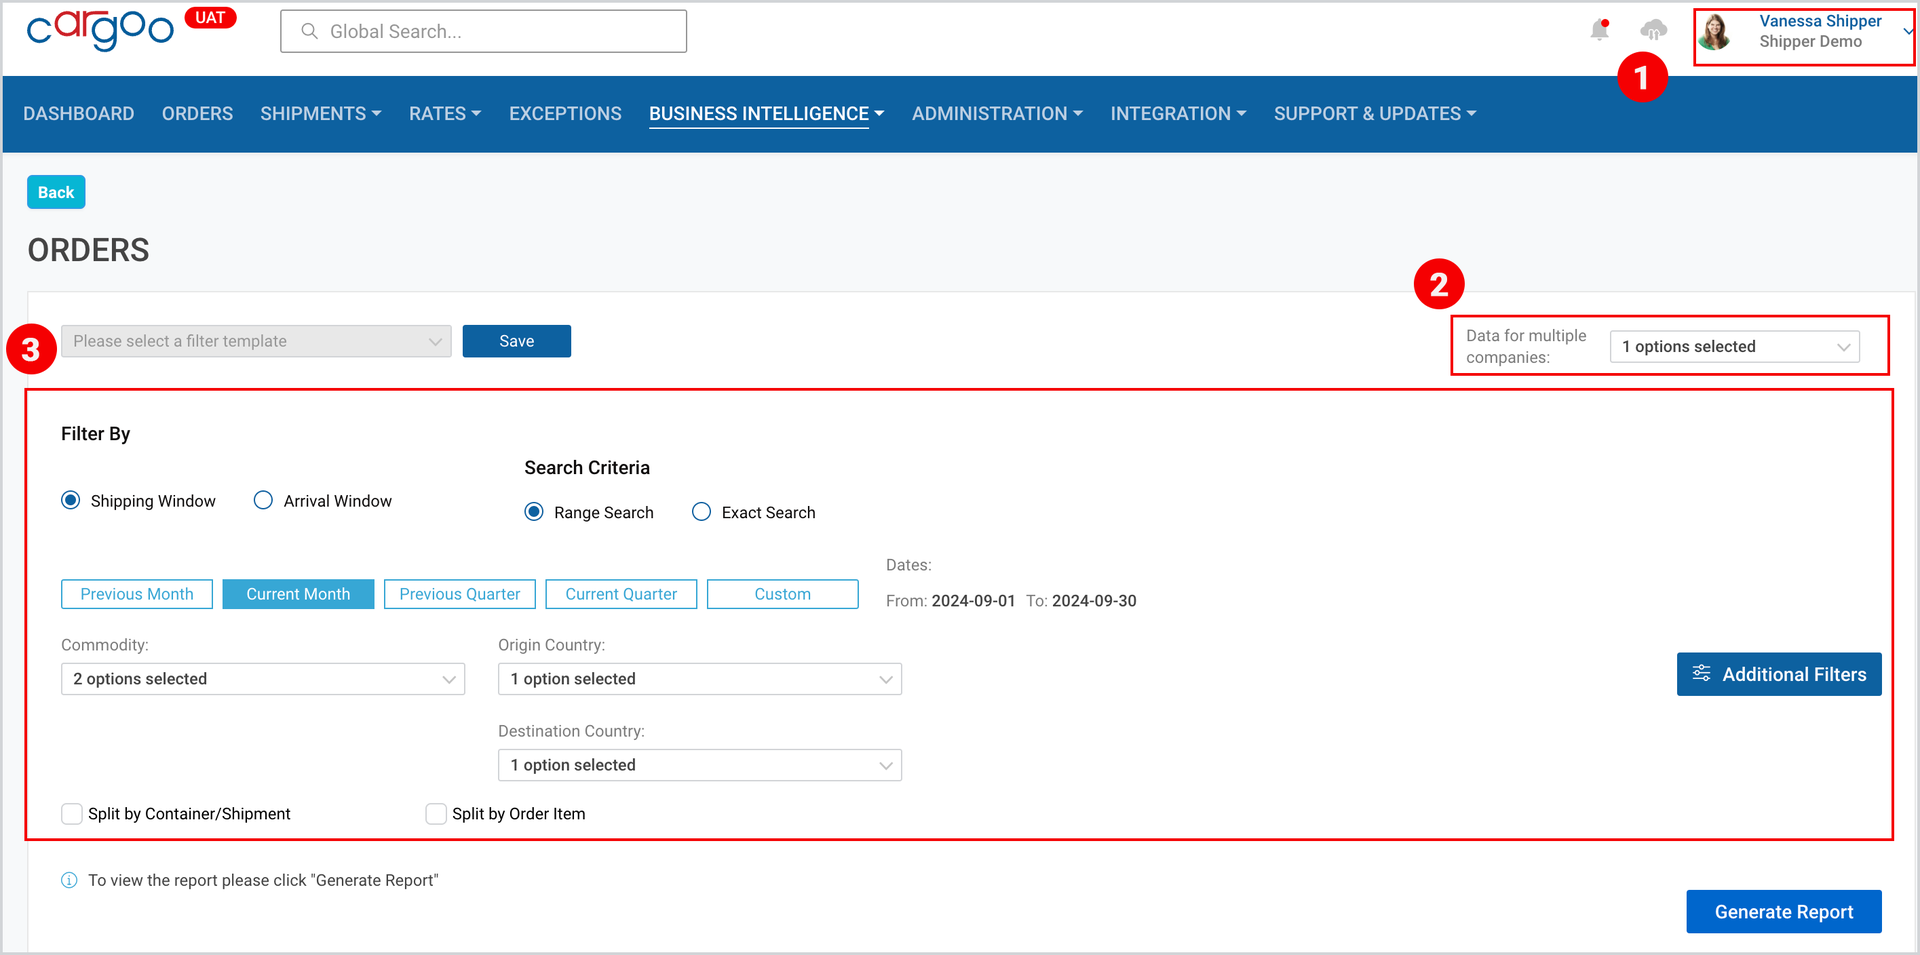
Figure 2
Note | To set the Filters and Additional Filters, follow the steps described in Filters and Search Criteria and Additional Filters. |
Tip | Save the filter configurations as a template in case you use the same filter configurations repeatedly, or use existing templates if any. (For more details, please see Common Features: Save Your Filter Configurations as a Template article.) |
Once all filters are set, generate a report and use report table features to view and analyze the report online or use the provided options to download or save it to preferred file formats. (For more details on report table features, please see Common Features: Report Table article.)
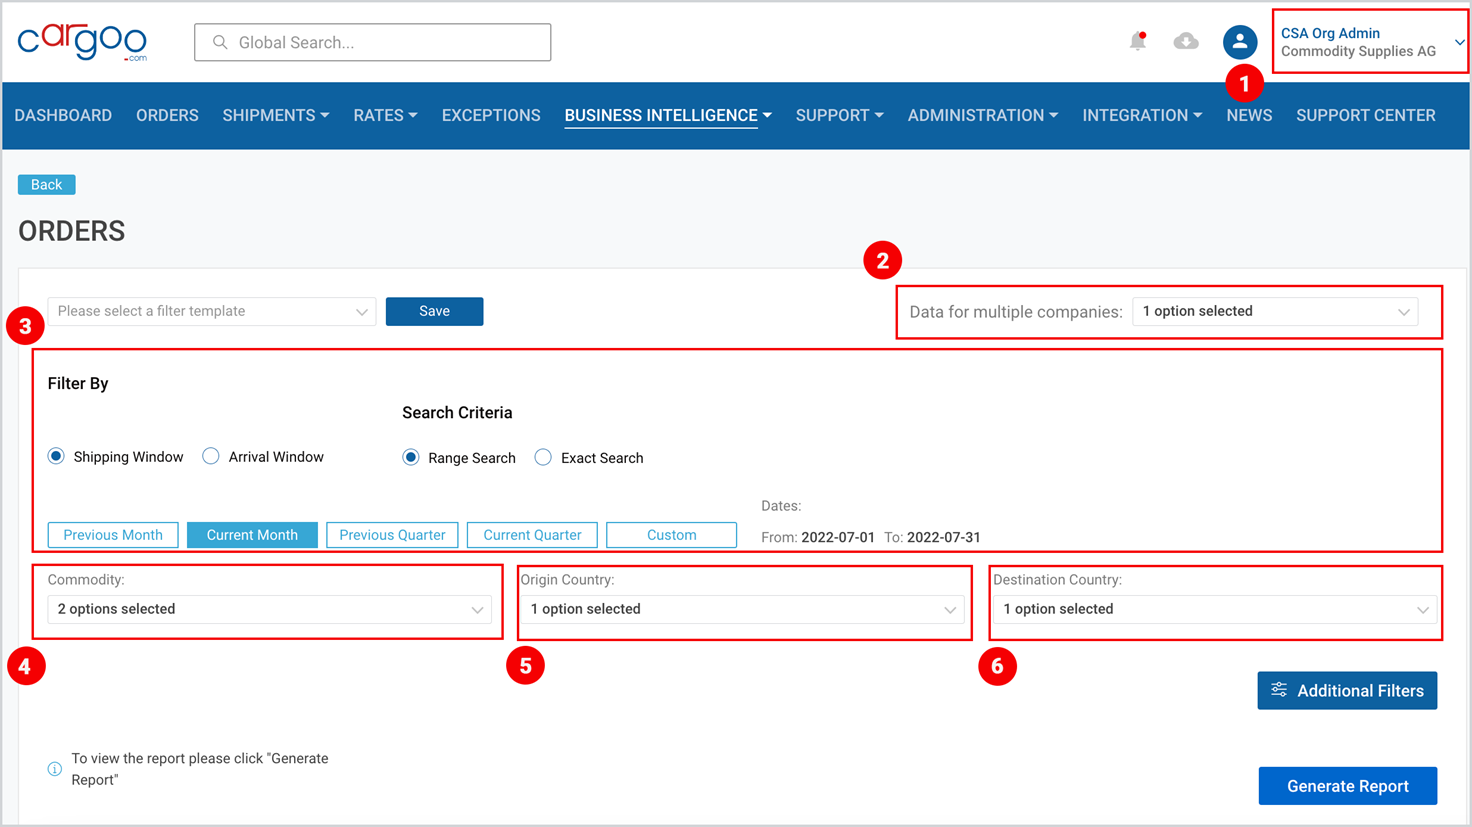
Figure 3
Filters and Search Criteria
- Choose the date range from the provided options; or select Custom and use the calendars to select From and To dates.
- Select one of the two search criteria
- Exact Search — the generated report includes all orders for which the below-mentioned criterion is true:
- Both, From and To dates are given, and the given From-To range is within the selected date range.
- Range Search — the generated report includes all orders for which the below mentioned criteria and criterion "a" of Exact Search are true:
- Both, From and To dates are given, and only one matches the selected date range.
- Both, From and To dates are given, and this From-To date period covers the selected date range.
- Only one of the two dates is given, either From or To, and the given From/To date is within the selected date range.
- Exact Search — the generated report includes all orders for which the below-mentioned criterion is true:
- Select the window type whereto you want to apply the selected Search Criteria(see Step 2).
- Shipping Window — this filter matches the Shipping Window From/To dates which you set in the Origin section of your Order.
- Arrival Window — this filter matches the Arrival Window From/To dates which you set in the Destination section of your Order.
- Select the commodity type for which you want to apply the search criteria (see Step 4).
- Select the origin country (see Step 5).
- Select the destination country (see Step 6).
- Split by Container/Shipment checkbox (see Step 7): if selected, then the orders will be split into rows per linked containers and shipments.
- Split by Order Item: if selected, the report displays orders split into rows by order items (see Step 8)
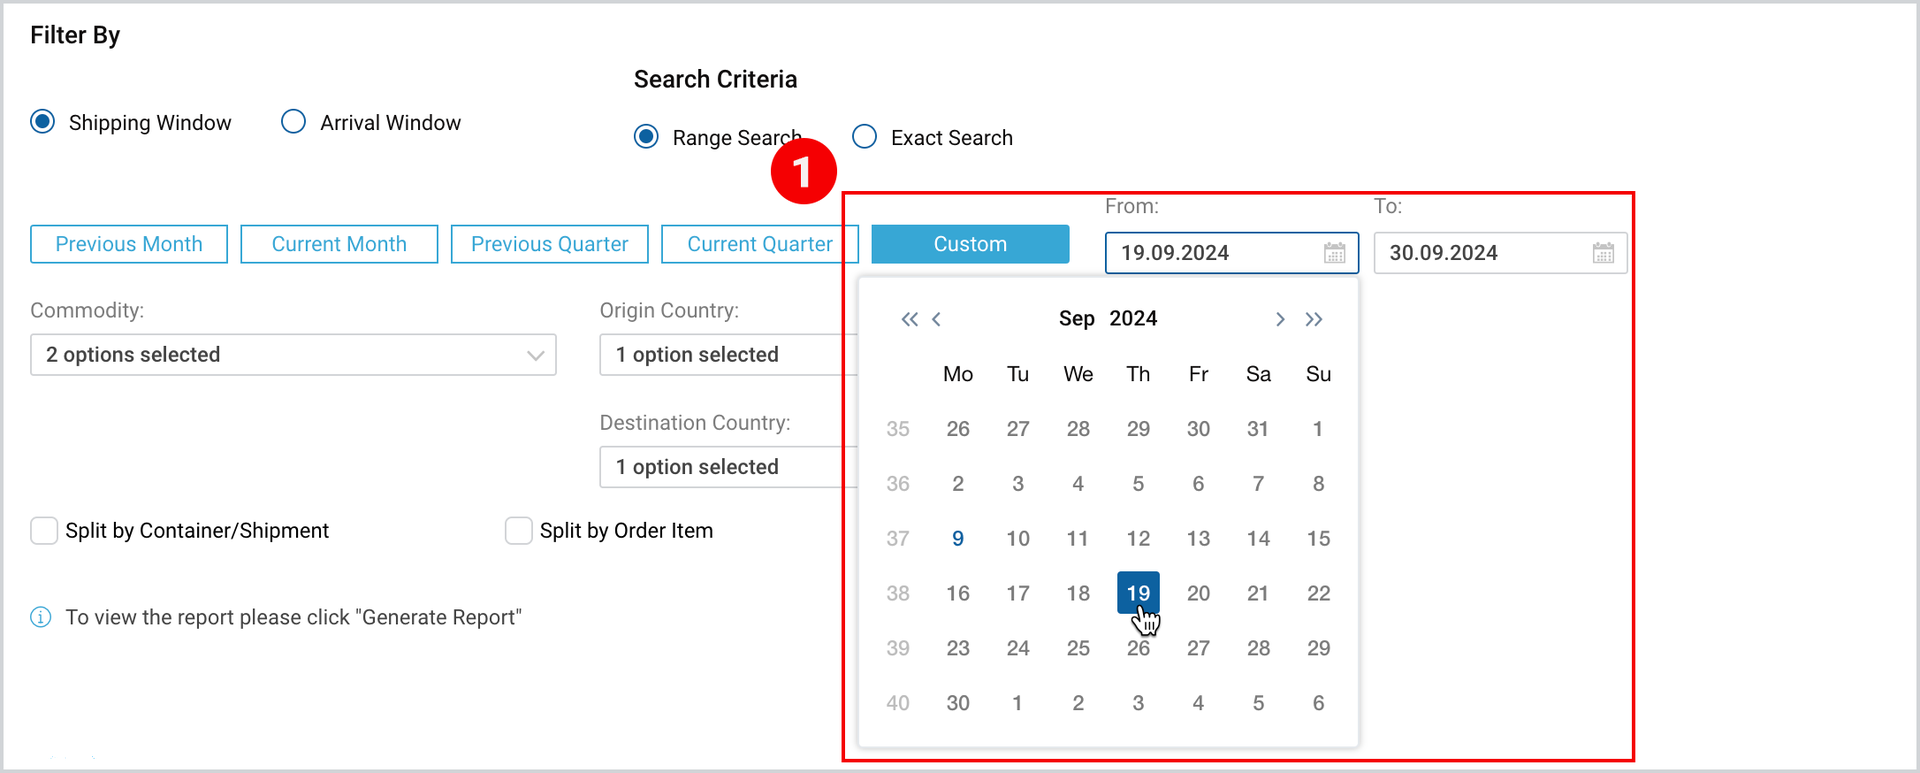
Figure 4
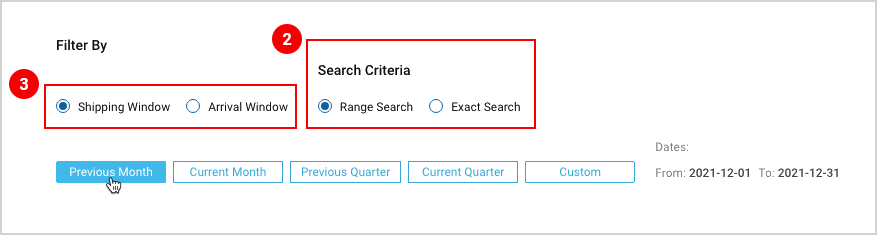
Figure 5
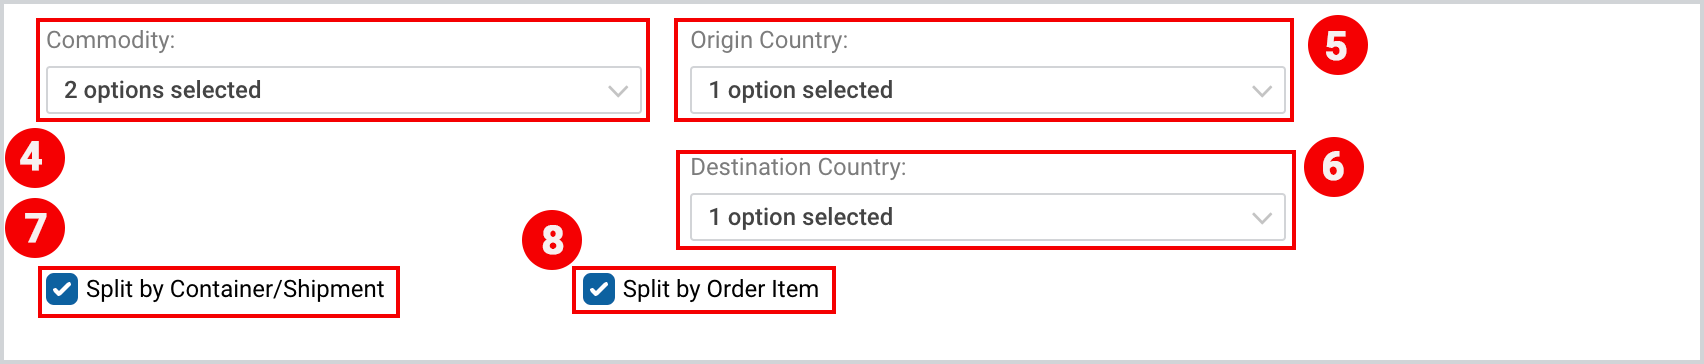
Figure 6
Additional Filters
Use Additional Filters to add additional columns to the generated report.
With this feature you can
- Filter the data per your role in the order.
- Select specific Business Partners to be displayed in the report.
- Add more fields to the report.
Select Your Role in the Order
Select Additional Filters to open the drop-down menu.
- Select one of the three filter options:
- My Orders — Orders created by you or by companies selected in Data for Multiple Companies.
- Observer — Orders where you or the companies selected in Data for Multiple Companies are added as Additional Order Parties.
- All — This option includes the above-mentioned two filter options and is selected by default.
- Click Apply.
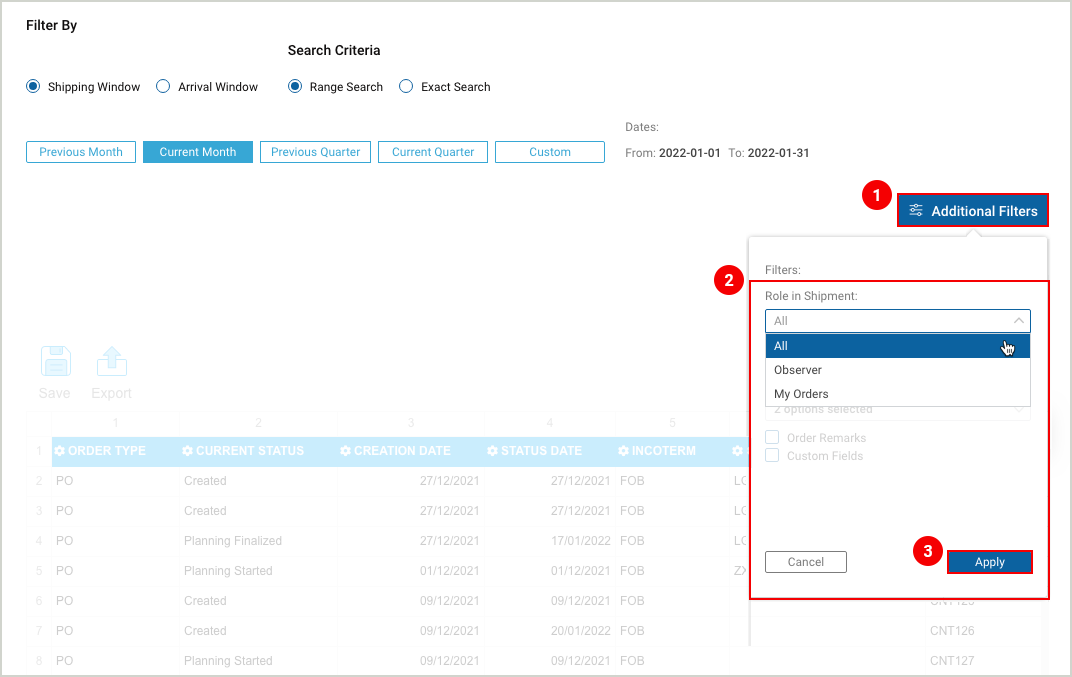
Figure 7
Select Business Partners
To add business partners to the report
- Click Additional Filters.
- Click on Business Partners drop-down menu and select the business partner(s) to be displayed in the report.
- Click Apply.
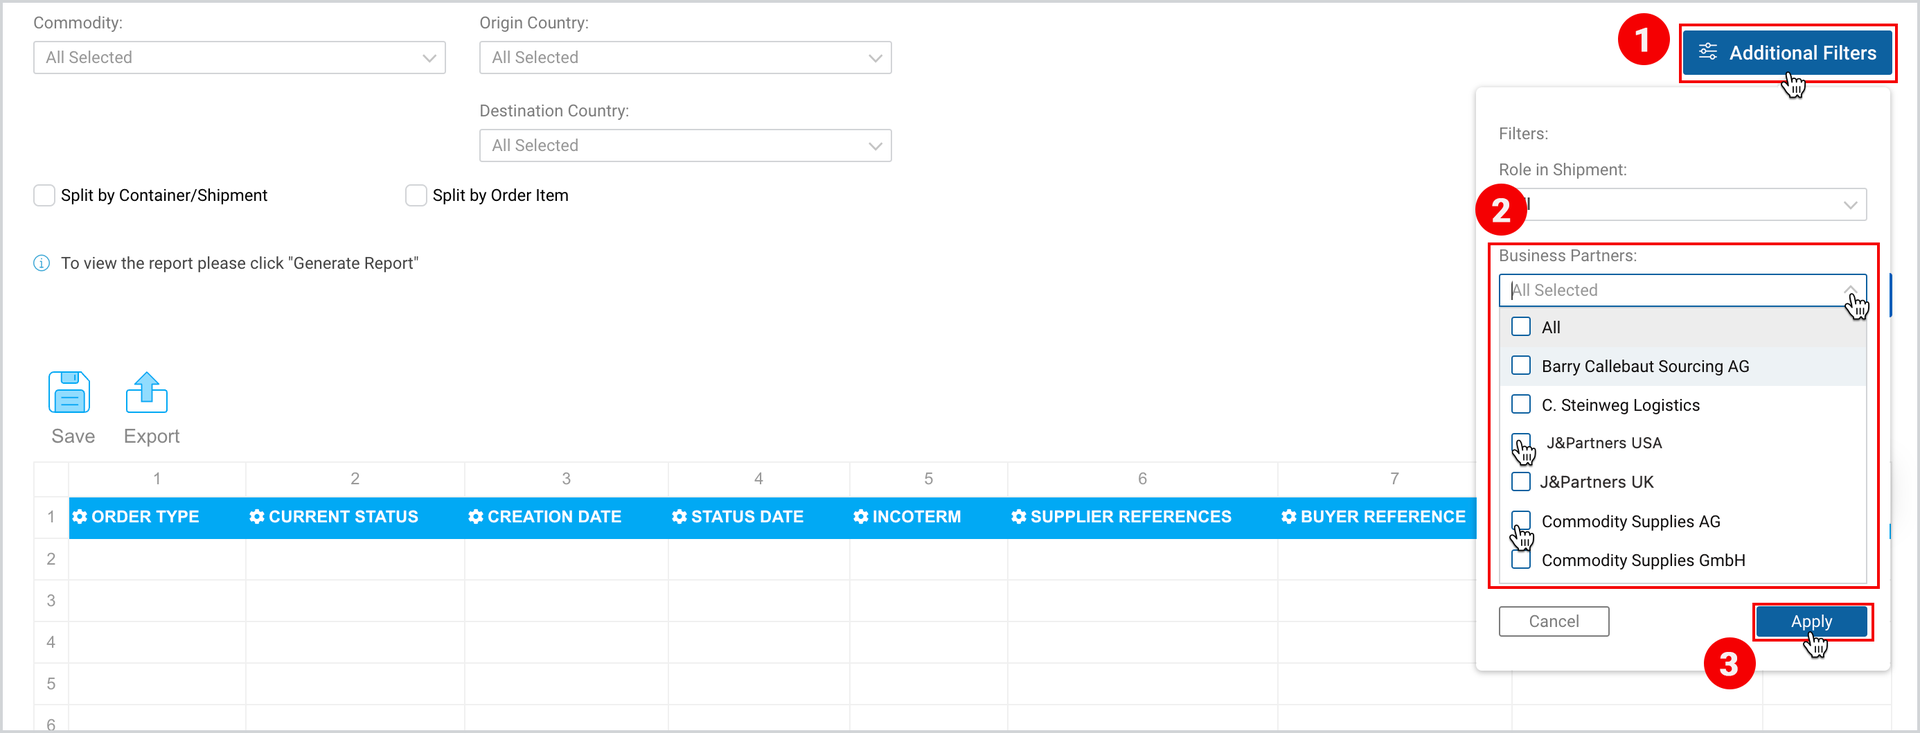
Figure 8
Note | When business partners are selected in the drop-down, the report displays only orders that have at least 1 Party from the list of selected companies. |
Note | The Business Partners dropdown shows the business partners of the selected Company or multiple companies (from the “Data for multiple companies” dropdown list); |
Show in Report: Parties and Checkboxes
- Click Additional Filters, open the Parties drop-down menu and select all the Parties (Business Partners) you want to be shown in the report.
By default, Buyer and Supplier are selected. - Add Order Remarks and Custom Fields.
- Order Remarks — creates a new field in the Report table, which will contain the information you entered in the Order Internal Remarks section of the Order.
- Custom Fields — creates new fields in the Report table, which will contain the information you specified in the Customer Specific Fields of your Order.
- Click Apply.
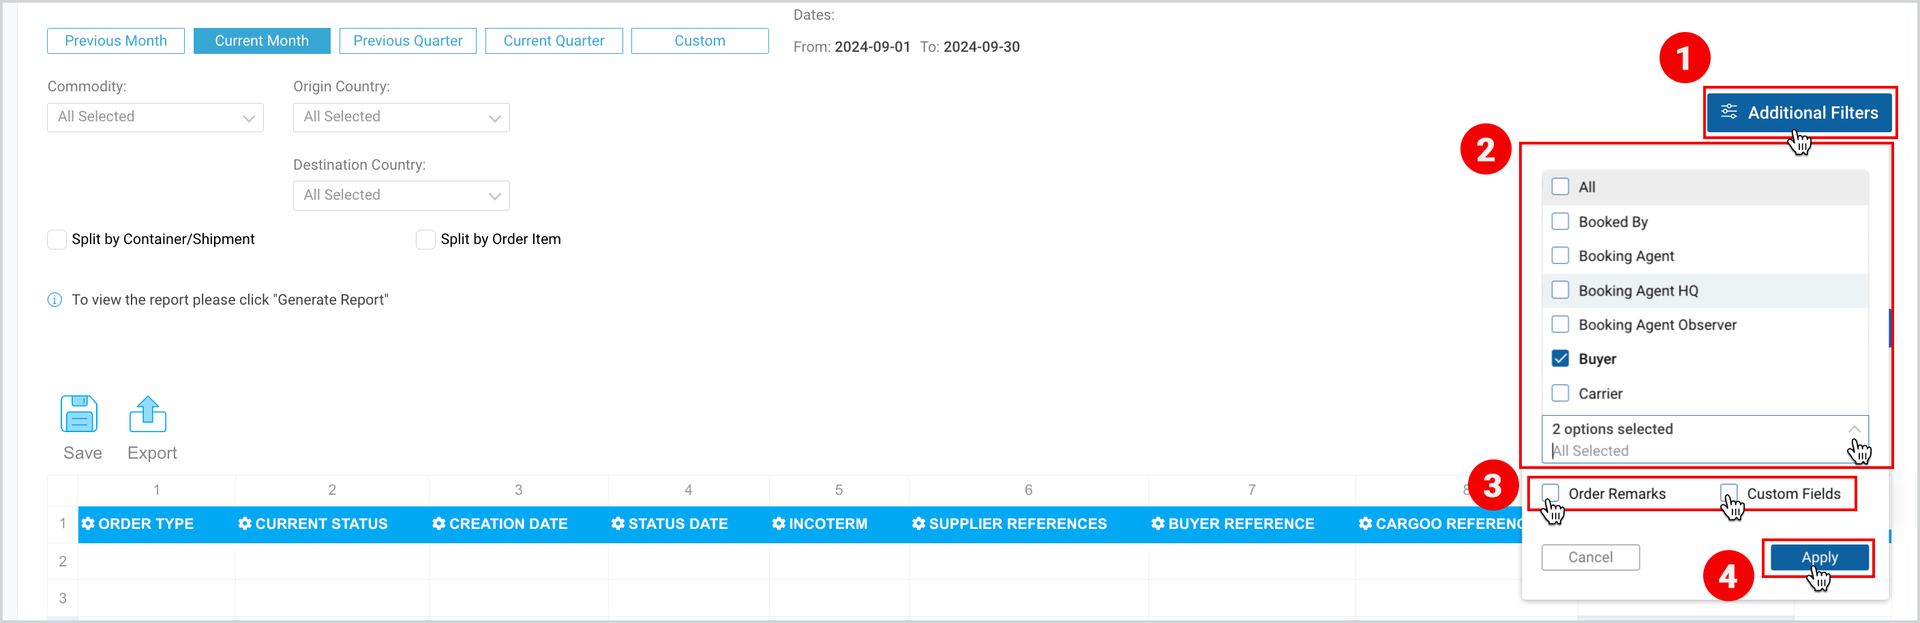
Figure 8
To download the print version of this article, click the PDF icon: