 BIM Support
My Organization
In terms of Organization/Company Management, the Org Admin has a few additional capabilities compared to the Company Admin. They can access the organization domains, edit the organization details, the profiles of the companies registered under their organization, add and delete a company. Both Org and Company Admins can subscribe business modules to their users, integrate carriers, manage their user groups. Company Admins can, like Org Admins, edit the profiles of those companies for which they have a Company Admin role.
Domains
As an Org Admin, you can access all the user domains that belong to your organization.
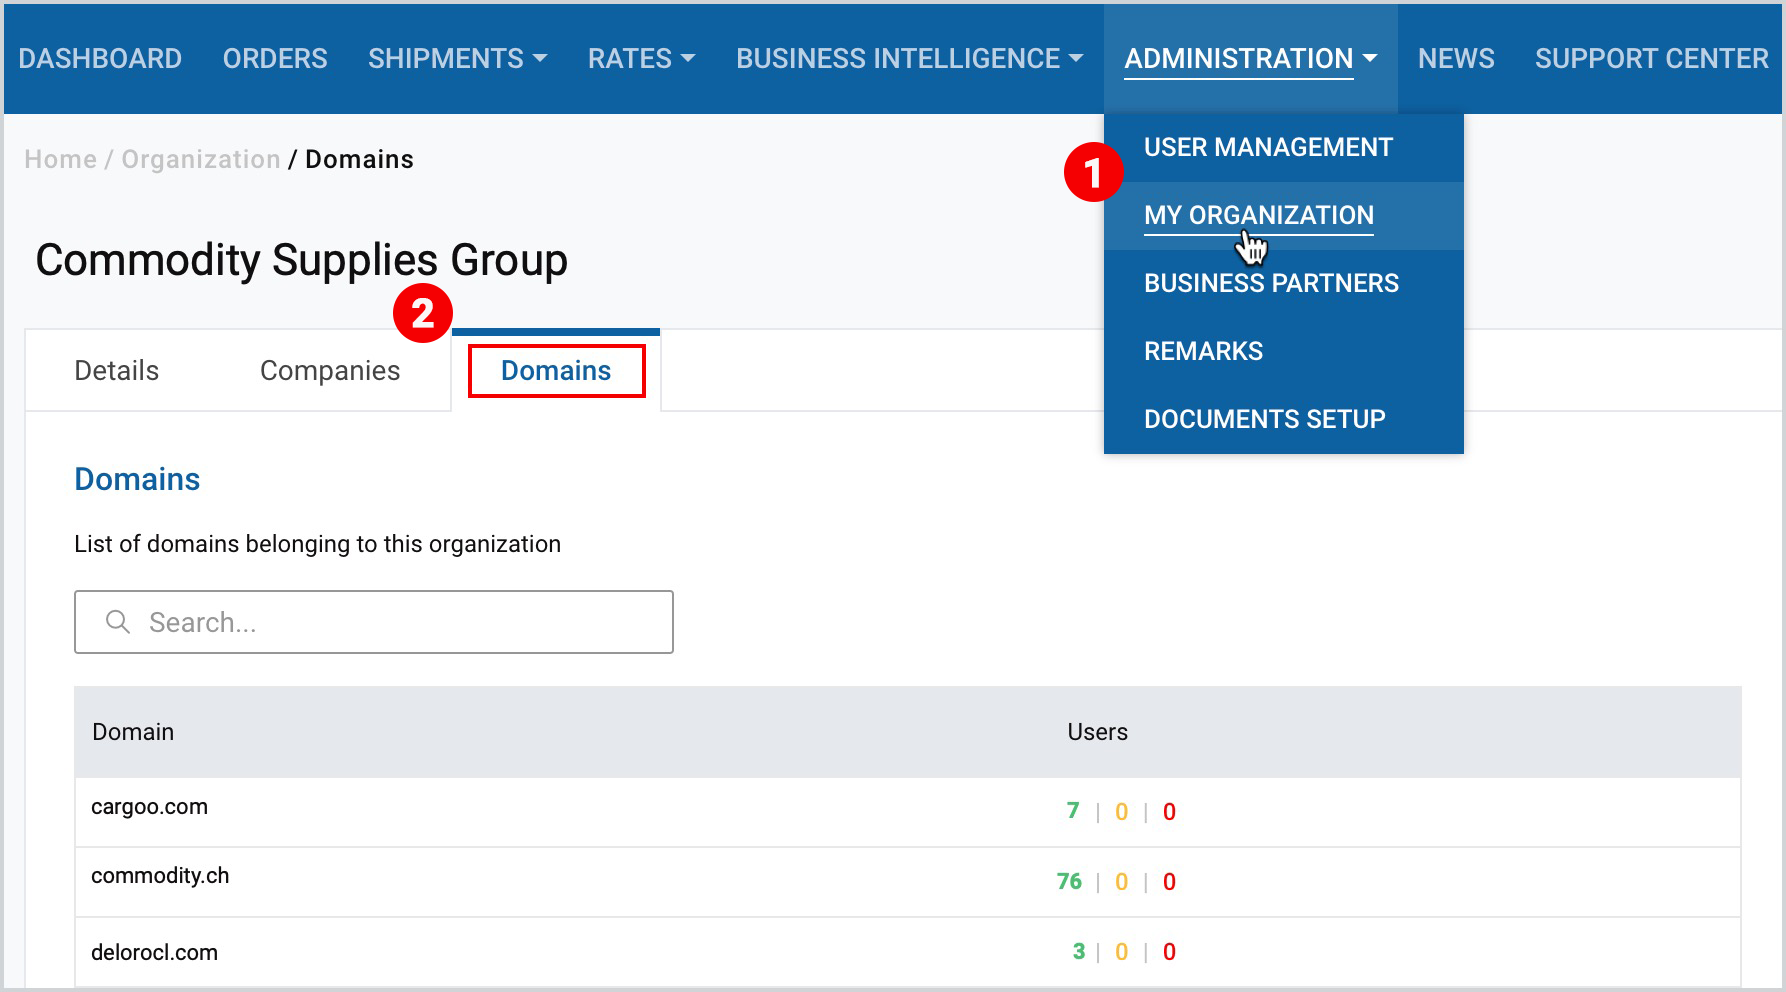
To view them
- On the Main Menu, under Administration, click My Organization.
- Next to Details, click Domains to see the affiliated domains with the number of users.
Edit Your Organization (for Org Admin)
In the Organization details section, you can view and edit your organization name, add or remove an Org Admin.
Edit Your Organization Name
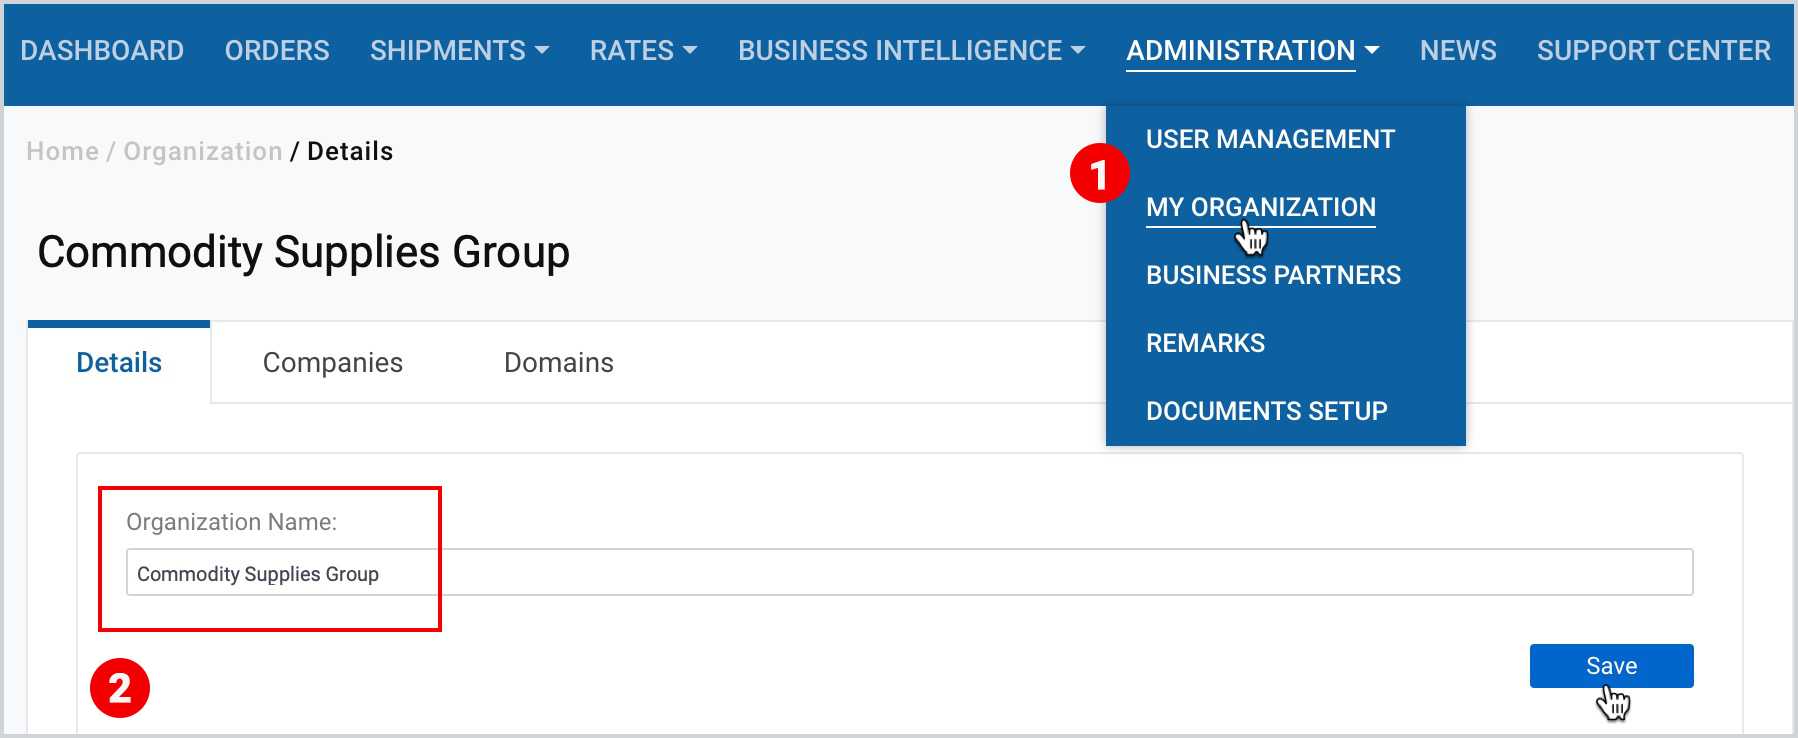
To edit your organization name, you should take the following steps:
- Click Administration>My Organization.
- Under Details, edit your organization name (if required) and then click Save.
Add or Remove an Org Admin
As an Org Admin, you can add or remove another admin. As you add a new admin, you cannot manage their accesses.
To add a new Org Admin
- Click Administration>My Organization.
- On the right side of the page, type a user name and then click Add users.
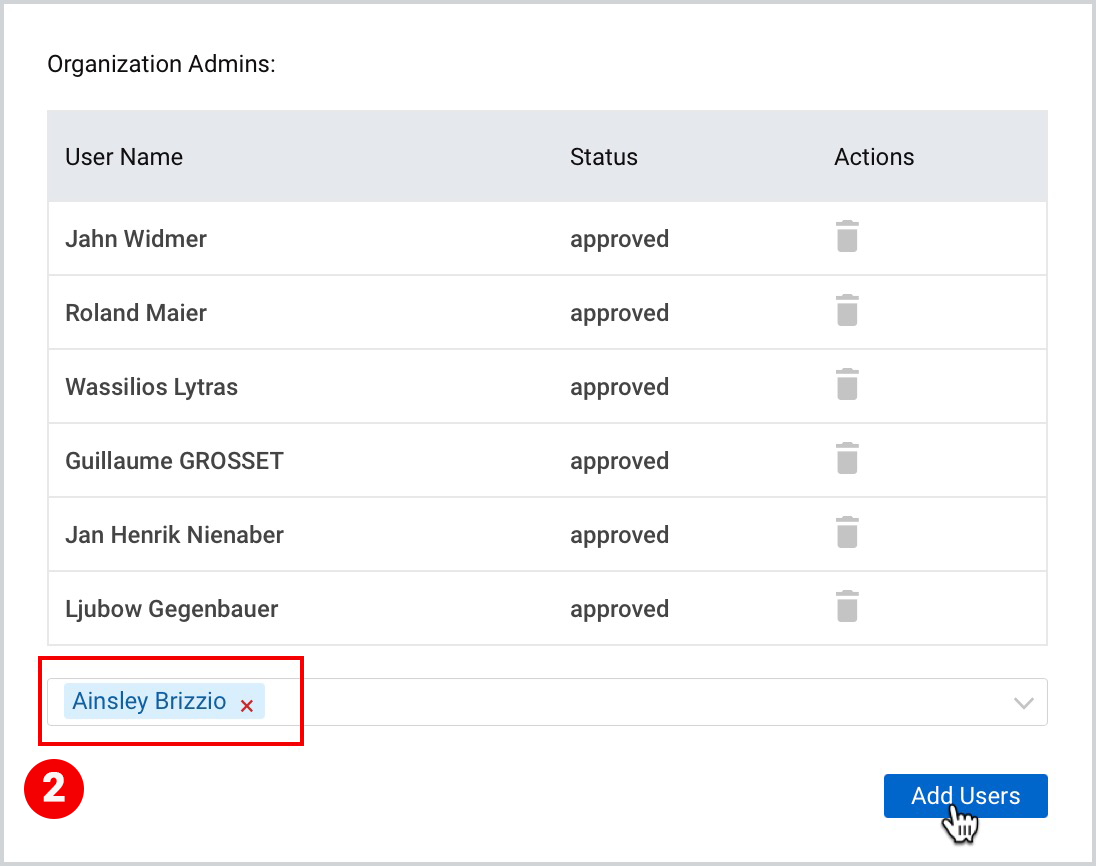
After being added, a new Org Admin will appear on the list with an “approved” status.
To remove an Org Admin
- Click Administration>My Organization.
- On the right side of the page, point to the particular org admin and under Actions, click the “bin” icon.
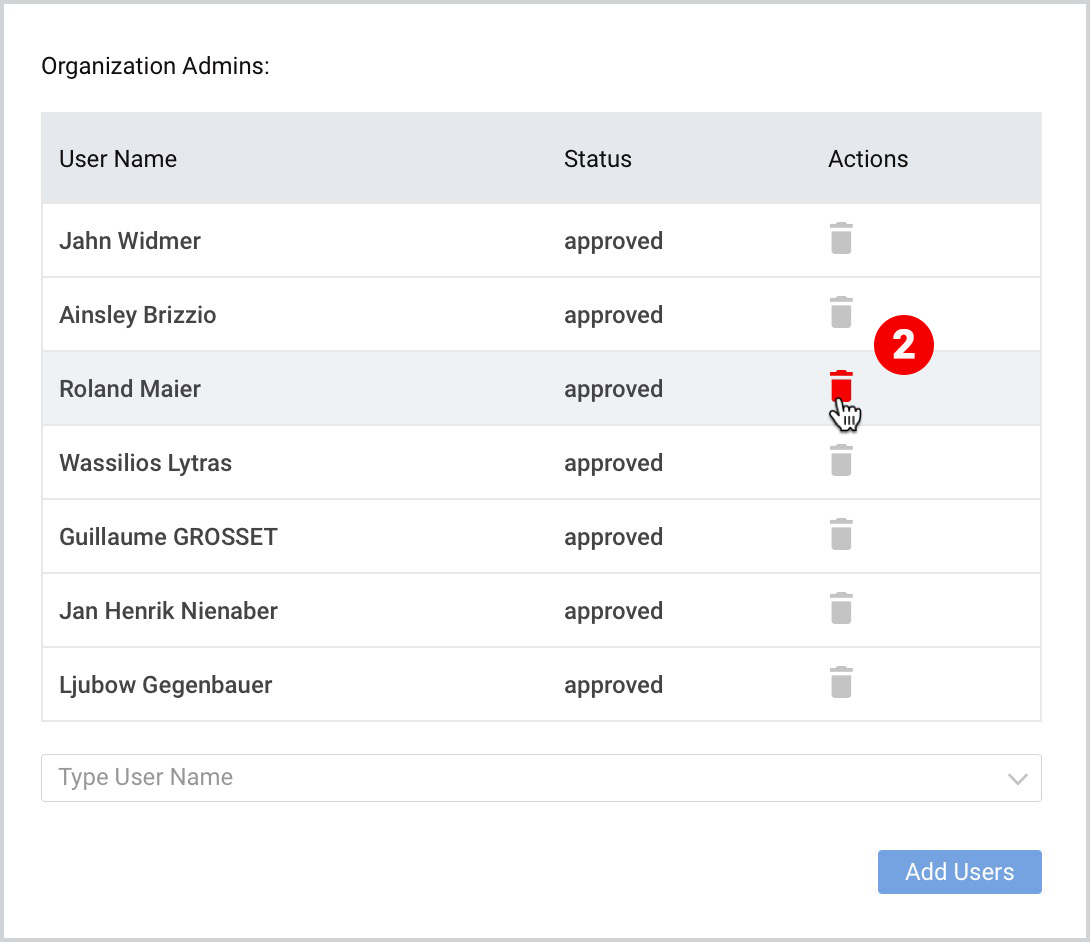
After being deleted, the user will no longer appear on the list of Org Admins.
Add and Delete a Company from Your Organization
As an Org Admin, you can add a new company to your organization or delete an existing one.
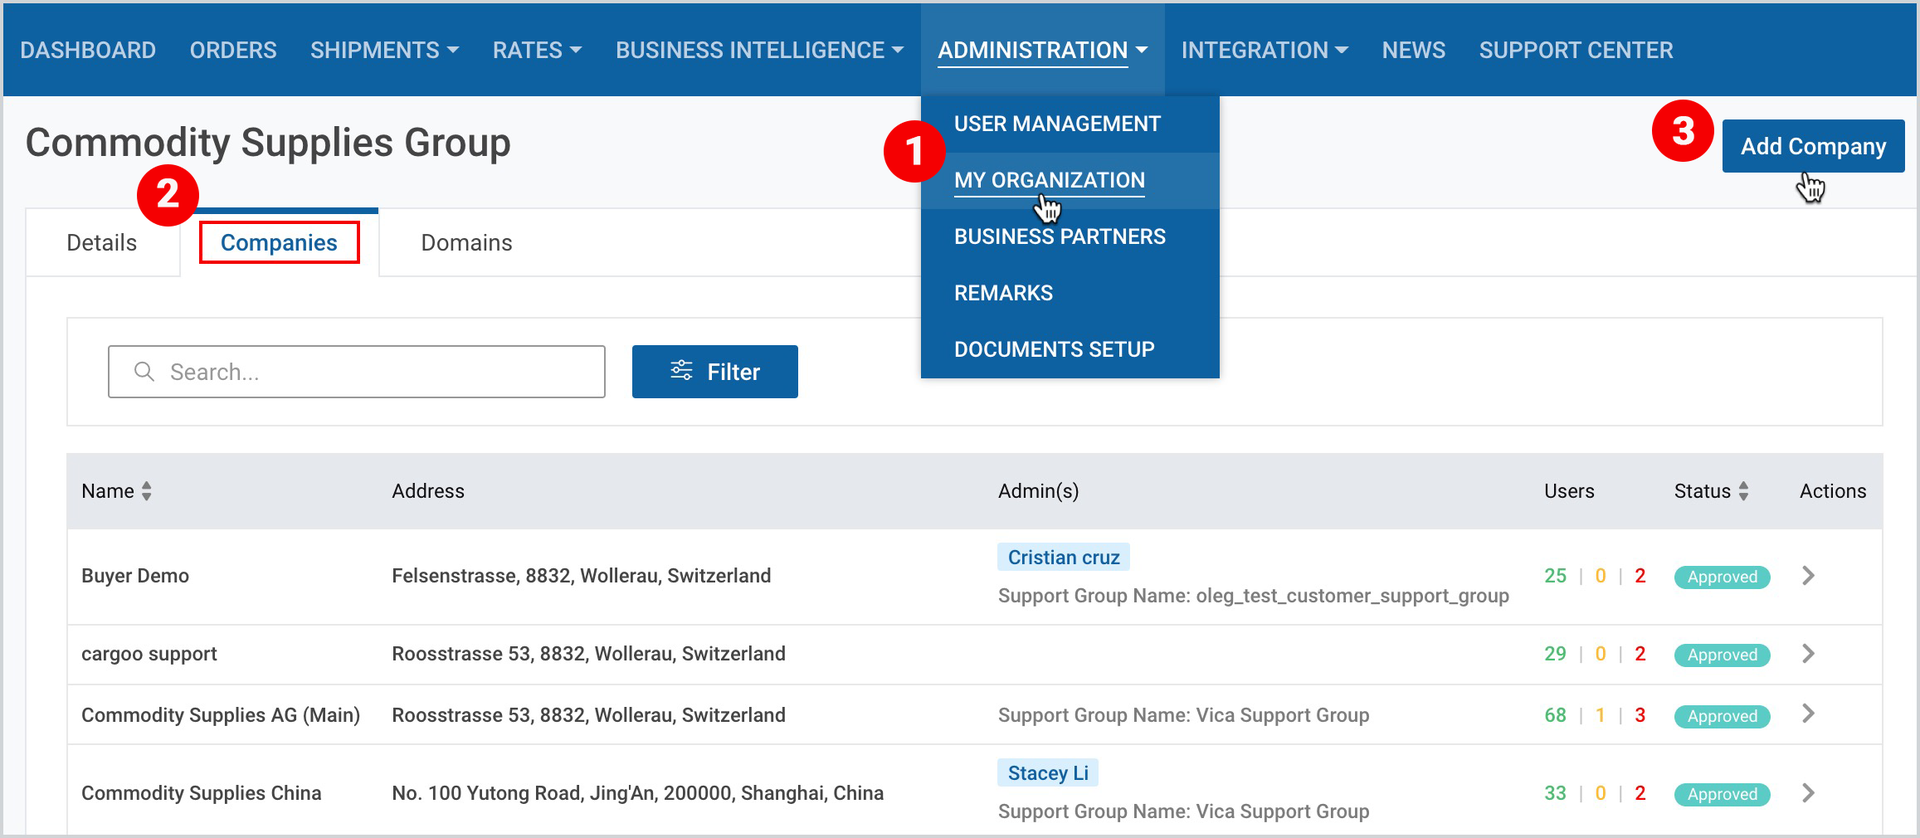
To add a new company to your organization
- Click Administration>My Organization.
- Next to Details, click Companies to see the list of all your companies with the number of their users.
- In the top-right corner of the page, click Add New Company.
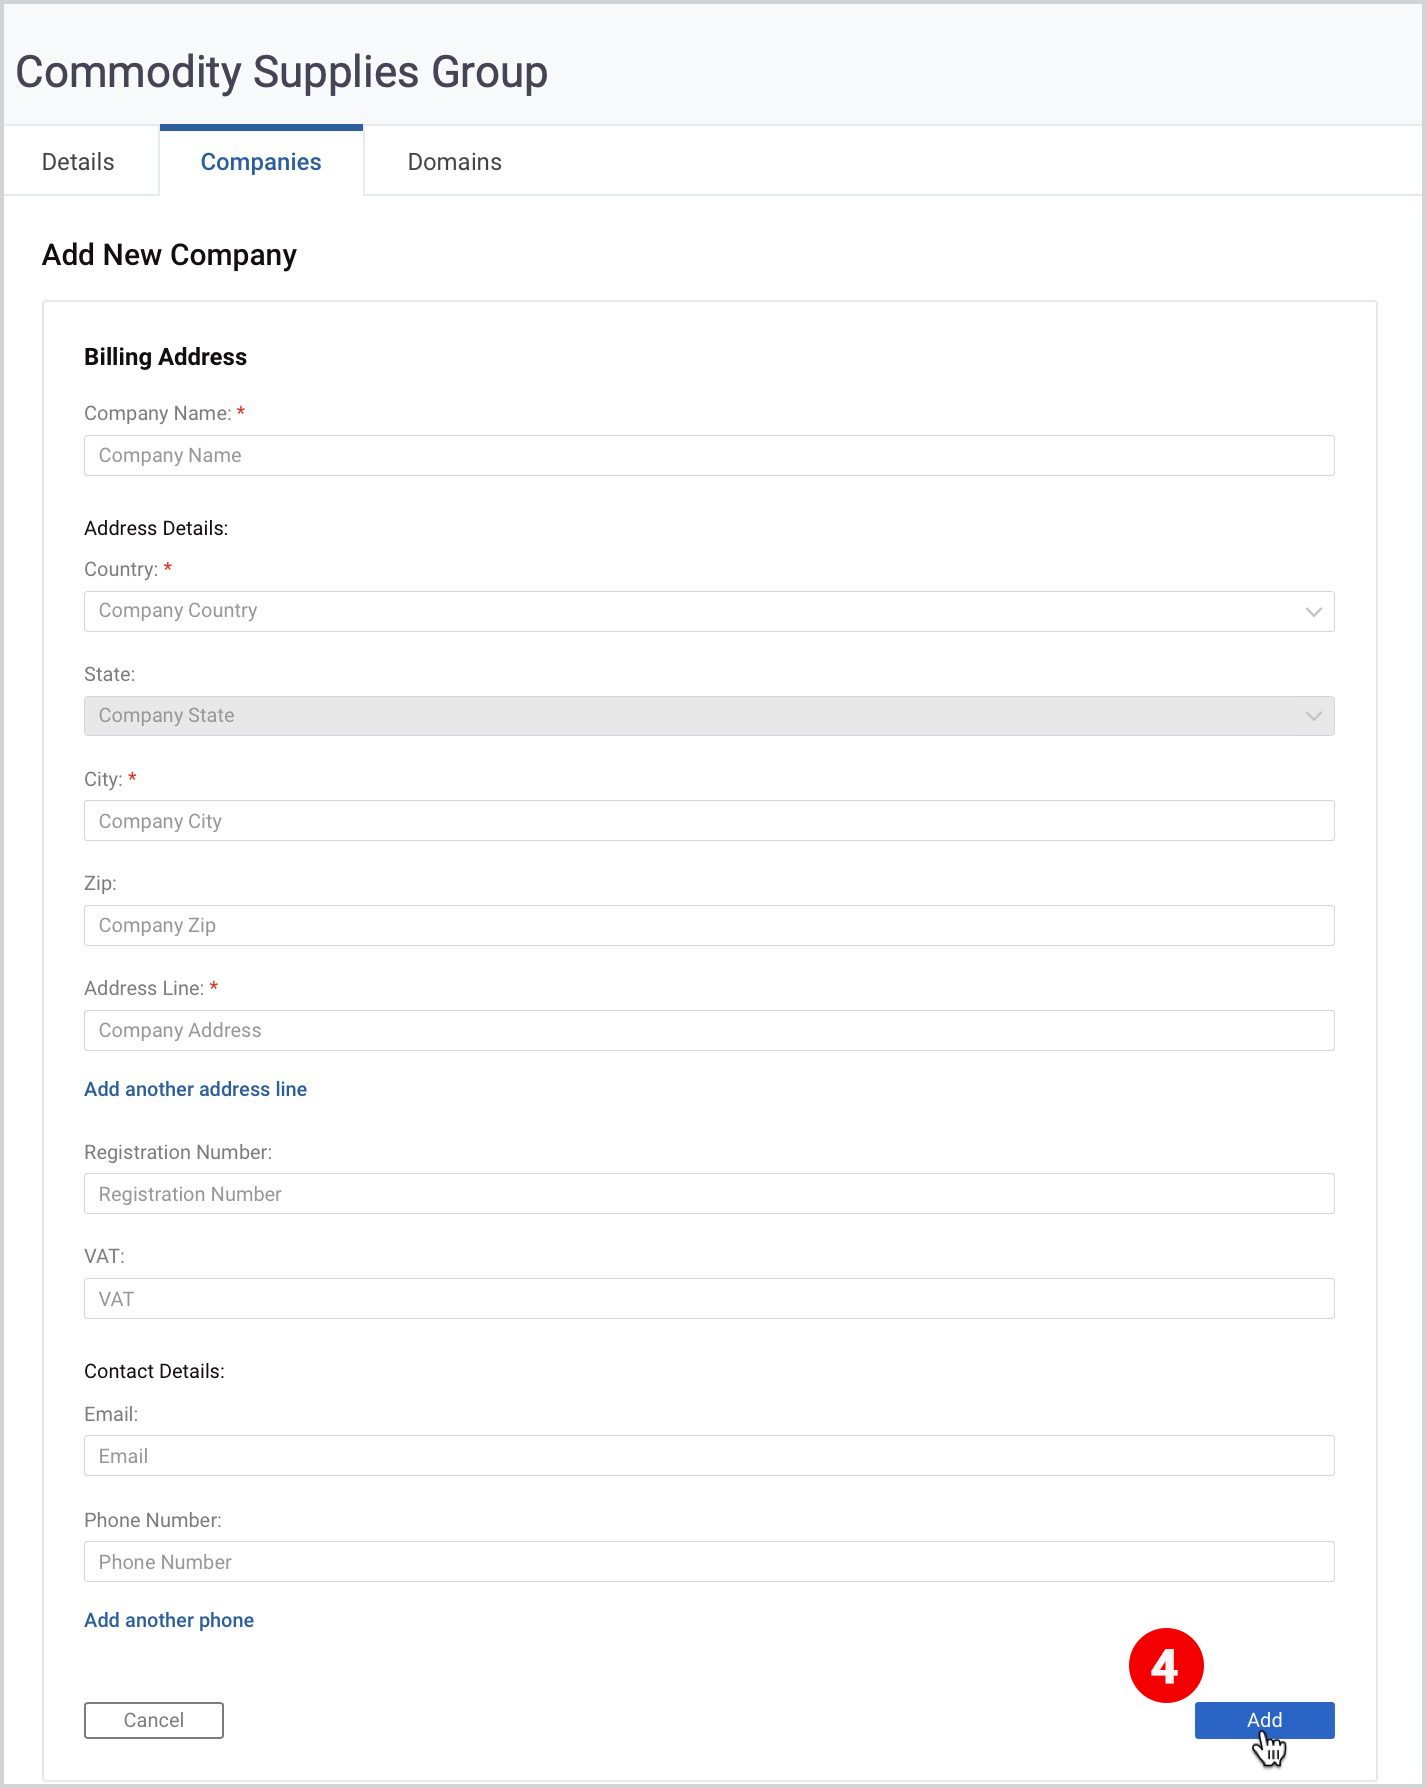
4. In the opened window, fill in the required (and optional) fields and click Add.
The company will appear on the list of your companies in the Companies section of this page.
To delete an existing company
- Click Administration>My Organization.
- Next to Details, click Companies to see the list of all your companies with the number of their users (this step is missing for Company admin, skip to Step 3).
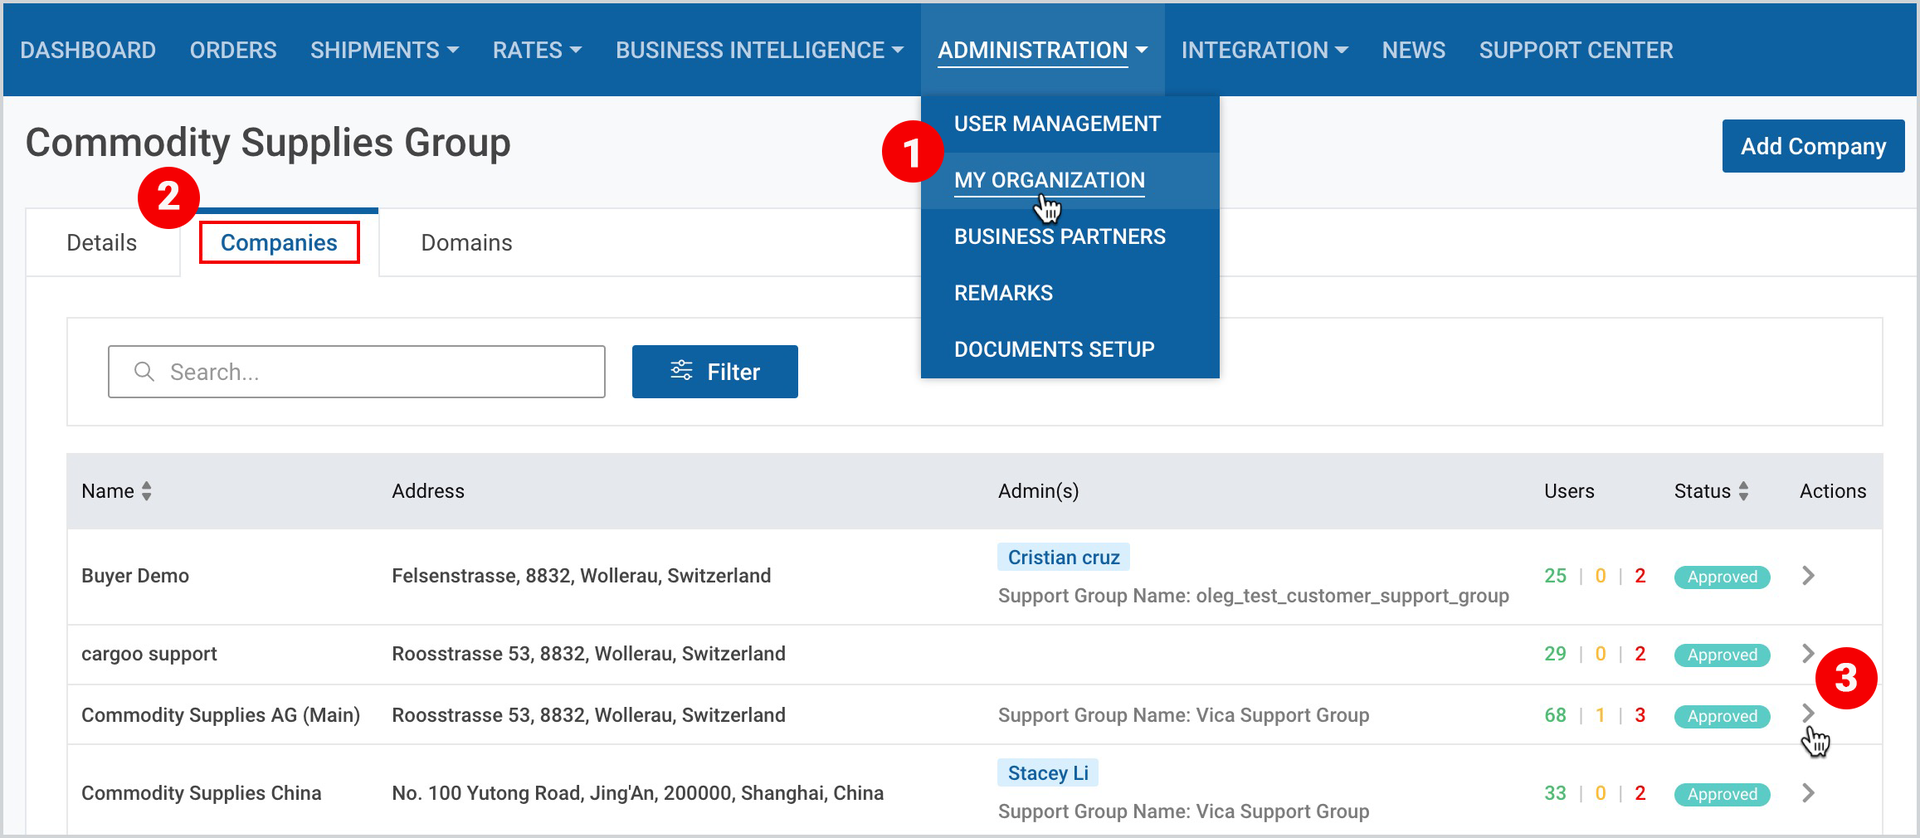
- Point to the desired company (or find the company by using search bar or filter), and under Actions, click the right-angle bracket (>).
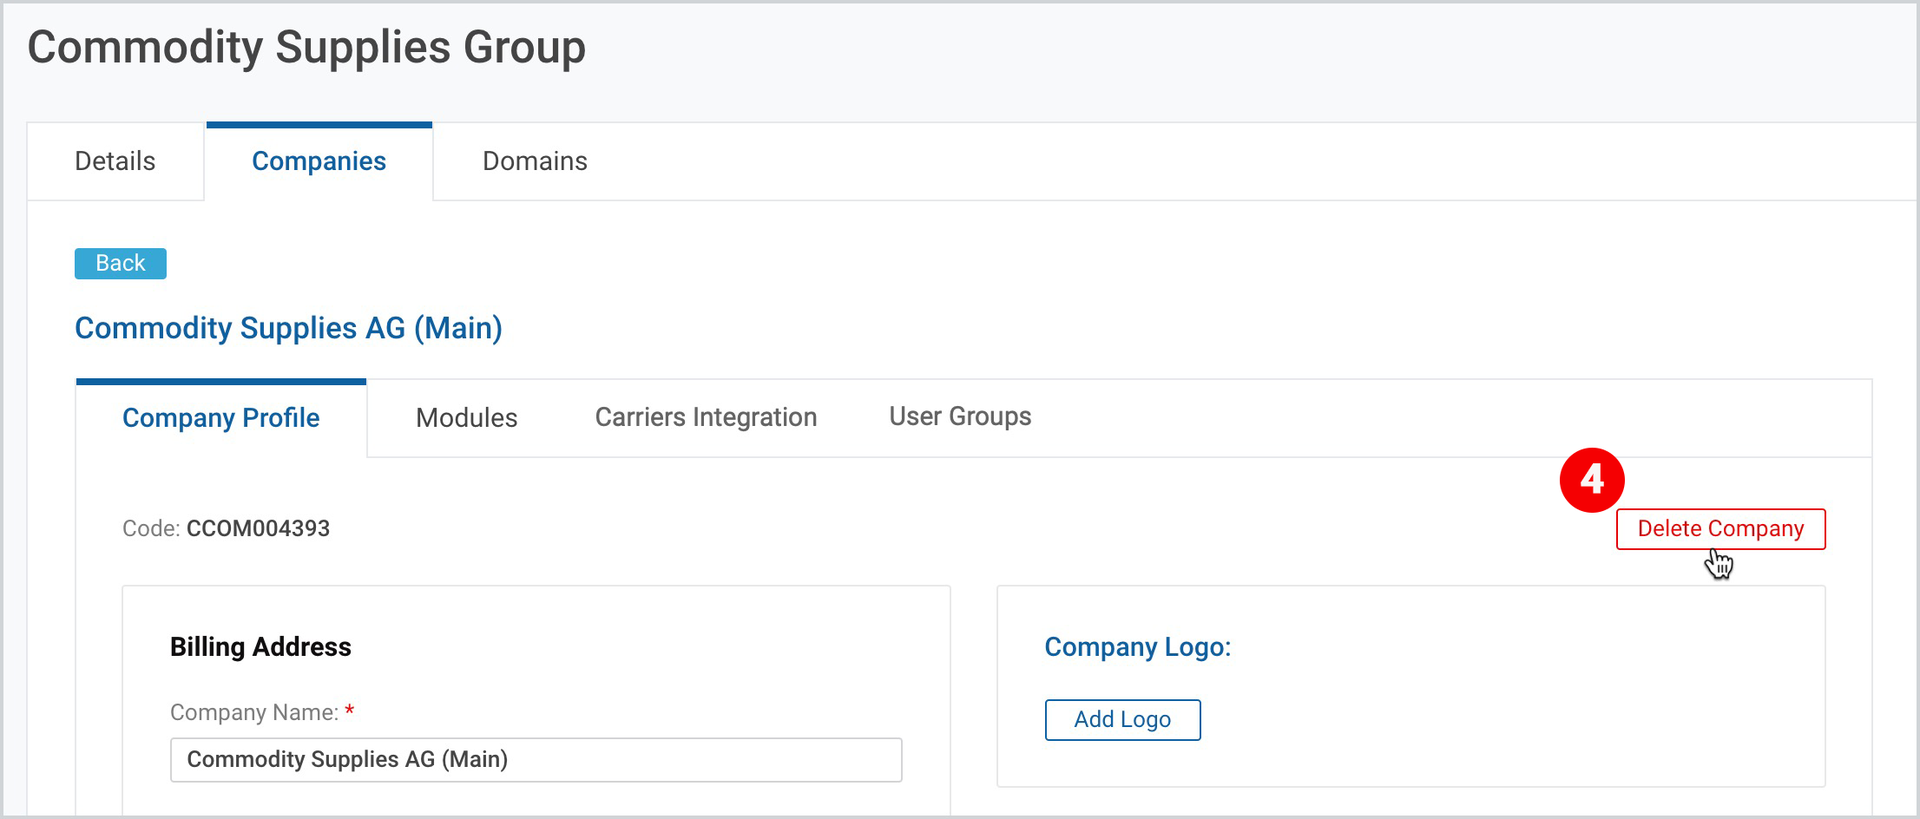
4. On the right side of the page, click Delete Company, and when the confirmation
window appears, click OK.
| Note | The deletion of the company is possible only if it does not have any orders/shipments as well as any linked business partners. |
Edit Companies Settings (for Org and Company Admins)
As an Org/Company Admin, you can configure companies' settings by editing their profiles, subscribing them to business modules, integrating carriers into them, managing their user groups.
Edit Company Profile
You can edit your companies’ profiles by editing/changing company name, adding a company logo, adding or removing a company admin.
Edit/Change Companies Names
To edit/change companies' names, you should take the following steps:
- Take the first 3 steps described here.
- On the right side of the page, make the required changes and click Save.
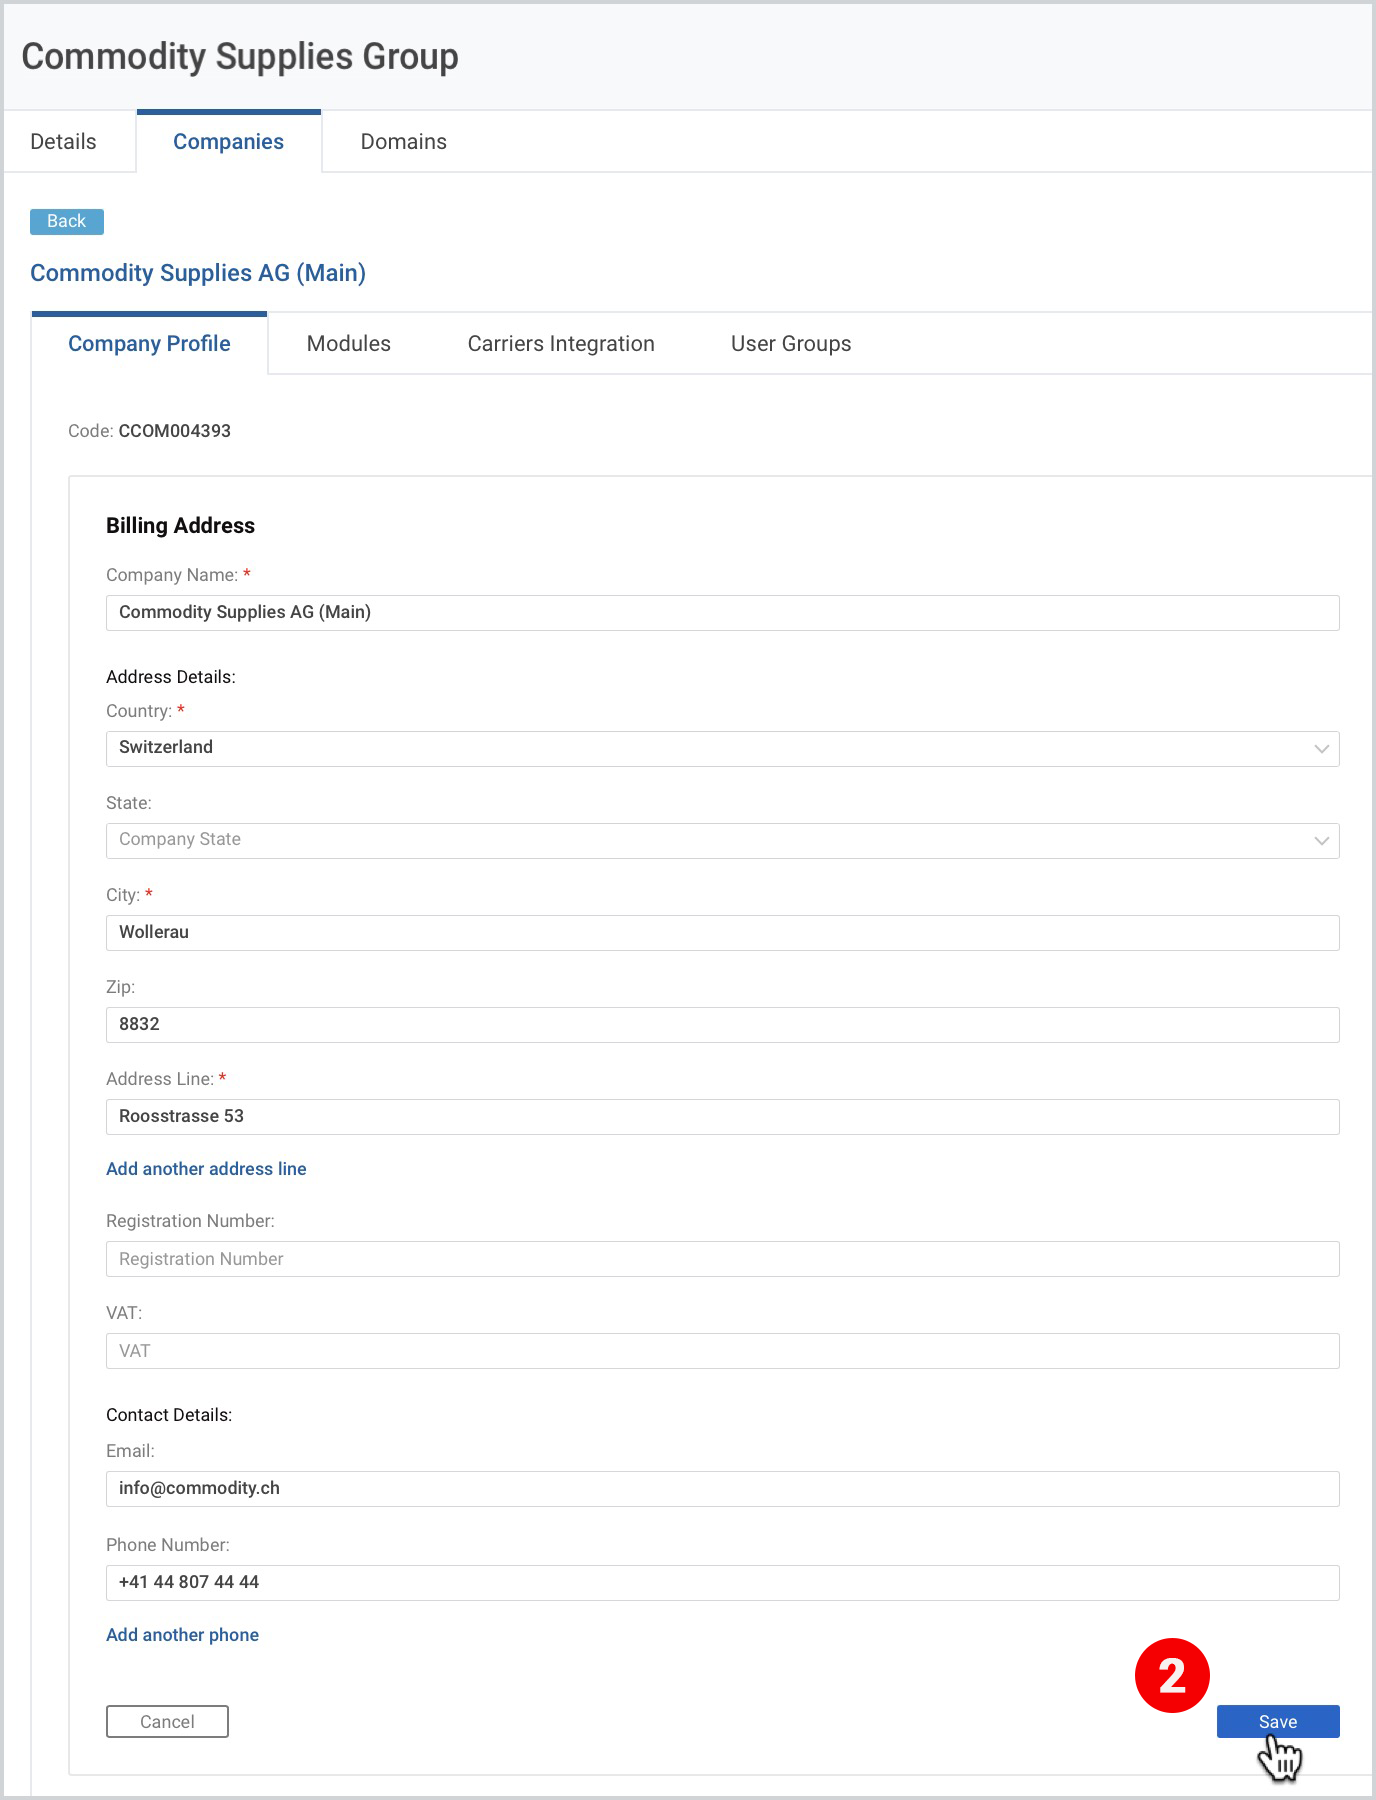
Company Logo
To add a company logo
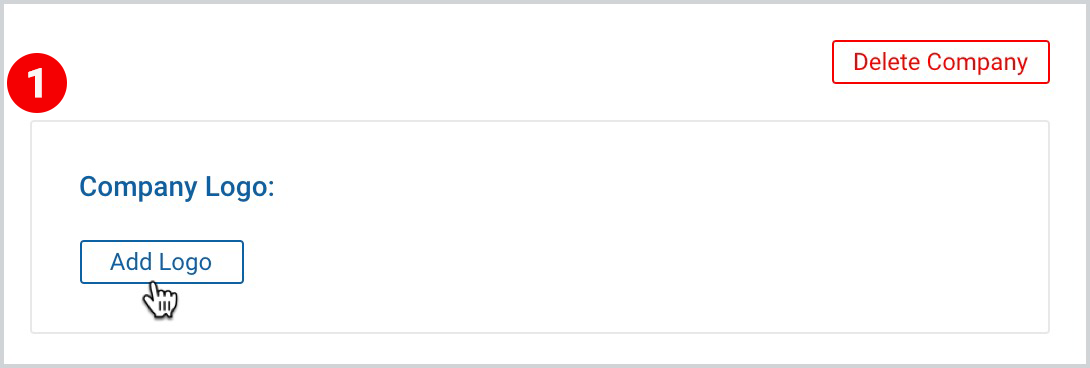
- Take the first 3 steps, described here, and on the right side of the page click Add Logo.
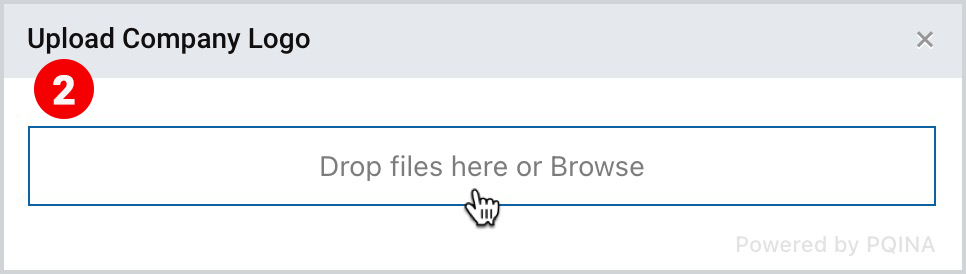
2. When the pop-up appears, click the Drop files here or browse.
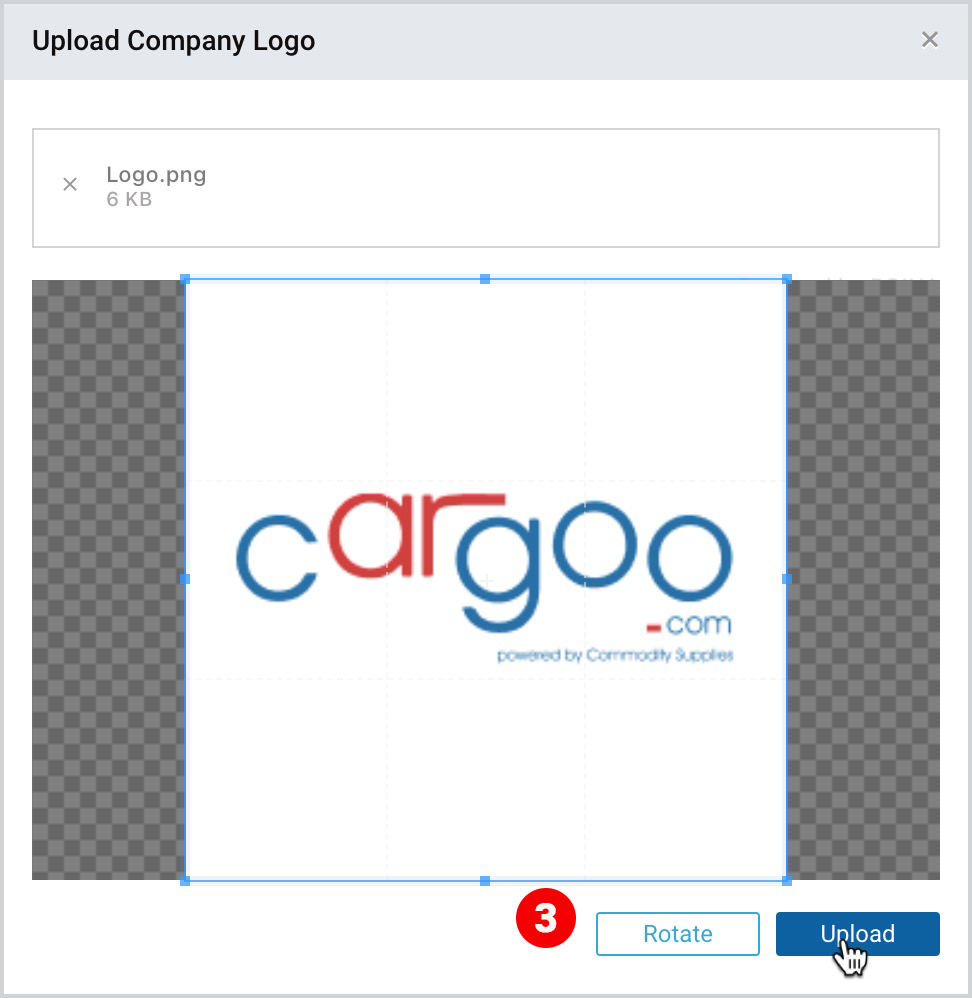
3. After dropping a file or browsing, click Upload.
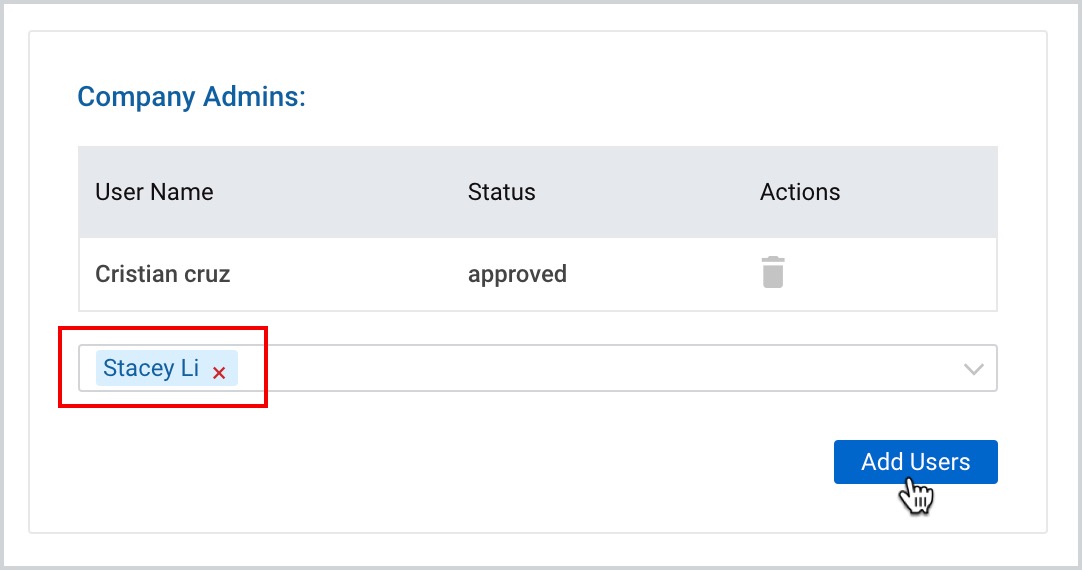
Company Admins
To add a new Company Admin
- Take the first 3 steps described here, and under Company Admins, type a user name and click Add users.
Notification Emails
Notification emails are an additional set-up for a company, which enables to send automatic notifications to the selected users when a shipment plan is delegated/redelegated to your company, or the delegation is cancelled. The email includes a notification on delegation/redelegation and the item description with the following details:
- Cargoo Reference
- Order Reference
- Carrier (Carrier Code)
- Place of Receipt (POR)
- Port of Loading (POL)
- Port of Discharge (POD)
- Final Destination (FND)
- Estimated Departure Date (ETD)
- Estimated Arrival Date (ETA)
In case of the delegation cancellation, the email also includes the reason for cancellation.
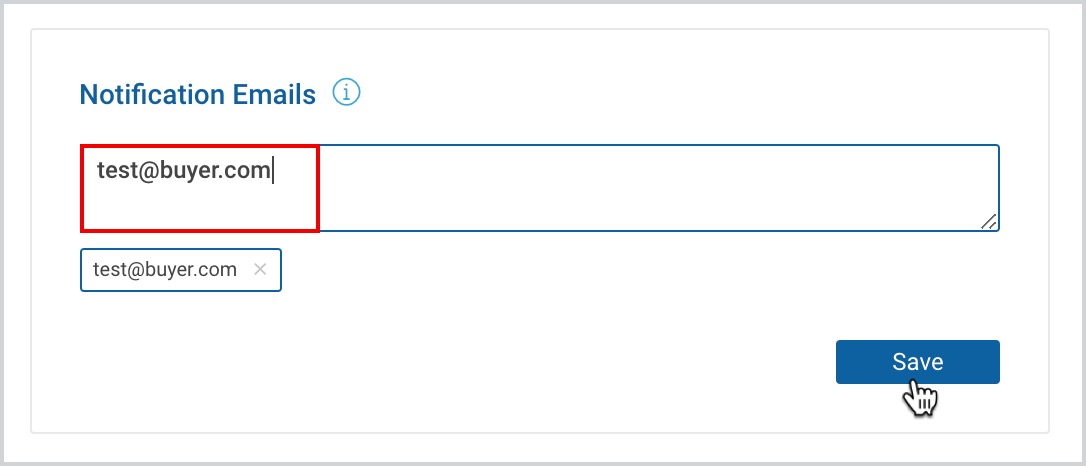
To enable the receipt of such email notifications for a user:
- Take the first 3 steps described here, and under Notification Email, type a user’s email (s) and click Save.
Subscribe to Business Modules
As an Org/Company Admin, you can subscribe your companies to business modules by sending subscription requests for each company to the Cargoo Administration.
For this action
- Take the first 3 steps described here.
- On the left side of the page, next to Company Profile, click Modules.
- When the list of Modules appears, point to the desired business module and under Actions, click Send Request, and then click Save.
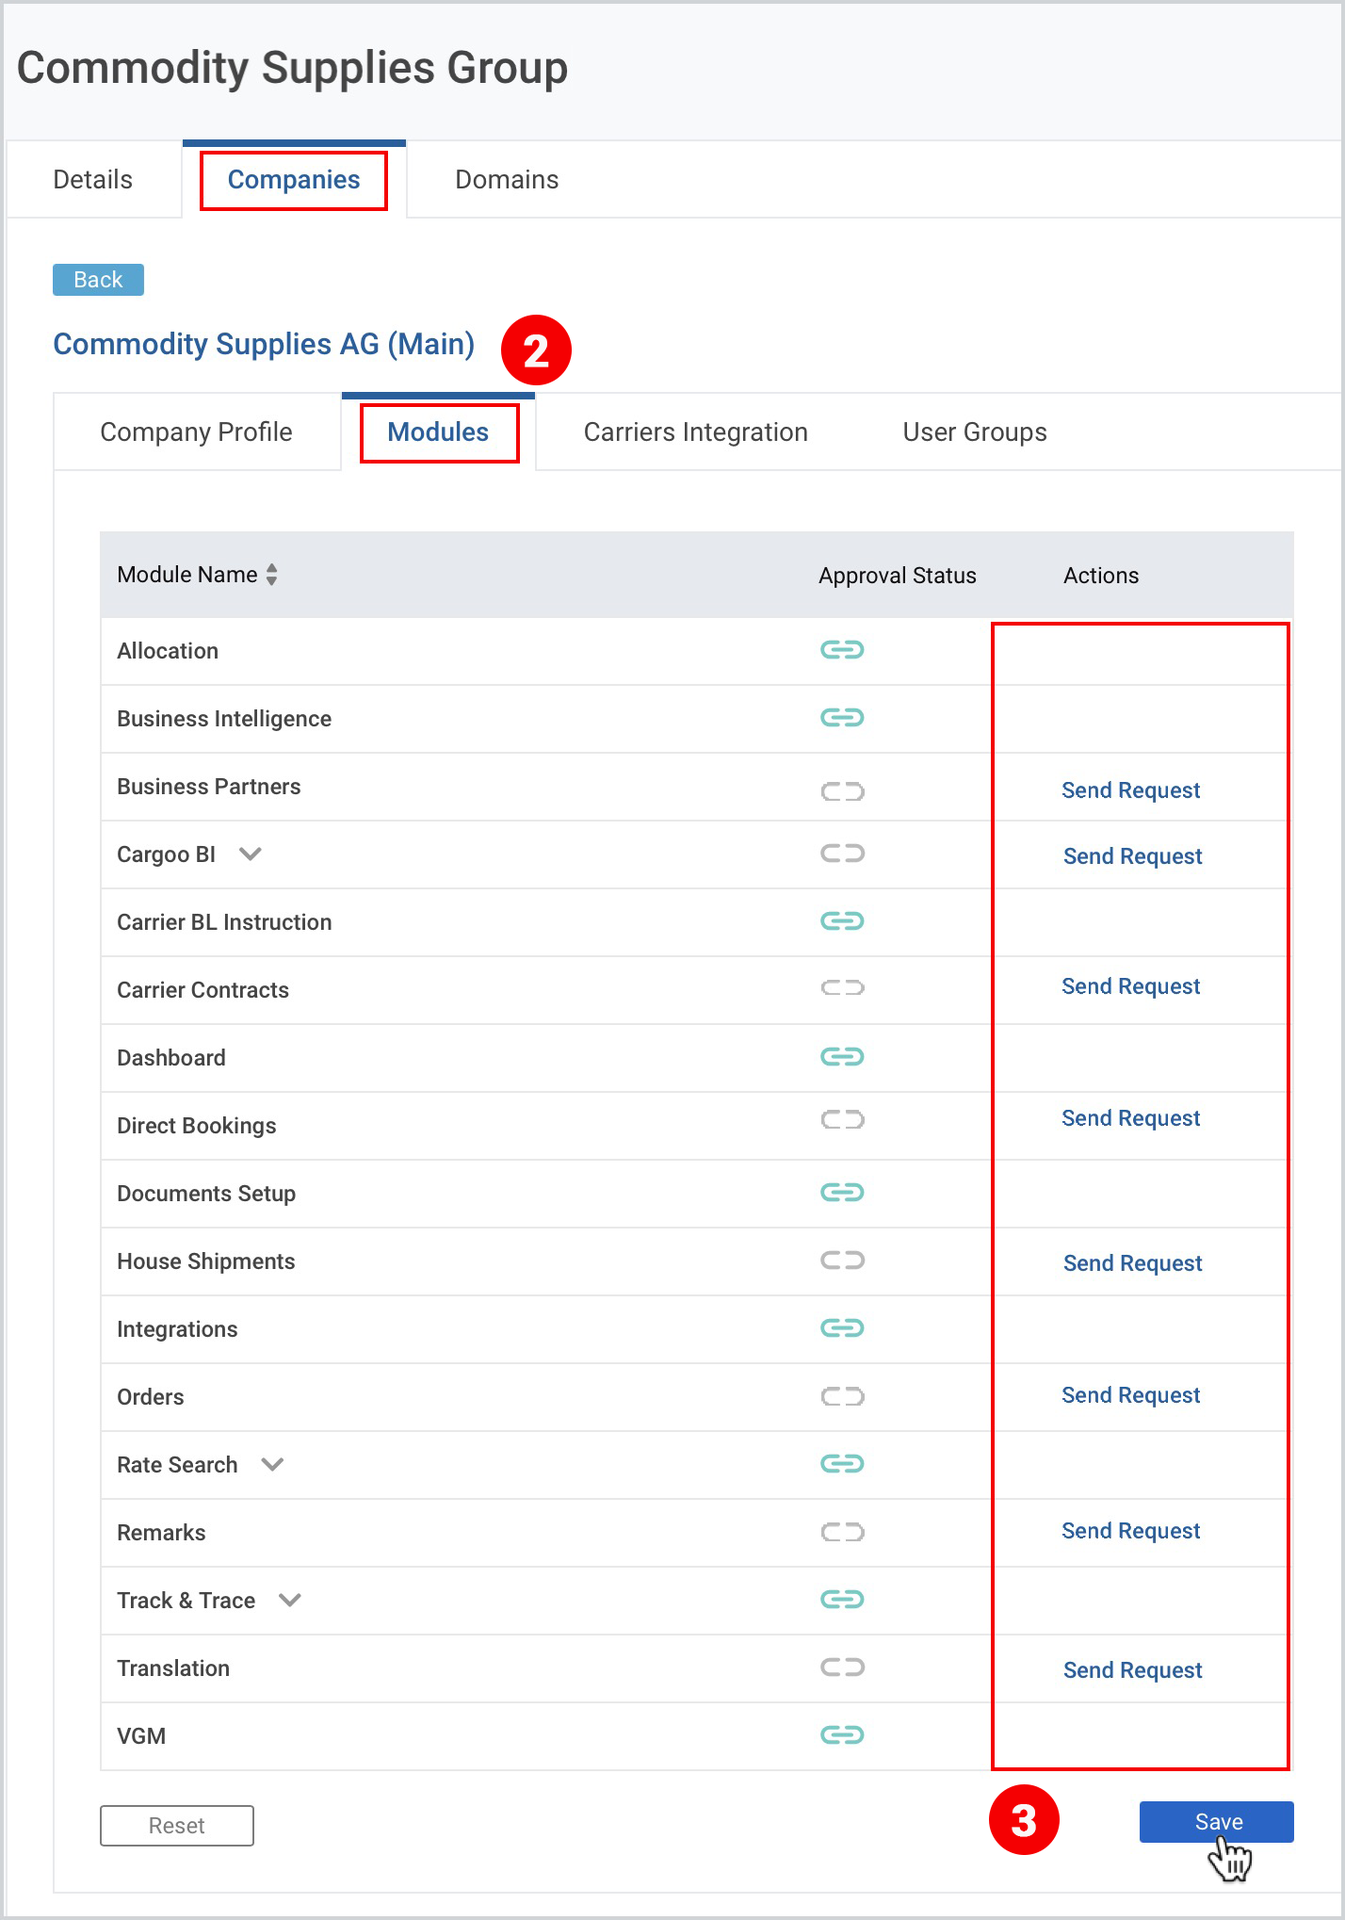
The business module will be visible on your account’s main menu, as soon as it is approved by the Cargoo Administration.
Note | The Companies do not automatically inherit the business modules of the first company registered under the same organization, but for each company, the Org Admin or Company Admin must send separate subscription requests to the Cargoo administration. |
Create User Groups
As an Org/Company Admin, you can group your users by creating user groups that will further help you to limit their access to shipments with specific Origin/Destination location or Commodity type.
To create a user group
- Take the first 3 steps described here.
- On the left side of the page, click User Groups.
- On the right side of the appeared page, click Add User Group.
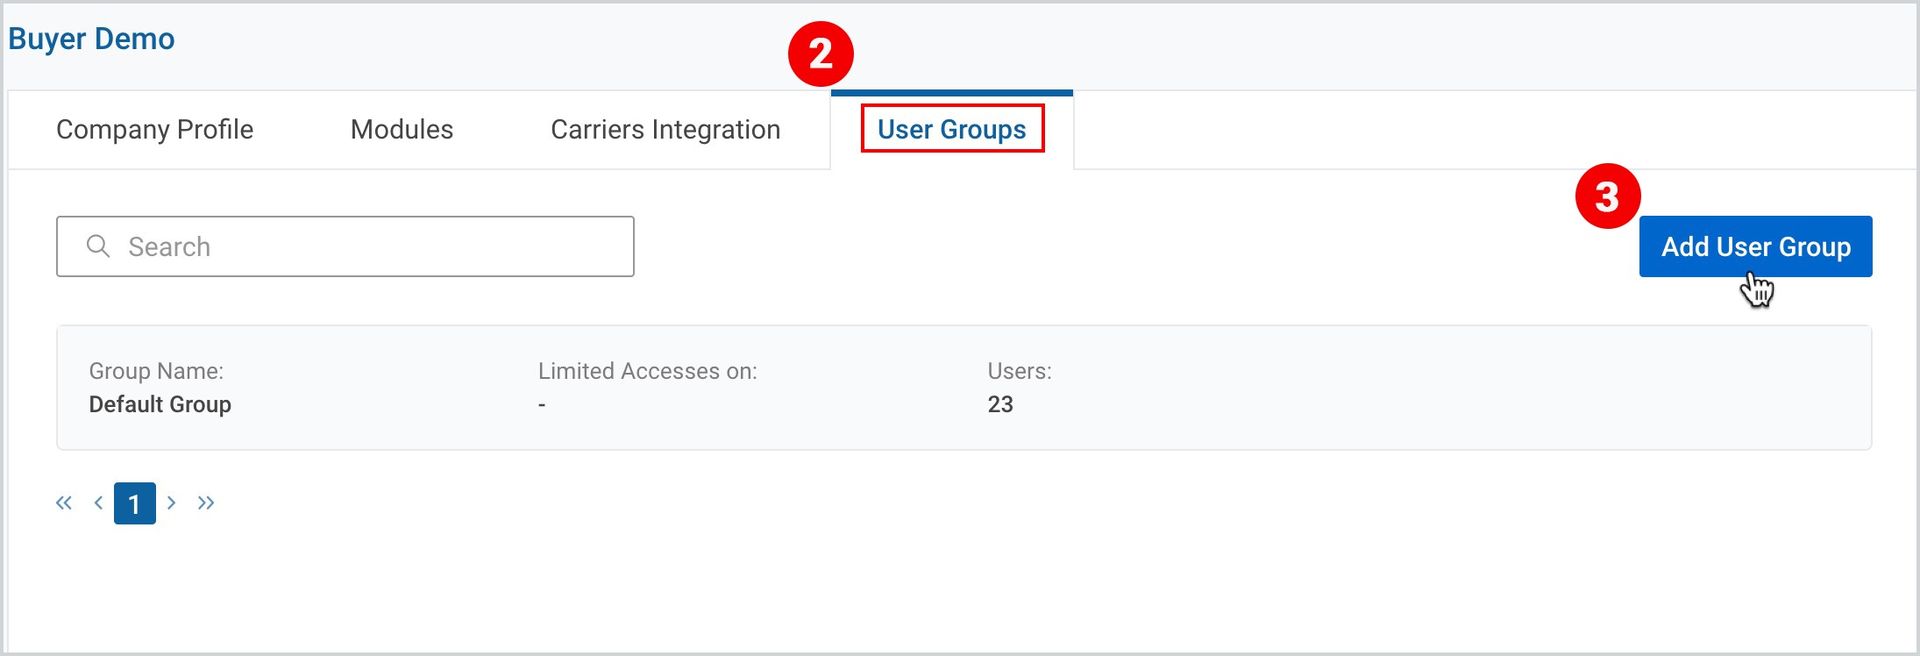
4. Under User Group Create, type user group name and click Save.
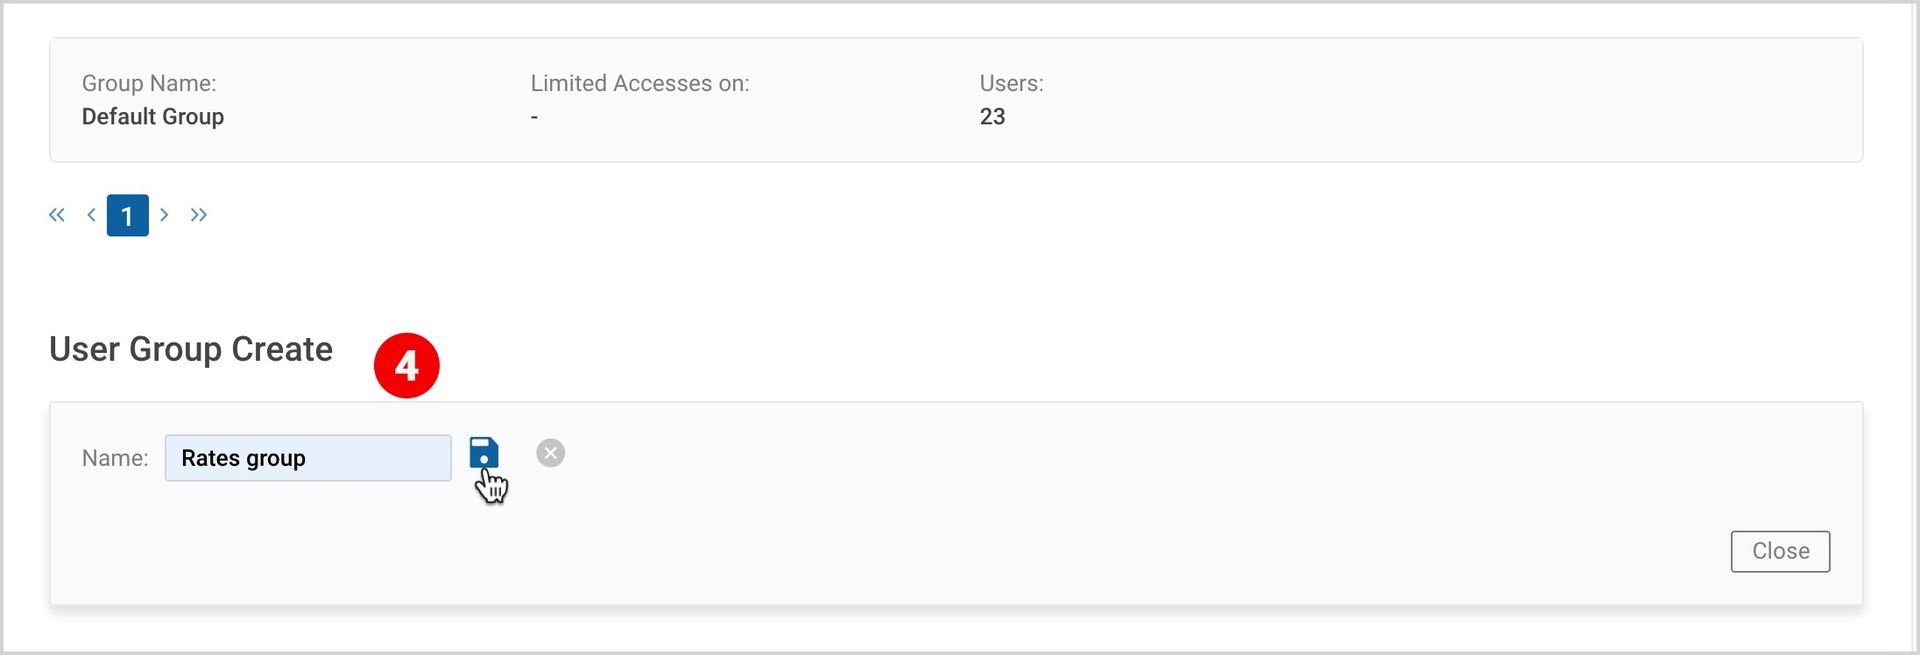
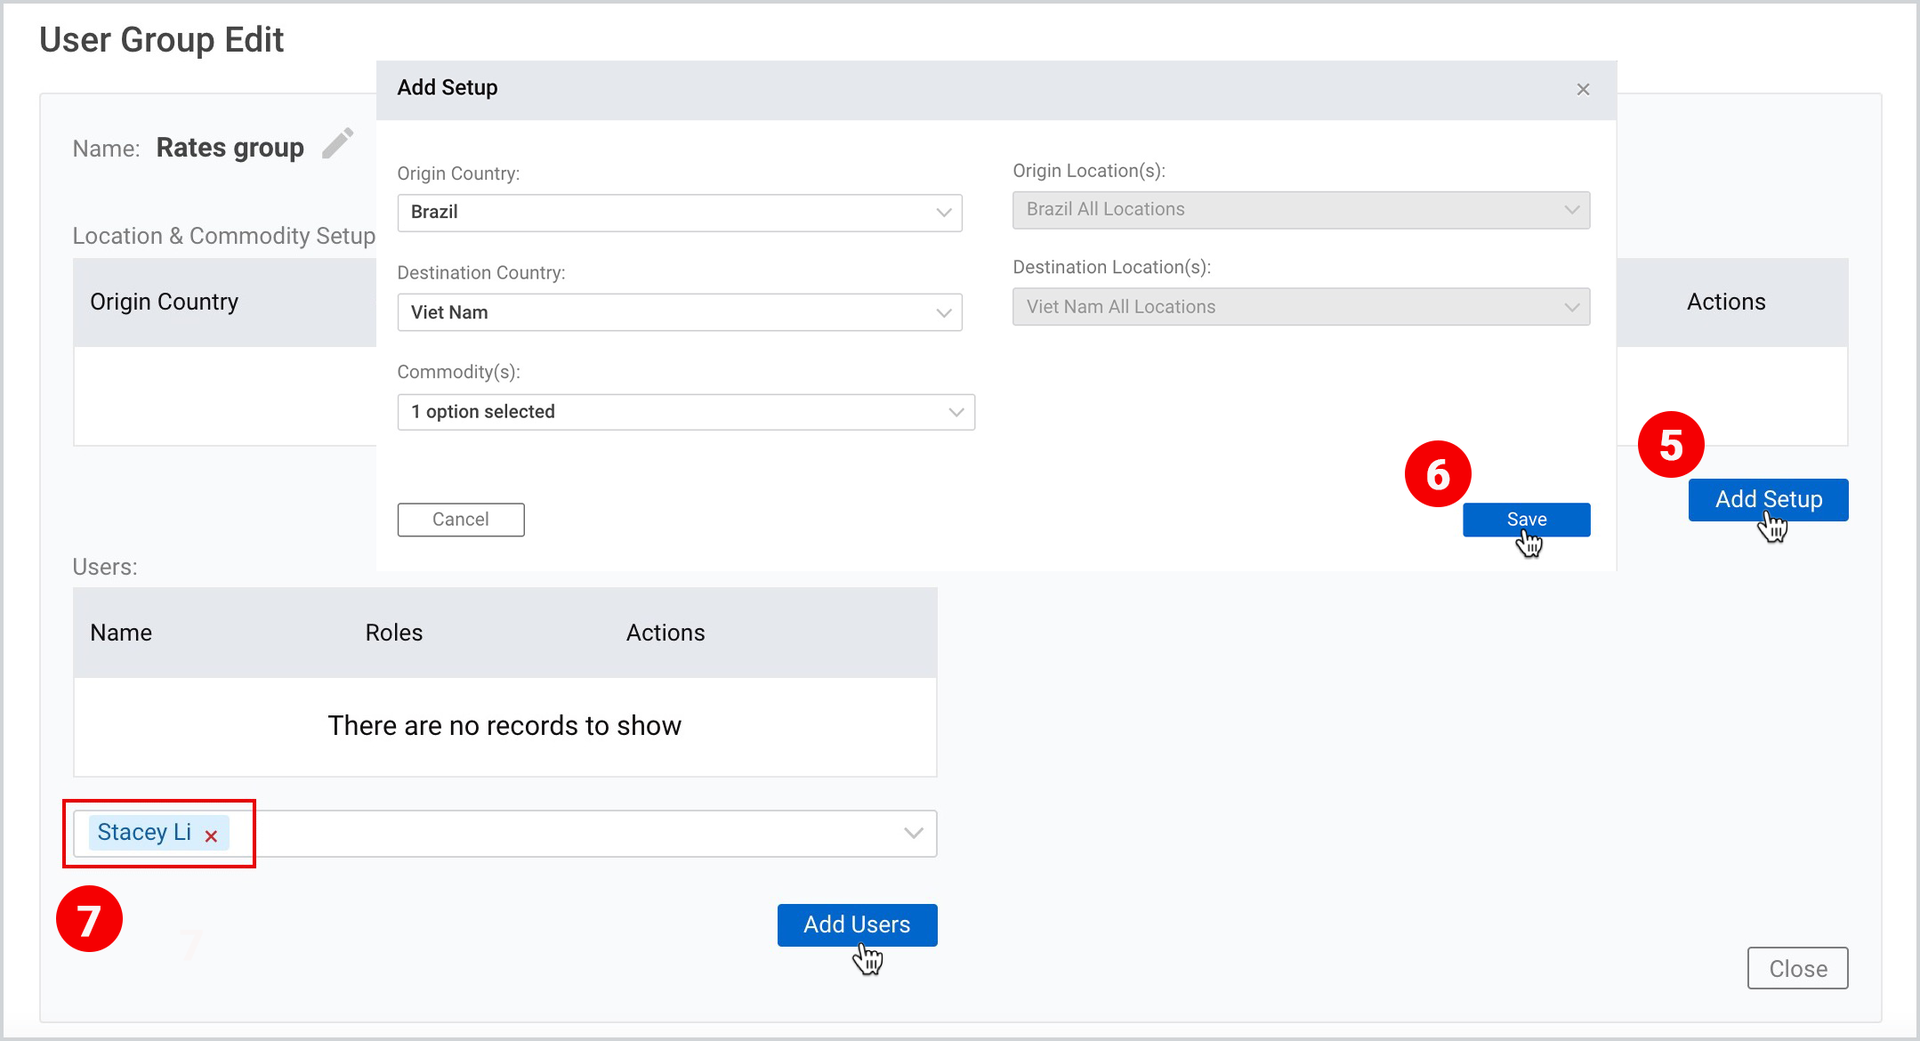
5. Click Add Setups to configure the user group setups.
6. Fill in the required information in the appeared window and then click Save.
7. In Select user, type in User Name and Click Save.
Integrate Carriers
As an Org/Company Admin, you can integrate carriers into your companies, so that they can send shipping requests to them. During integration, it is important that you have an integration ID to manage communication with your carrier.
To integrate a carrier
- Take the first 3 steps described here.
- On the left side of the page, click Carriers Integration.
- Find the desired carrier on the list, point to it, and under Actions, click the right-angle bracket (>).
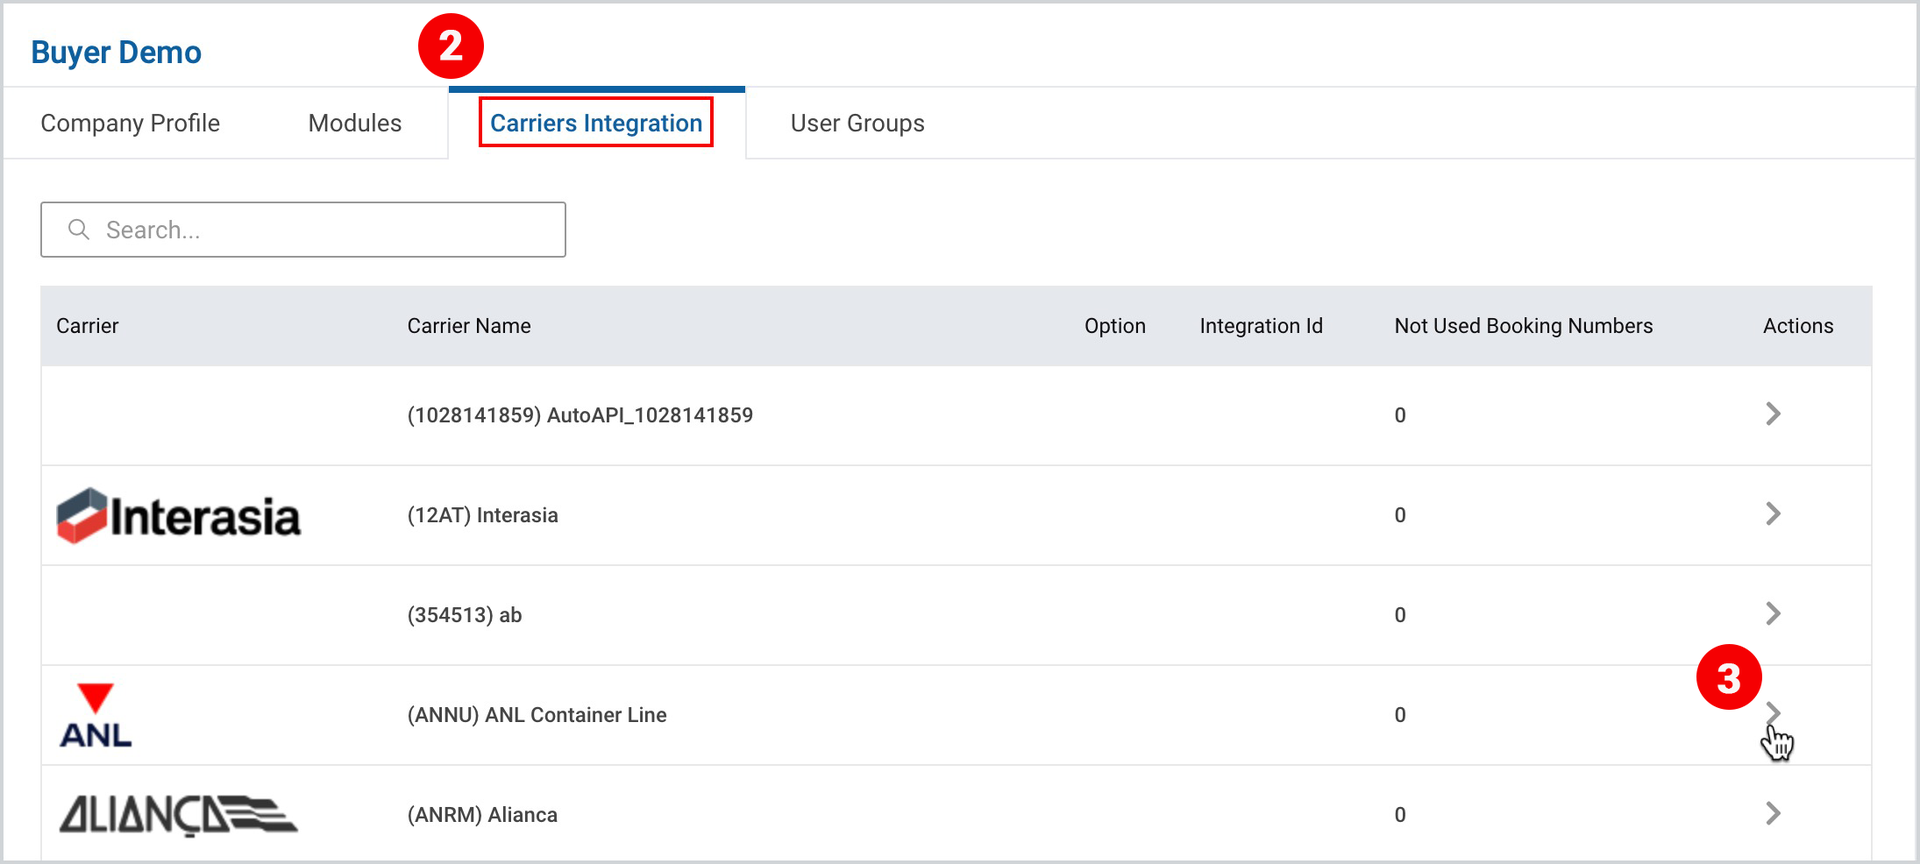
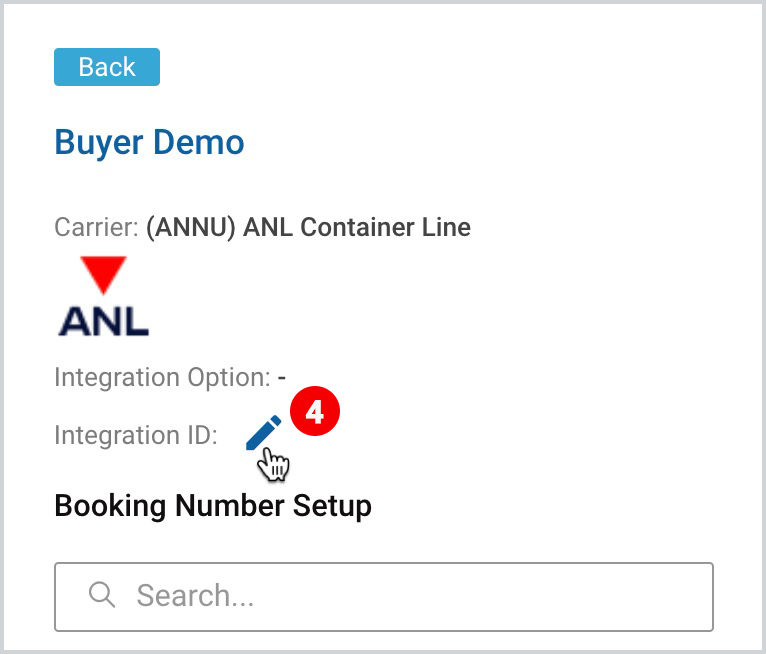
4. Click Edit on integration ID, type in the integration ID and click the Save icon.
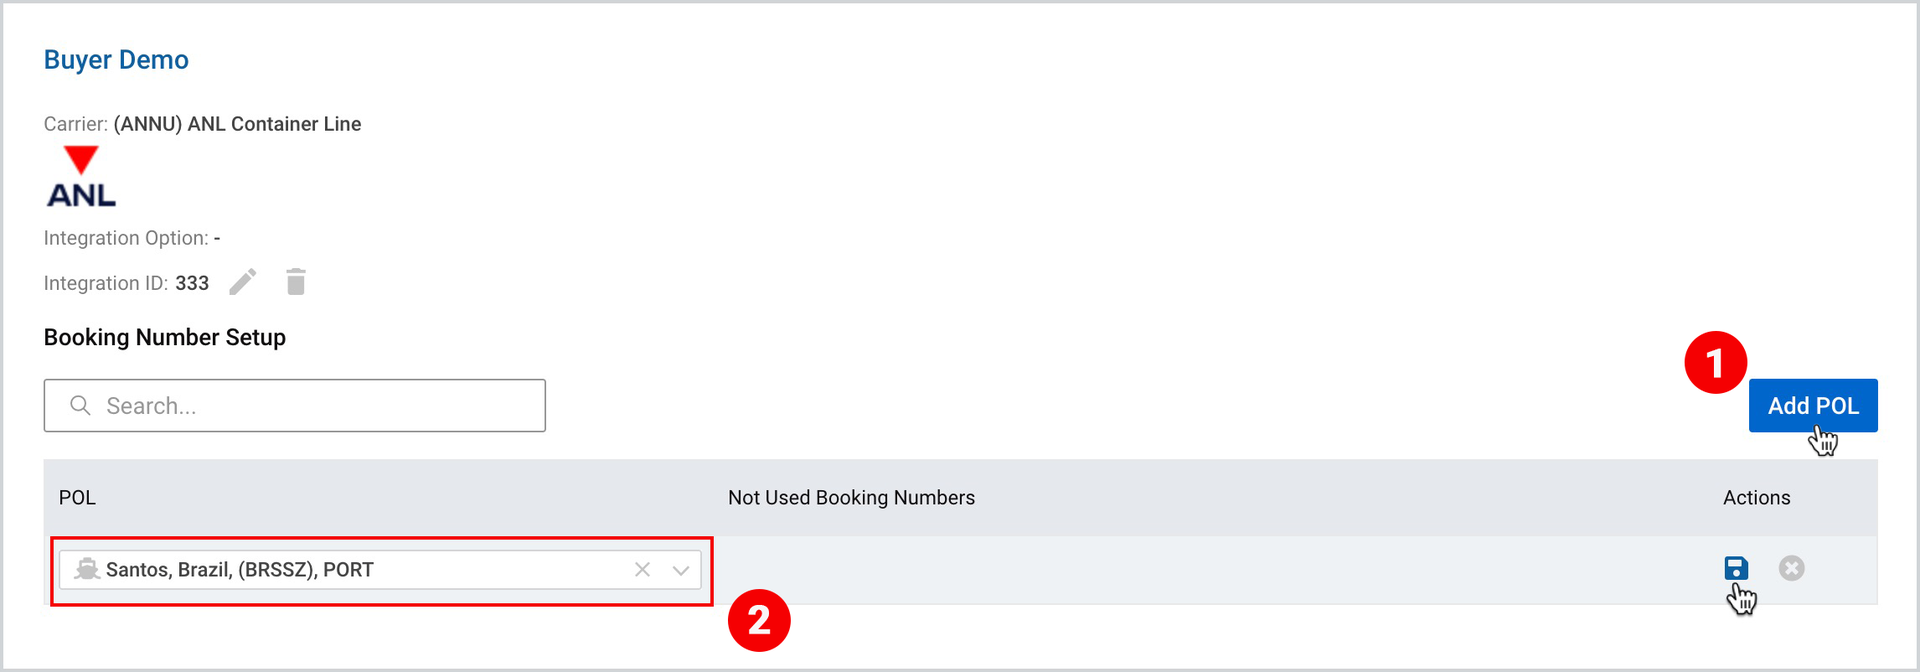
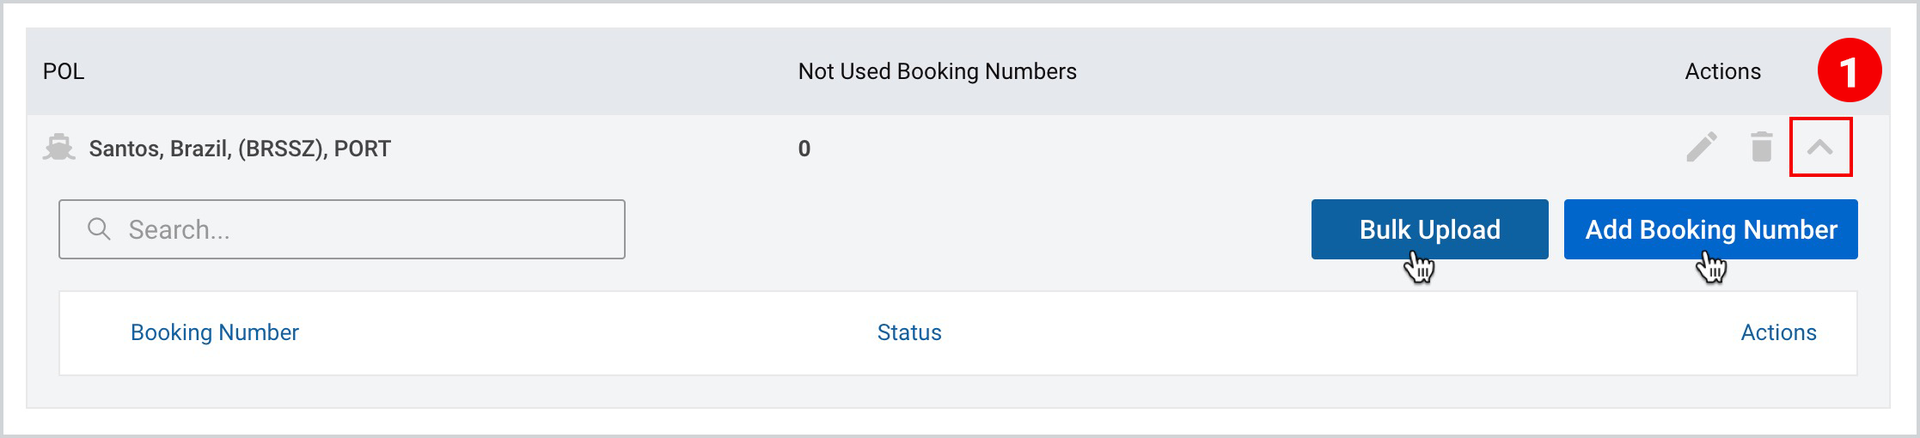
At this step, if you already have a booking number, you can configure the booking setups by adding POL (port of landing), and then either add booking number or bulk upload all your booking numbers. Further, when creating a booking request with the same carrier and POL, the booking number, if being set up, will be automatically picked up during the booking submission, and the booking request will be submitted with that booking number.
To organize the booking setups
- After integrating a carrier, click Add POL.
- Type in POL location and click Save.
Here, in case of availability of the booking number
- Under Actions, click the drop-down icon.
- Click Add Booking Number, type in the number and then click Save; or
- Click Bulk Upload, Drag and Drop your file or Browse, and then click Upload.
Note | For subscription of commodity or container types, neither Org Admins nor Company Admins can send subscription requests. These modules are subscribed to companies manually by the Cargoo administration. |
To download the print version of this article, click the PDF icon: