 BIM Support
Creation of Carrier Bill of Lading Instructions (CBLI)
Before creating a CBLI, you must add the respective document type to your shipment plan.
- Under Main Menu, click Shipments->Shipments.
- Find your booked shipment on the shipment list and click on it.
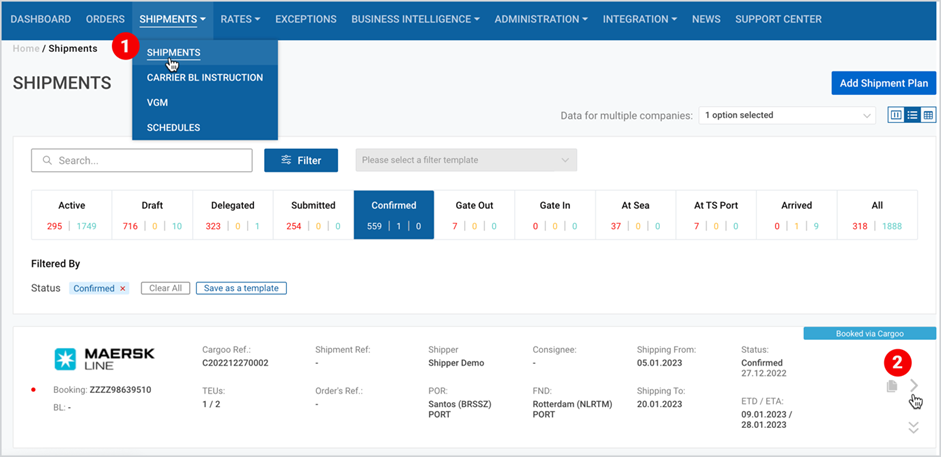
3. Click on the Documents tab.
4. Click Add Document Type and select from the list - Carrier BL Instruction.
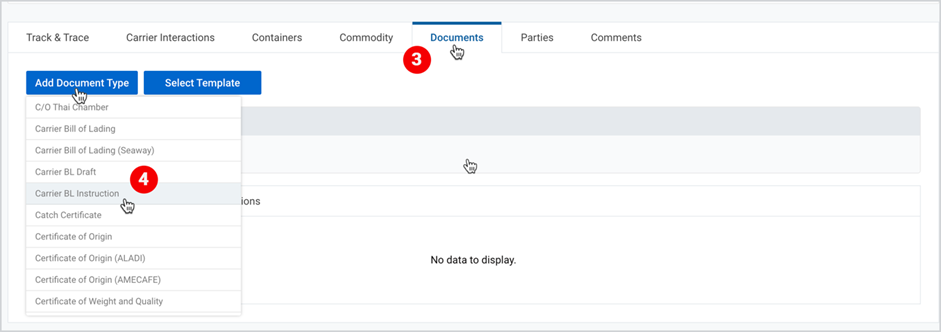
The creation of CBLI becomes available
- once the shipment reaches “confirmed” status;
- if CBLI module with manage right is enabled (see My Organization, Subscribe to Business Modules and User Management, Subscribe Business Modules to Your Users);
- if your company is either of the following parties:
- Shipment Creator
- Shipper
- Origin Handling Agent
- Booking Agent
- Origin Broker
To start the CBLI creation process:
- Click Create on the Carrier BL Instructions document.
- Select the container(s) and click Save.
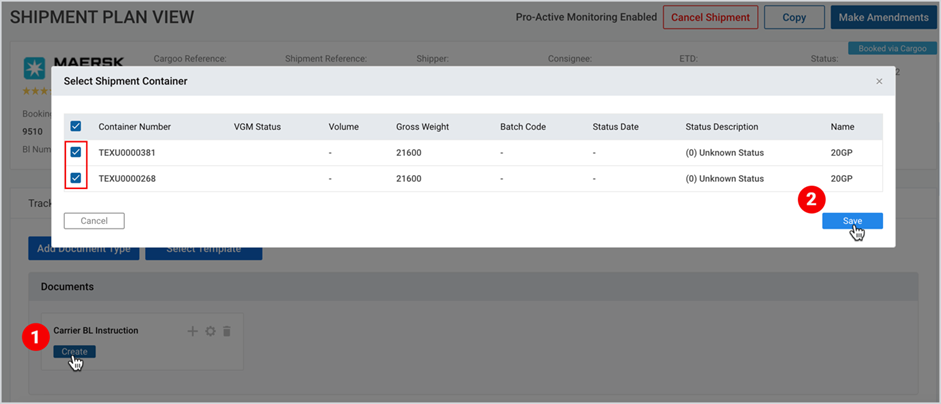
If there are no containers added to the shipment yet, then you will have to fill in the container details during the CBLI creation process.
After selecting the container (s), you will be redirected to the Carrier BL Instruction Create page, where you have to provide the following information:
- Parties
- References
- Locations
- Transport
- Particulars (cargo and container details)
- Freight Charges
- Documentation
- V/L Print Instructions for the Carrier
- Emails
The mandatory fields are marked with an asterisk (*).
CBLI Parties
All the parties that have a role in CBLI are prefilled from the initial shipment plan and can be edited. BL name and address are prefilled from the Business Partners set-up page that can be amended here.
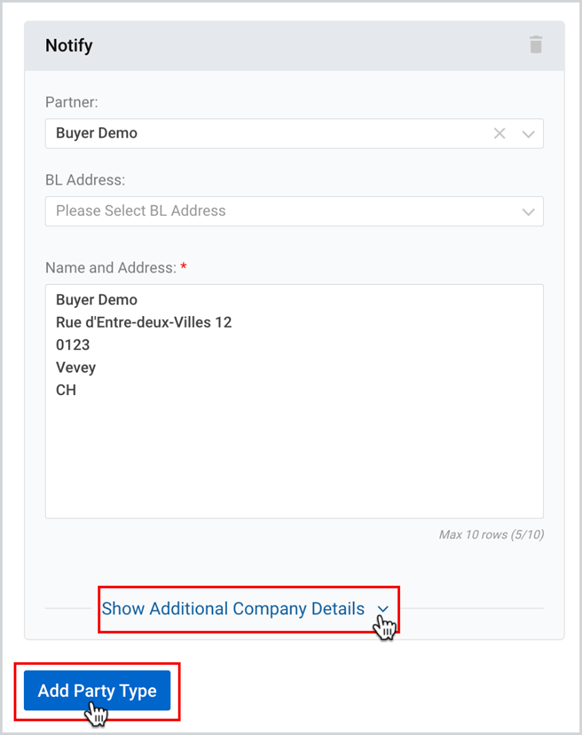
The mandatory parties are:
- Shipper
- Consignee
- Notify
You can add additional details by clicking on Show Additional Company Details.
You can also add new party by clicking on Add Party Type button.
References
In this section, it is possible to add the following reference types:
- Transaction Number
- Exporter’s Reference Number (mandatory if origin country is Brazil, Peru, or Ecuador)
- Shipper’s Reference
- Forwarder’s Reference
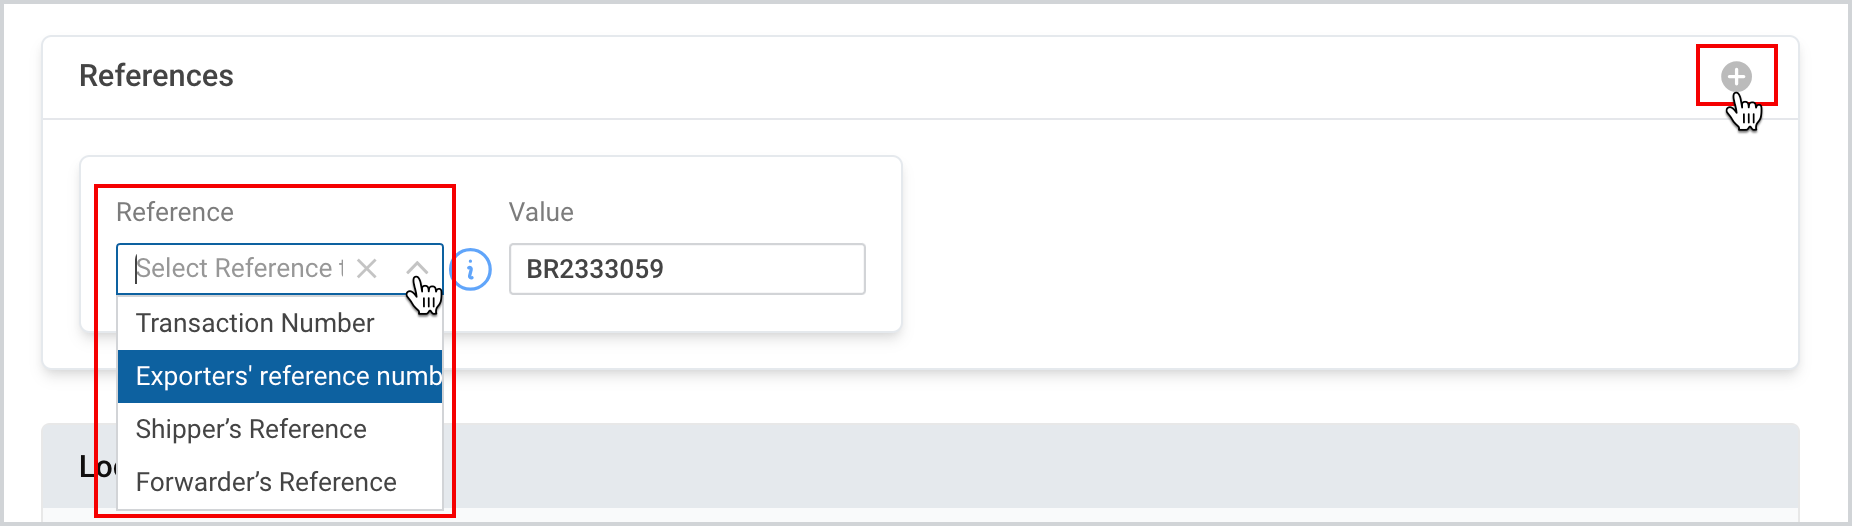
You can add all reference types by clicking on the “+” icon. The list will not display the references that are already added to the CBLI.
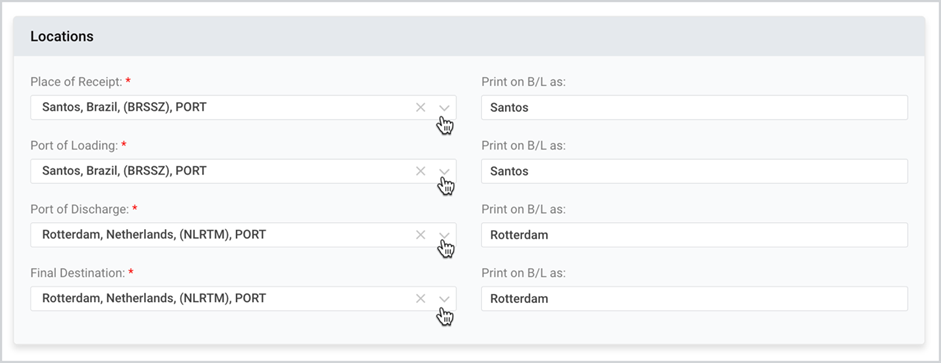
Locations
Location names are also prefilled from the shipment plan and can be amended for printing final BL or SWB.
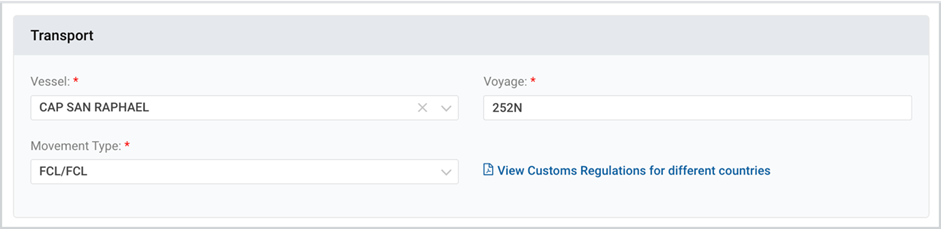
Transport
Vessel and Voyage are also picked up from the initial shipment plan. Movement type is a structured field in a Bill of Lading and will be submitted in the EDI message.
Particulars
Particulars include the cargo and container details.
In case the shipment has multiple containers, cargo items must be defined for each container.
There are two options:
Option 1:
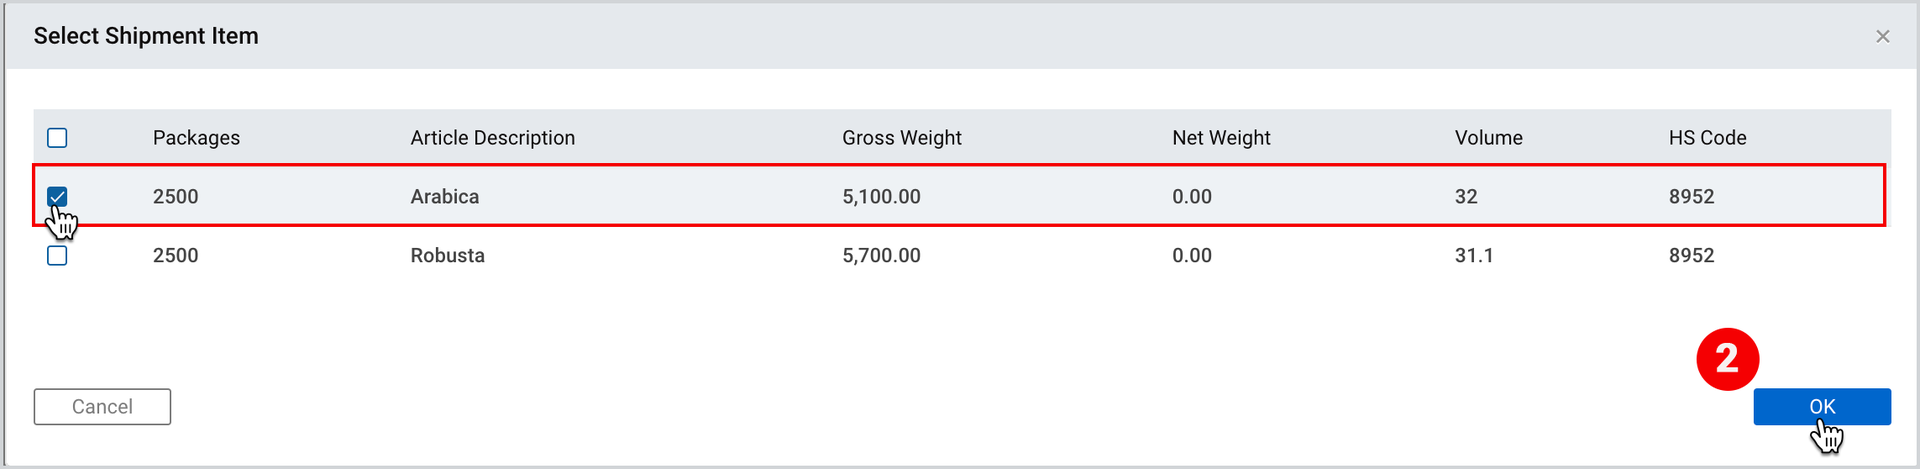
- Click on Select Shipment Item button located under each container.
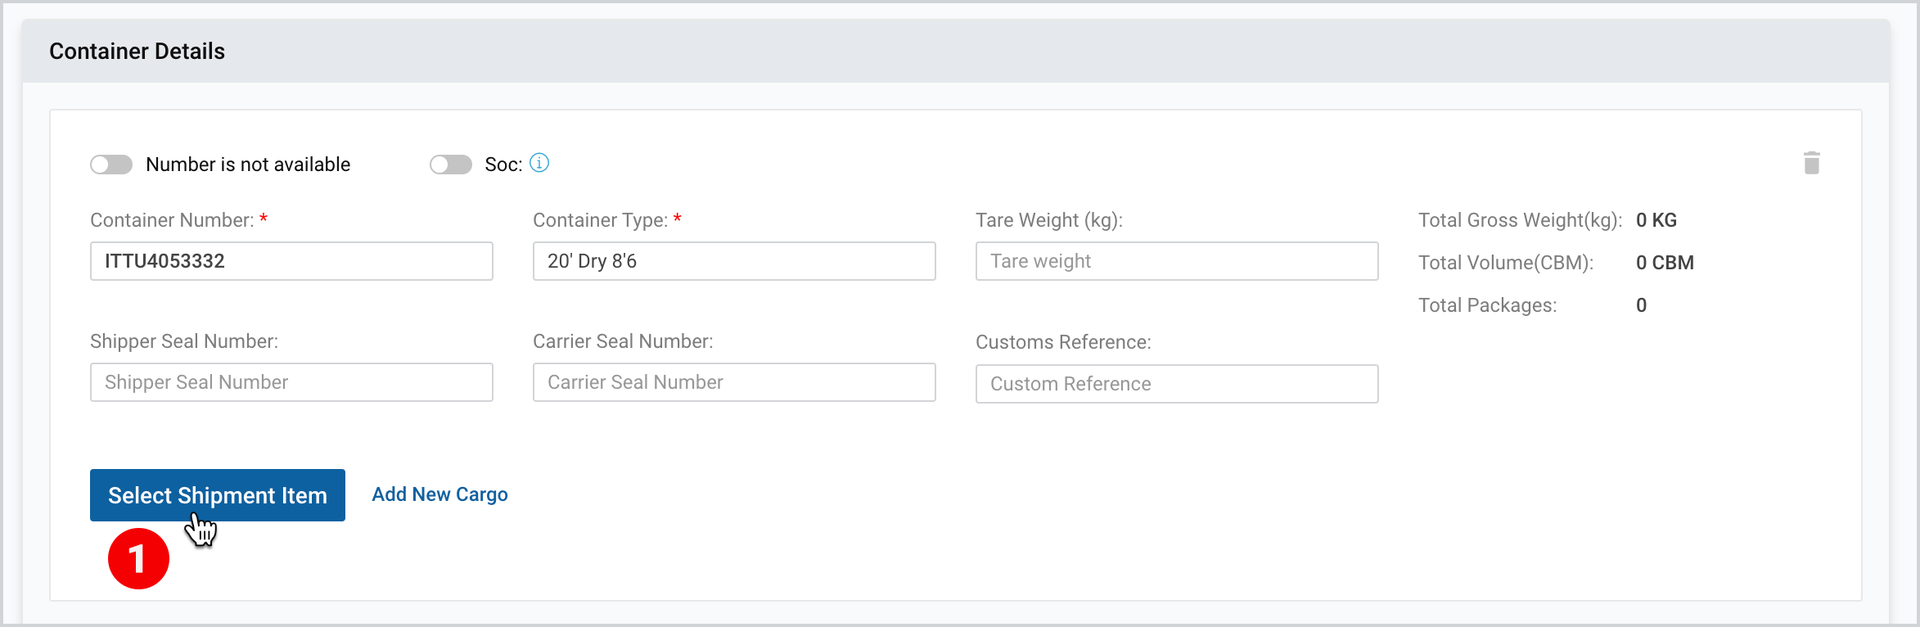
2. Select from the available shipment items and click OK.
Option 2:
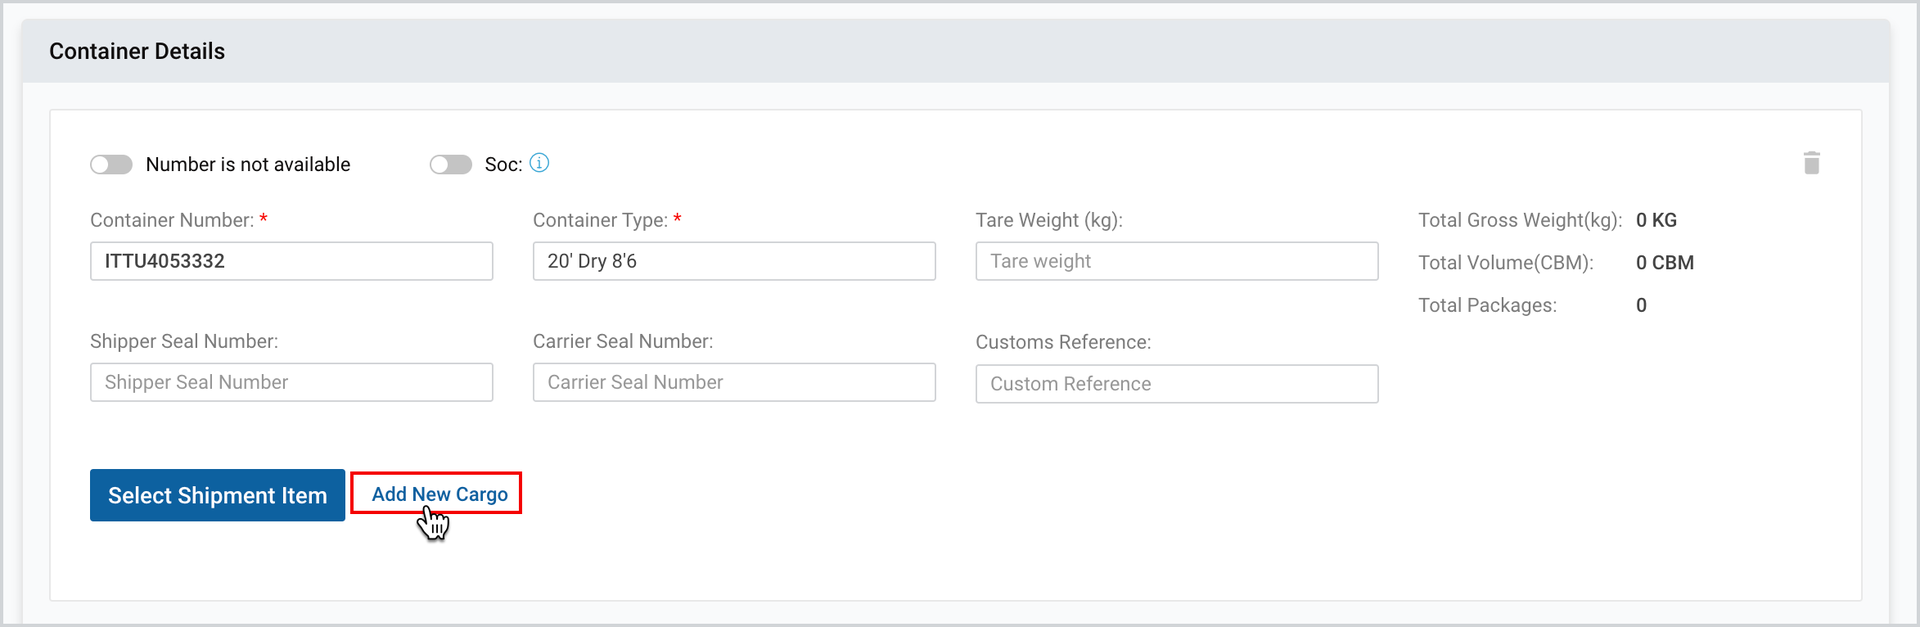
- Click on Add New Cargo button and manually fill in the information.
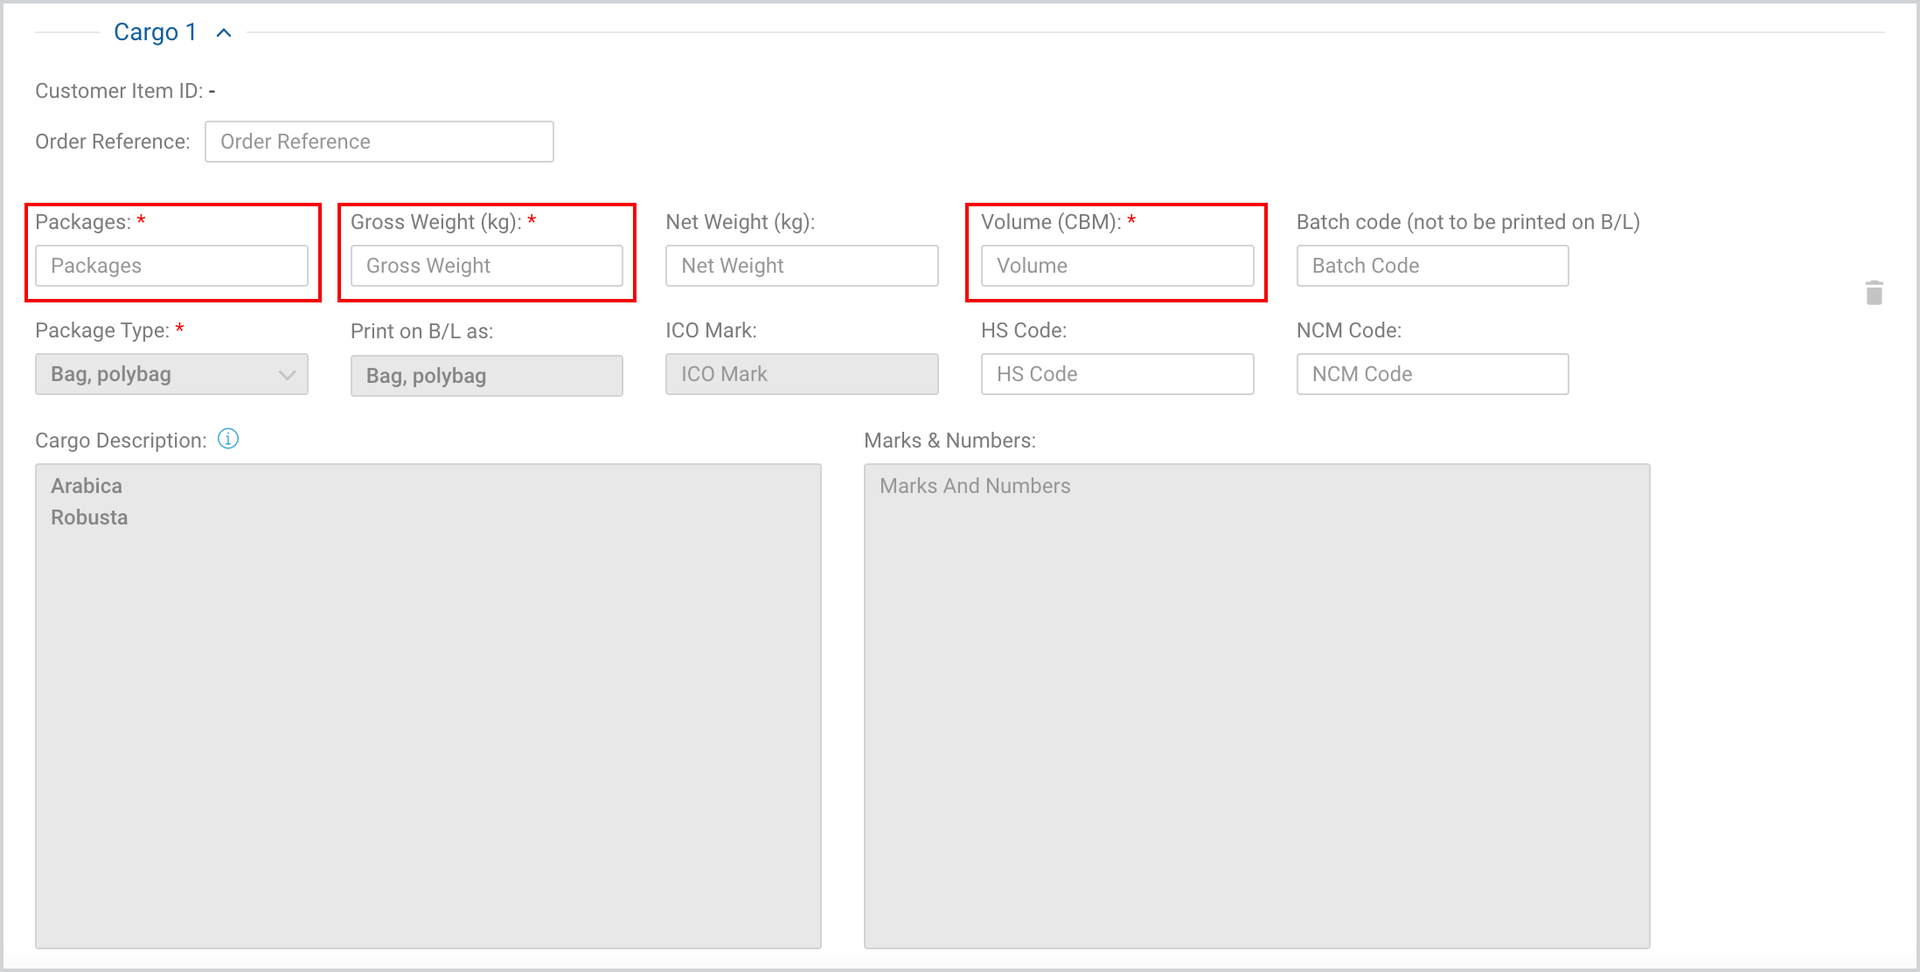
Gross weight, volume and number of packages are required for each cargo item.
In case the given shipment has
- 1 container,
- shipment items have the same commodity,
- package types, HS code are the same for all shipping items,
and once CBLI is created,
- CBLI will have 1 cargo item,
- weight, packages, volumes will be summed up,
- cargo description will be a joint description from all article descriptions.
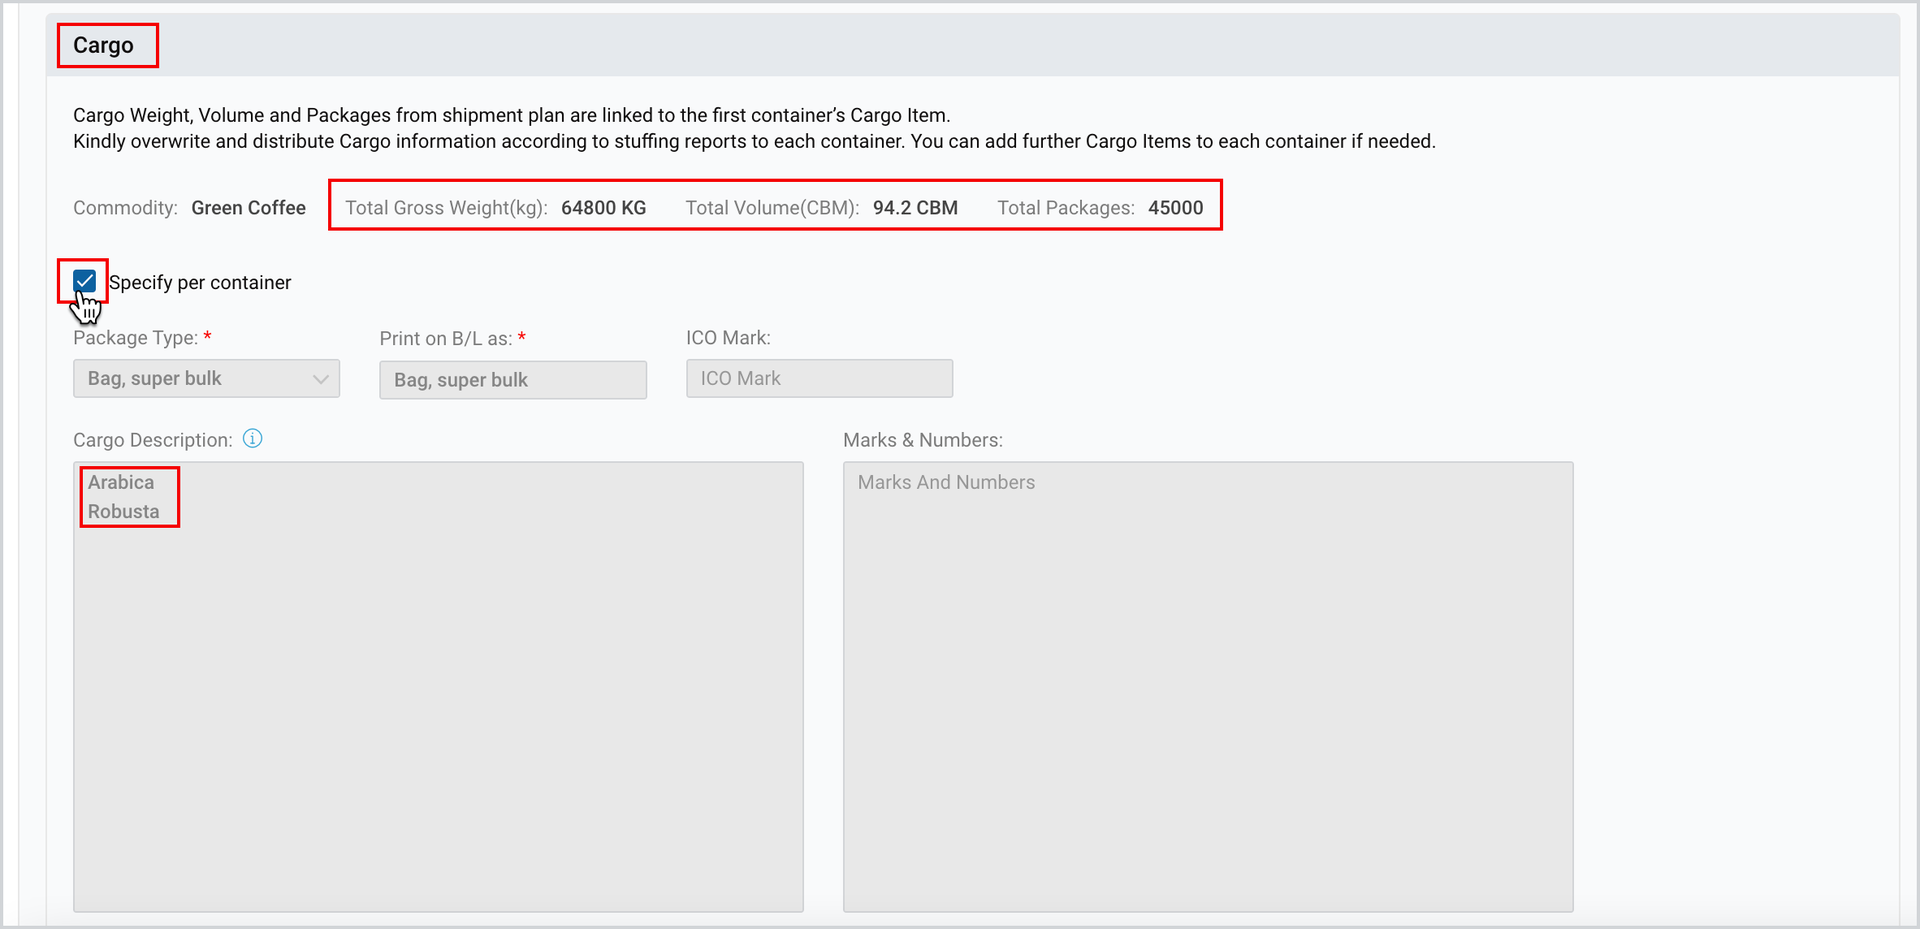
If the “specify per container” box is checked (see the Figure above), it will be required to edit Cargo Description and Marks & Numbers for each cargo item separately.
Note | Cargoo highly recommends to not repeat the number of bags within Cargo Description. The EDI will submit this data assigned with each specific container. |
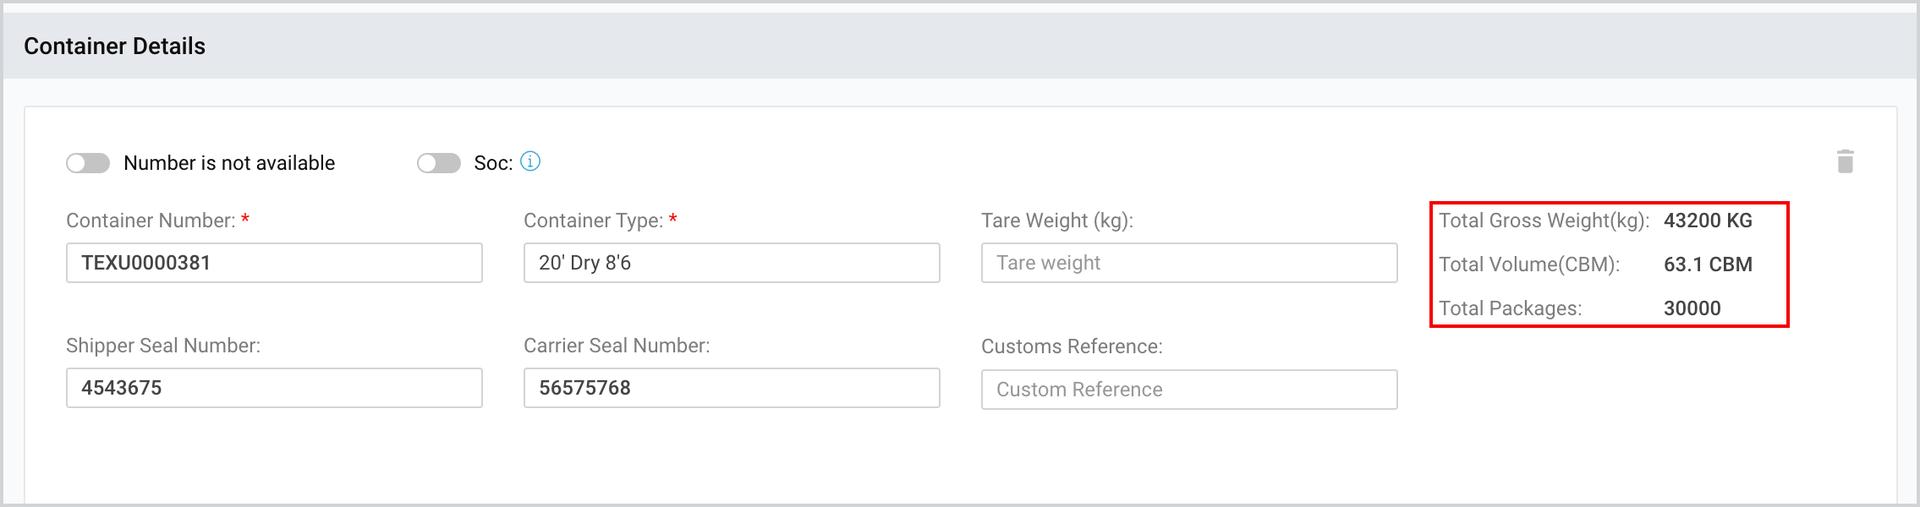
The summary for each container is displayed at the top right corner of the container details box.
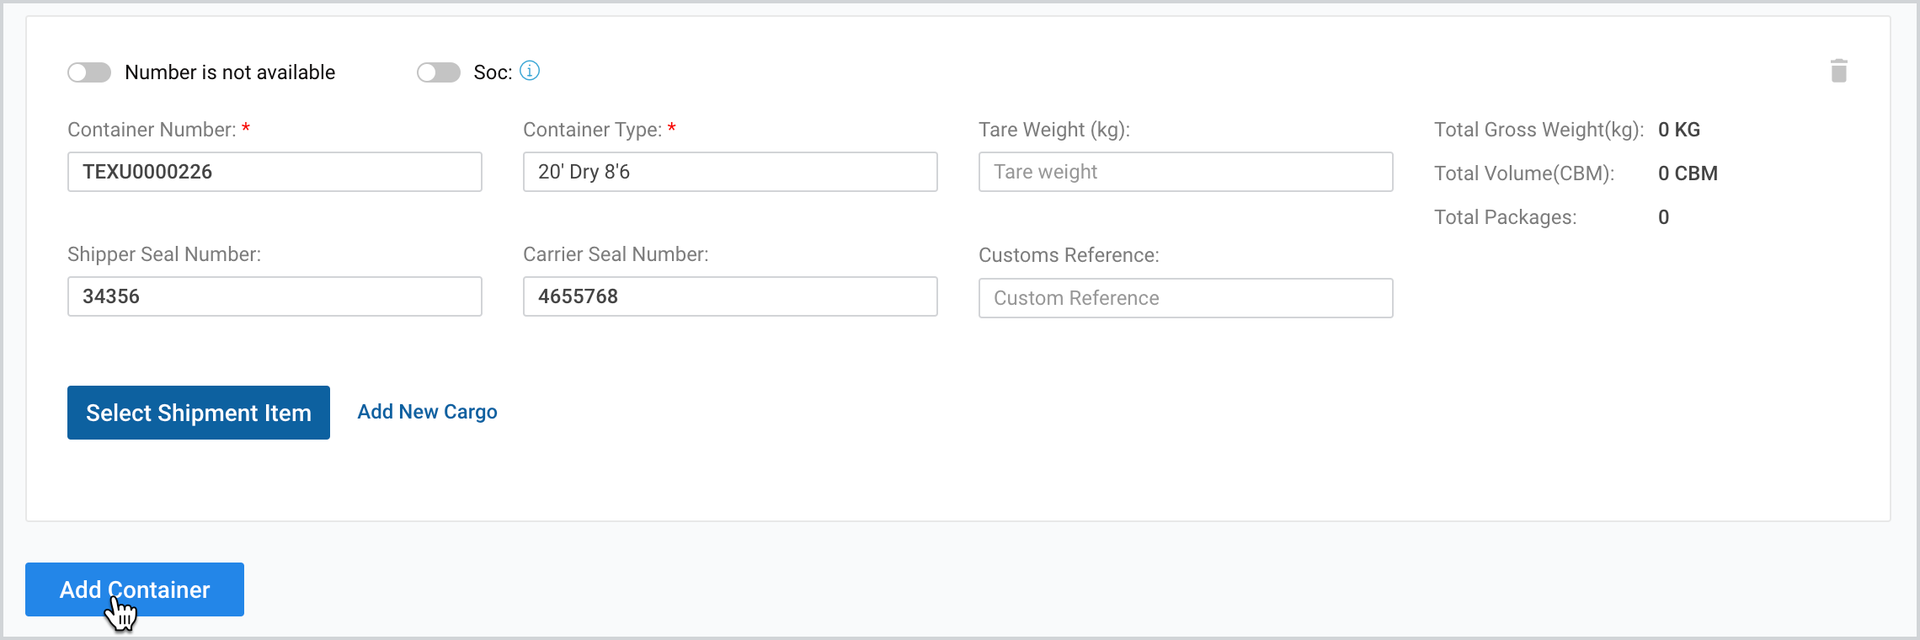
If required, you can add new containers by clicking on Add Container button and selecting the shipment item or adding new cargo.
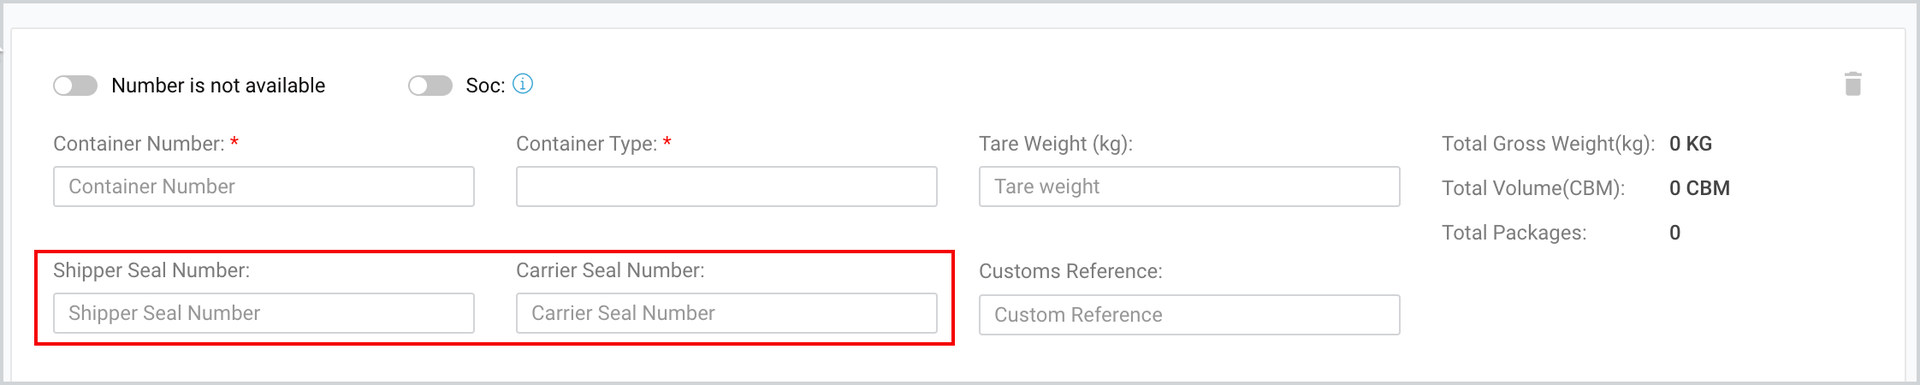
At least one seal number (carrier or shipper seal) per container must be available.
Freight Charges
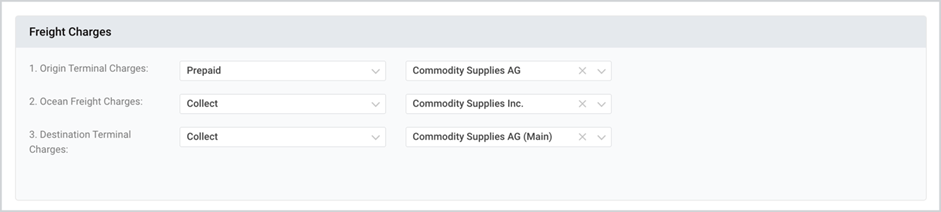
Data in Freight Charges are prefilled from the shipment plan with the possibility to edit.
Documentation
The Documentation section allows adding further information in the B/L Clauses field, such as demurrage/detention free time agreed, ocean freight contract number, or any certificate number, special payment terms/places, etc. These details will be submitted to the carrier as Print on B/L information. It is possible to specify the B/L Release Office, Print on BL as, and the Requested Date of Issue.
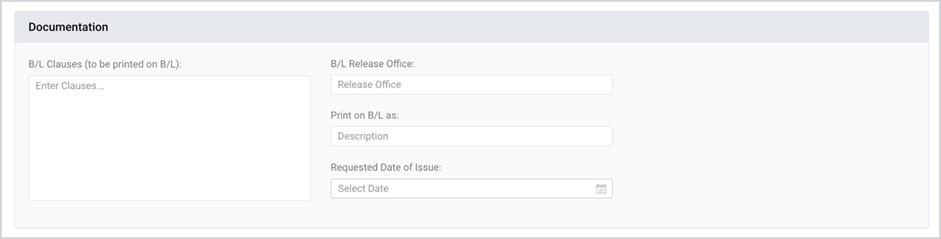
Note | The carrier may reject to print information that does not comply with either carrier terms or conditions or legal requirements. |
B/L Print Instructions for the Carrier
This section allows you to define the B/L format that is required to be issued.
For Original Bill of Lading, both can be specified: the number of originals and the number of copies to be printed.
Fill in the number of freighted and unfreighted copies. Note, that Freighted copies will include the freight charges.
For Seawaybill, only the number of copies to be issued are specified.
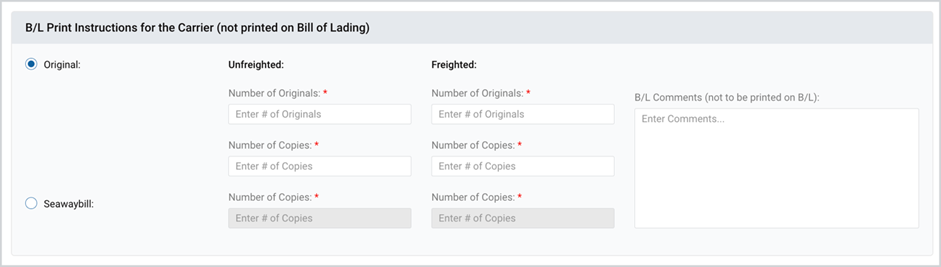
You can add comments to the carrier’s documentation teams, which will not be printed.
Emails
The “Send Copy by Email to” section allows to add e-mail addresses of the recipients who should receive a PDF Copy of the CBLI instructions. Multiple recipients can be added.
The current user's email is prefilled automatically in the "Submitting Party Email Address”. This address is submitted to the carrier and will receive updates related to B/L draft from the carrier. It is not possible to add multiple email addresses in this field.
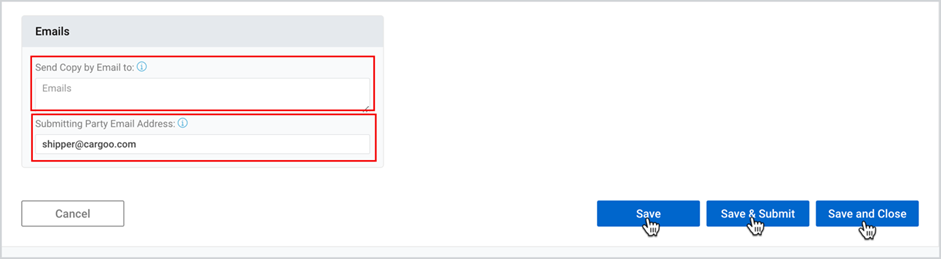
Once all the required data is entered, there are 3 options to finalize the CBLI:
- Save the captured data for further completion – status changes to “draft”;
- Save and Submit - saves the captured data, validates for completeness and submits EDI file to the carrier – status changes to “processed by Cargoo”,
- Save and Close – saves the captured data and closes the page – status changes to “draft”.
Note | To submit a CBLI successfully, your company ID must be linked to an ID in the receiving carrier’s system. If you have placed the booking earlier, this has been ensured already. However, you may receive an error if that link has not yet been established. If in doubt, please reach out to support@cargoo.com. |
CBLI List
As you click on the CBLI section of Shipments module, you can see the list of all your CBLIs in the card view. You can switch them to table view by clicking the table view icon at the upper-right corner of the page.
Card view |
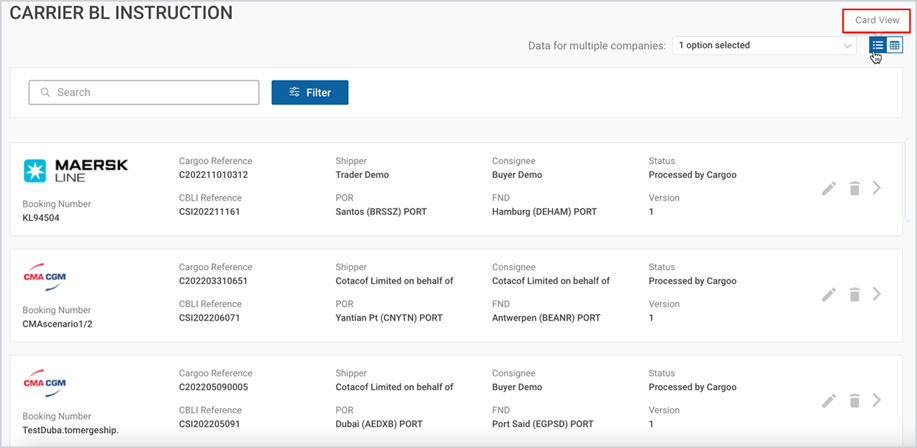 |
Table view |
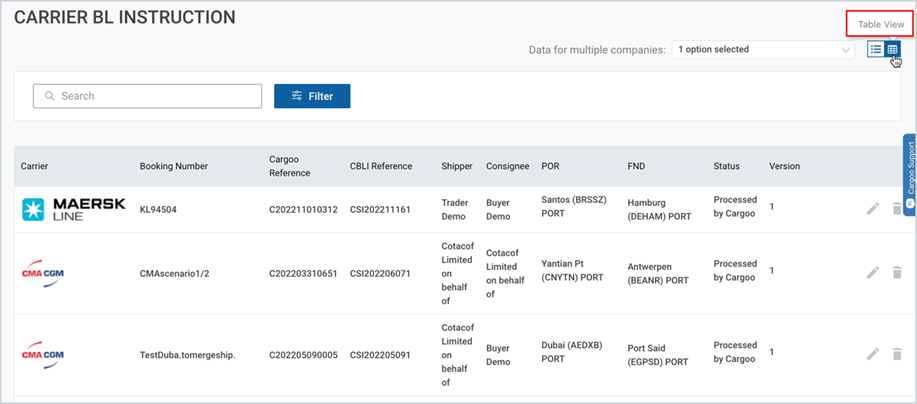 |
Access CBLI
Only specific parties have CBLI update right (CBLI creator, shipment creator, shipper). The others have only view right. So irrespective the user has view or manage right, he/she will always see the CBLI from menu page in view mode only.
You can access particular CBLI by searching or filtering it by the status.
Search your CBLI
The CBLI search can be performed by
- Container Number
- Cargo Shipment reference
To search a CBLI
- Under Main Menu, click Shipments->Carrier BL Instruction.
- At the upper-left corner of the page, in the Search field, fill in the container number (or cargo shipment reference).
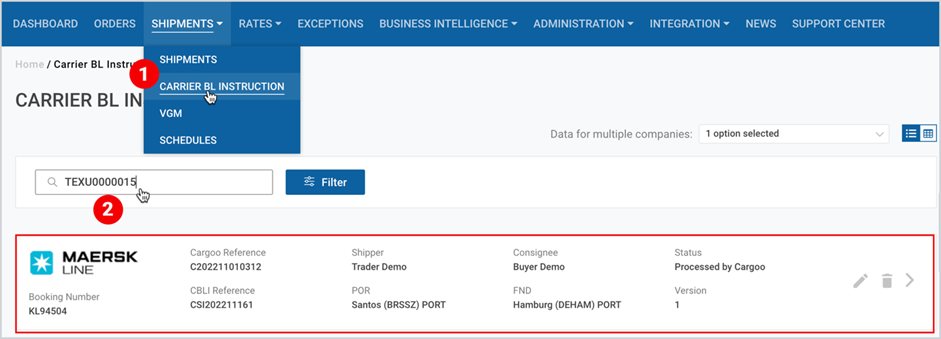
Filter CBLI
You can filter CBLI by the following statuses:
N | CBLI STATUS | DESCRIPTION |
1. | Processed by Cargoo | Message is created and in process to be sent to the Carrier |
2. | Delivered to Carrier | Message is sent to the Carrier |
3. | Received by Carrier | Carrier received the message and sent a acknowledgment note via EDI |
4. | Accepted by Carrier | Carrier confirms that message was processed in the system |
5. | Rejected by Carrier | Carrier refused the CBLI and the information about the rejection reason will be visible in Cargoo |
To filter CBLI
- Click Shipments->Carrier BL Instruction.
- At the upper-left corner of the appeared page, next to the Search field, click Filter.
- Click Custom and select the CBLI status.
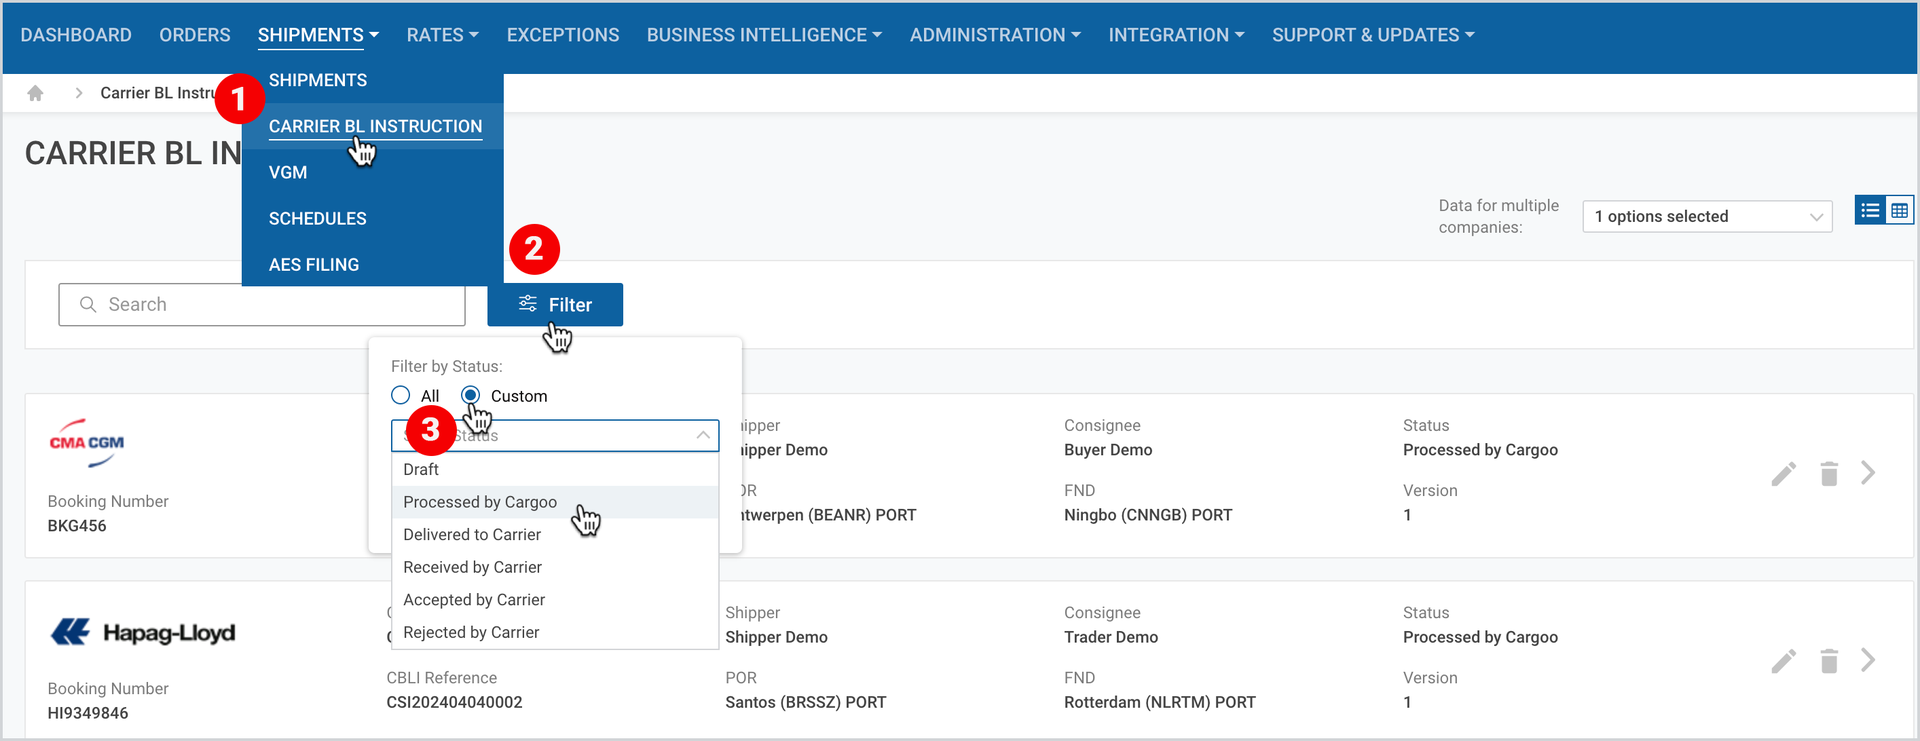
Edit or Remove CBLI
On each CBLI card you can see the following buttons.
- Edit CBLI – a possibility to make changes in the Carrier BL Instruction Edit page.
- Remove – a possibility to delete the CBLI draft.

You can edit and remove CBLI by clicking anywhere on the CBLI card/table and find the same icons at the upper right corner of the appeared page.
To download the print version of this article, click the PDF icon:
You can also watch the CBLI video tutorial here: