 CSA Support
Special Features: Report Scheduling
The report scheduler is accessible from the top right corner of the Shipments report.

The mandatory precondition for creating a new scheduler is an existing report template. If there are no existing templates for the company, one should be created before creating a scheduler.
After pressing the Create Schedule button a modal window with schedule settings should appear:
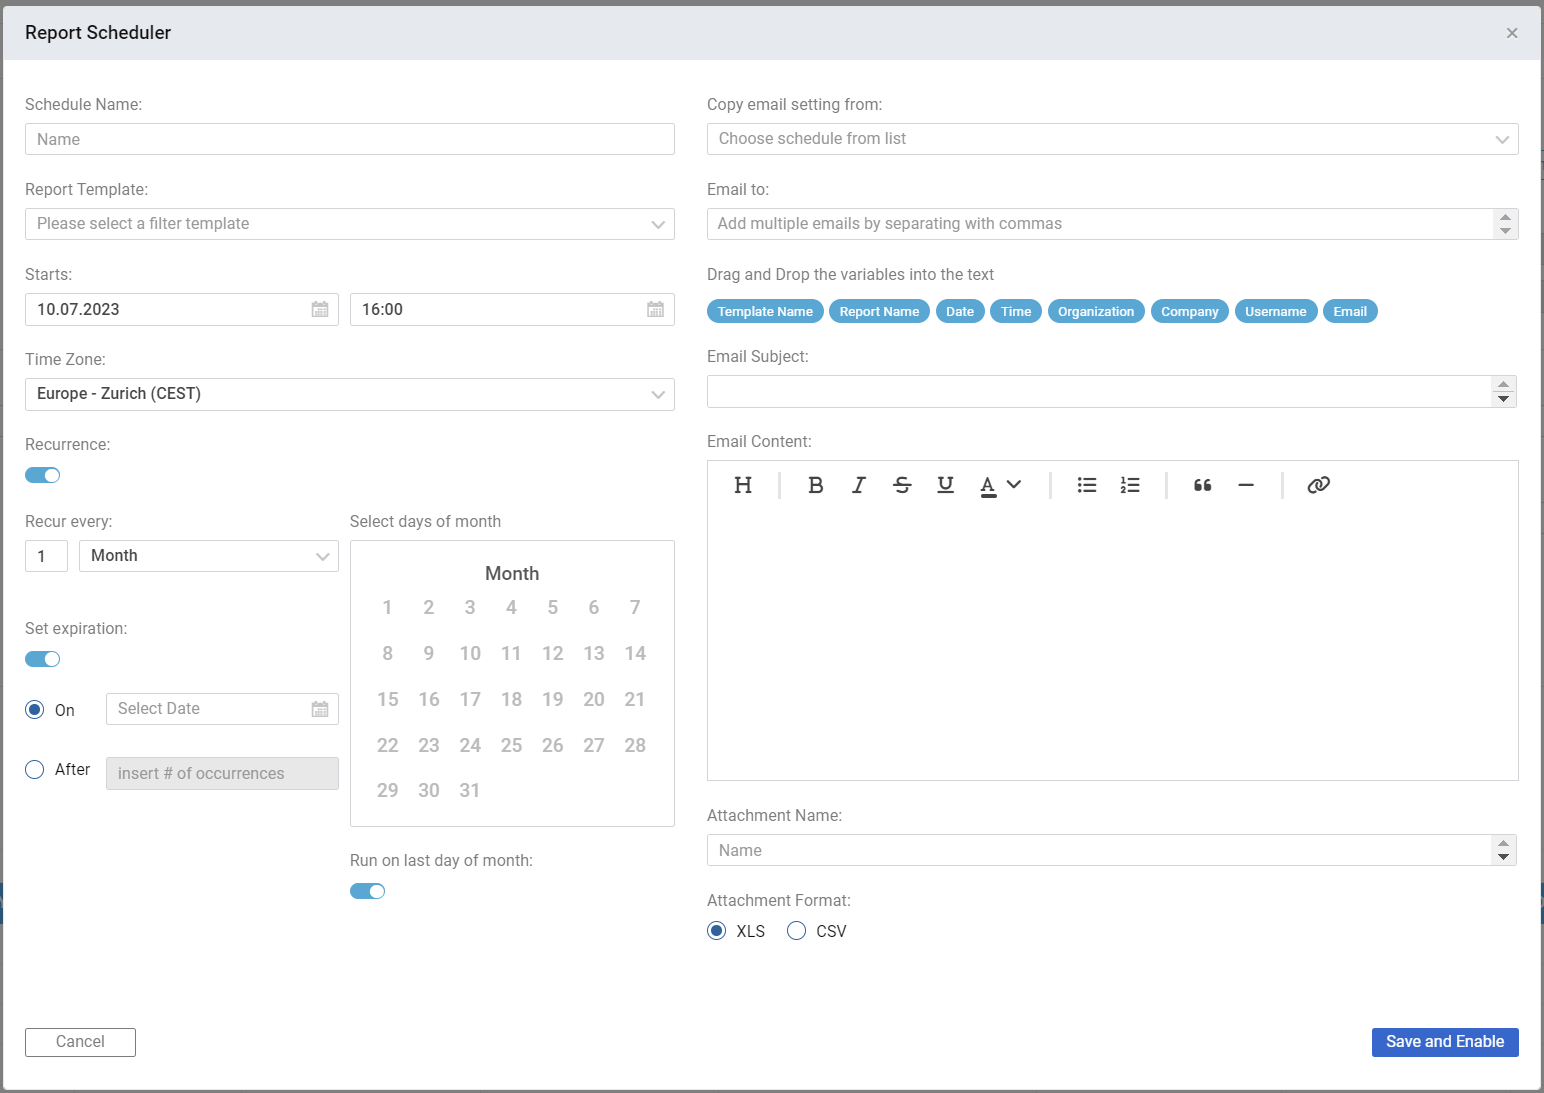
Steps to create a schedule:
- Press the Create Schedule button in the report window
- In the opened modal window, do the following:
- Give the schedule a unique name.
- Choose a previously created report template.
- Choose the schedule's start datetime and timezone (this will be the time of the first schedule execution).
- If the schedule should run more than once, activate the Recurrence toggle.
- It is possible to choose between daily, weekly, or monthly intervals
- For the weekly interval, it is possible to choose on which weekdays to run the schedule.
- For the monthly interval, it is possible to choose the days of the month on which the schedule will run (if the scheduler should run exactly on the last day of the month, activate the Run on last day of the month toggle. If other days of the month are also selected, the scheduler will run on those days as well).
- There is no possibility to run the same schedule multiple times per day. However, if this is required, as a workaround, multiple schedules can be created for different running times.
- It is possible to set an expiration date for a schedule. There is a choice between specifying an exact expiration date or the number of occurrences before it expires.
- On the right side of the schedule creation window, email settings must be defined. (It is possible to reuse settings from previously created existing schedules by selecting them from the Copy email settings from drop-down selection.)
- Insert the email(s) where the generated report should be sent.
- Add an email subject, body, and attachment name. (It is possible to use drag and drop variables in all three fields, which will resolve to actual values each time the schedule is executed.)
- Choose the desired report format.
- Saving the schedule also enables it. The first execution will be at the start datetime set in step c.
Modifying existing schedule
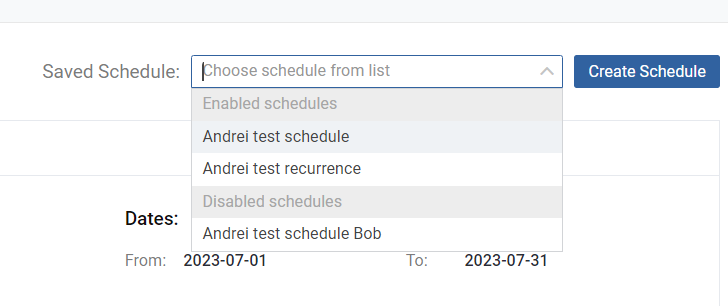
The list of existing schedules is accessible from the drop-down selection in the top right corner of the report:
To quickly enable/disable or delete an existing schedule, use the quick buttons that appear instead of the Create Schedule button once the schedule is selected. (Click on the down arrow button for the quick buttons to show):
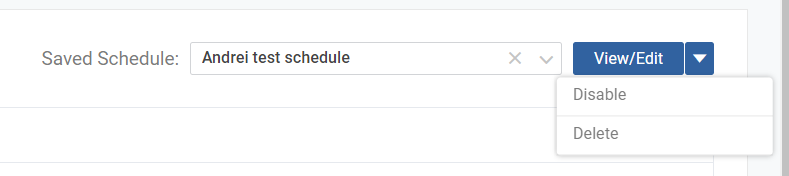
To change the settings of a scheduler, click the View/Edit button and change the desired settings.
Access rules for schedules:
Schedules are created at the Company level and are accessible by all Company users, admins, and organization admins. (Users can only edit schedules created by themselves, while admins can edit all Company schedules.)
Caution
If the report is too big (50k rows and higher, depending on the number of columns), there might be a server timeout during generation, and it won't be sent.